
Introdución
The Cambridge Soundworks Ensemble 310 is a high-fidelity speaker system designed to deliver rich, room-filling audio for both music and home theater applications. This system combines two compact Newton Series MC300 satellite speakers with a powerful BassCube 10S powered subwoofer. This manual provides essential information for setting up, operating, maintaining, and troubleshooting your Ensemble 310 system.
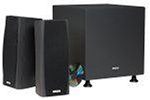
Image: The Cambridge Soundworks Ensemble 310 Subwoofer/Satellite Speaker System, featuring two satellite speakers and one subwoofer.
Configuración
1. Desembalaxe e inspección
Retire con coidado todos os compoñentes da embalaxe. Comprobe que estean presentes os seguintes elementos:
- 2 x Newton Series MC300 Satellite Speakers
- 1 x BassCube 10S Powered Subwoofer
- Speaker cables (if included)
- Power cord for subwoofer
- Este manual de instrucións
Inspect all components for any signs of damage. If any items are missing or damaged, contact Cambridge Soundworks customer support.
2. Colocación de altofalantes
Optimal speaker placement is crucial for sound quality.
- Altofalantes satélite: Position the MC300 satellite speakers equidistant from your primary listening position. For stereo listening, place them to the left and right of your display or listening area, ideally at ear level. For home theater use, they can serve as front left/right, center, or surround speakers.
- Subwoofers: The BassCube 10S subwoofer can be placed almost anywhere in the room, as low frequencies are less directional. Experiment with different locations to find the best bass response. Placing it in a corner can often enhance bass output. Ensure it is near a power outlet.
3. Conexións
Before making any connections, ensure all audio equipment (receiver, amplifier, subwoofer) is turned off and unplugged from the power outlet.
- Connecting Satellite Speakers: Use high-quality speaker wire to connect the MC300 satellite speakers to your amplifier or receiver. Match the positive (+) terminal on the speaker to the positive (+) terminal on your amplificador e o terminal negativo (-) do altofalante ao terminal negativo (-) do seu ampmáis vivo.
- Conexión do subwoofer:
- Conexión LFE (Efectos de baixa frecuencia): If your receiver has an LFE or Subwoofer Pre-Out jack, connect a single RCA cable from this output on your receiver to the LFE input on the BassCube 10S subwoofer.
- Conexión RCA estéreo: If your receiver does not have an LFE output, connect RCA cables from your receiver's stereo pre-out jacks (left and right) to the corresponding left and right RCA inputs on the subwoofer.
- Speaker Level Connection (Optional): If your receiver lacks pre-outs, you can connect speaker wires from your receiver's main speaker outputs to the speaker-level inputs on the subwoofer, and then from the subwoofer's speaker-level outputs to your satellite speakers. Refer to your receiver's manual for specific instructions.
- Conexión de alimentación: Once all audio connections are made, plug the subwoofer's power cord into a wall outlet.
Note: Ensure all connections are secure to prevent signal loss or short circuits.
Instrucións de funcionamento
1. Acendido/apagado
- Subwoofers: The BassCube 10S subwoofer typically has an auto-sensing power feature. It will turn on automatically when it detects an audio signal and enter standby mode after a period of inactivity. A manual power switch may also be present for complete shutdown.
- Altofalantes satélite: The satellite speakers are passive and draw power from your amplifier/receiver. They will operate when your ampo adaptador/receptor está acendido.
2. Adjusting Subwoofer Settings
The BassCube 10S subwoofer features controls to fine-tune its performance:
- Volume/Ganancia: Adjusts the subwoofer's output level. Start with a moderate setting and adjust to blend seamlessly with your satellite speakers.
- Frecuencia de cruce: This control determines the highest frequency the subwoofer will reproduce. Set it to complement your satellite speakers. A common starting point is 80-100 Hz. If your receiver has bass management, set the subwoofer's crossover to its highest setting or bypass if possible, and manage the crossover through your receiver.
- Control de fase: This switch (0° or 180°) helps integrate the subwoofer's output with the main speakers. Experiment with both settings to find the one that produces the most coherent and impactful bass at your listening position.
3. System Calibration
For optimal sound, use your receiver's automatic room calibration system (if available) after connecting the speakers. This will adjust levels, distances, and crossovers for your specific room acoustics.
Mantemento
1. Limpeza
- Use a soft, dry cloth to wipe down the speaker cabinets.
- Para marcas difíciles, d lixeiramenteampen the cloth with water. Avoid harsh chemicals or abrasive cleaners, as these can damage the finish.
- Do not apply liquids directly to the speaker drivers or grilles.
- Use a soft brush or vacuum cleaner with a brush attachment to gently clean dust from grilles.
2. Atención xeral
- Evite colocar os altofalantes baixo a luz solar directa ou preto de fontes de calor.
- Keep speakers away from moisture and excessive humidity.
- Ensure adequate ventilation around the subwoofer, especially if it has a built-in ampmáis vivo.
- Non coloque obxectos pesados enriba dos altofalantes.
Resolución de problemas
| Problema | Causa posible | Solución |
|---|---|---|
| No sound from satellite speakers | Conexións soltas dos cables do altofalante; Amplifier/receiver off or incorrect input selected; Speaker protection engaged. | Comprobe todas as conexións dos cables do altofalante, tanto no altofalante como no ampvidador. Asegurar amplifier is on and correct input is selected. Consult ampmanual do liificador. |
| Non hai son do subwoofer | Subwoofer not powered on; Loose RCA cable connection; Subwoofer volume too low; Auto-standby mode. | Check power cord and power switch. Verify RCA cable connection. Increase subwoofer volume. Play audio to activate auto-standby. |
| Son distorsionado ou pouco claro | Sobrecargado amplifier/speakers; Loose connections; Incorrect speaker placement; Poor audio source quality. | Reduce volume. Check all connections. Adjust speaker placement. Use a higher quality audio source. |
| Weak or boomy bass | Incorrect subwoofer placement; Incorrect crossover or phase setting; Subwoofer volume too low/high. | Experiment with subwoofer placement. Adjust crossover frequency and phase control on the subwoofer. Adjust subwoofer volume. |
If you continue to experience issues, refer to your amplifier/receiver manual or contact Cambridge Soundworks customer support.
Especificacións
| Característica | Detalle |
|---|---|
| Número de modelo | k1pk310e |
| Marca | Cambridge Soundworks |
| Tipo de altofalante | Satellite, Powered Subwoofer |
| Altofalantes satélite | Newton Series MC300 (2 x 4-inch midrange drivers, 1-inch reinforced silk dome tweeter) |
| Subwoofer | BassCube 10S (Downward-firing 10-inch driver, built-in 75-watt ampmáis vivo) |
| Potencia máxima de saída do altofalante | 150 Watts (System Peak) |
| Peso do produto | Aproximadamente 27.22 kg (60 lbs) |
| Opcións de cor | Slate (as per product title), also available in White |
Garantía e Soporte
Información da garantía
The Cambridge Soundworks Ensemble 310 system comes with the following manufacturer's limited warranty:
- Non-Powered Speakers (Satellite Speakers): Garantía de pezas e man de obra dun ano
- Powered Subwoofer (BassCube 10S): Garantía de pezas e man de obra dun ano
Please retain your proof of purchase for warranty claims. Warranty terms and conditions may vary; refer to the official Cambridge Soundworks warranty documentation for complete details.
Atención ao cliente
For technical assistance, troubleshooting beyond this manual, or warranty service, please contact Cambridge Soundworks customer support. Visit the official Cambridge Soundworks websitio web para obter información de contacto e recursos adicionais.
Nota: Os datos de contacto específicos non se proporcionan neste manual. Consulte a embalaxe do produto ou o manual do fabricante. website for current support information.