1. Introdución
The Marantz CDR300 is a portable CD recorder designed for direct recording of audio, particularly spoken word, onto CD-R/RW media. This device combines the functionality of a professional portable recorder with the convenience of CD recording, allowing for immediate playback on standard CD players. Its robust design and versatile features make it suitable for various field recording applications.
2. Características clave
- Gravación directa: Records directly to blank CD-R/RW discs.
- Minute Track Mode: Automatically marks each minute of spoken word as a separate track for easy navigation during playback.
- Portabilidade: Transportable, tabletop operation with options for AC power or optional RPS300 battery system for up to four hours of recording.
- Integrated Audio Tools: Features a built-in microphone, internal speaker, microphone inputs (including XLR), Automatic Level Control (ALC), mic filtering, limiter, and programmable EQ for optimized stereo recording.
- CD-R/RW Compatibility: Supports standard CD-R and CD-RW media.
3. Produto rematadoview
3.1 Controis do panel frontal

Figura 1: Fronte view of the Marantz CDR300 with its remote control.
The front panel provides access to all primary recording and playback functions. Key controls include:
- Axustes de audio: BASS, MID, TREBLE knobs for tone control.
- Configuración de gravación: TEXT, PHANTOM (for external microphones), PROG, REPEAT, MENU/STORE buttons.
- Disc Operations: DISC MODE, SINGLE, A-B, CANCEL/DELETE buttons.
- Potencia: POWER switch and STANDBY button.
- Visualización: LCD screen showing status, track information, and settings.
- Bandexa de CD: Push ENTER button to open/close the CD tray.
- Recording/Finalizing: ERASE, FINALIZE, REC buttons.
- Controis de transporte: Botóns Reproducir/Pausa, Deter, Saltar adiante/Retroceder.
3.2 Conexións do panel traseiro
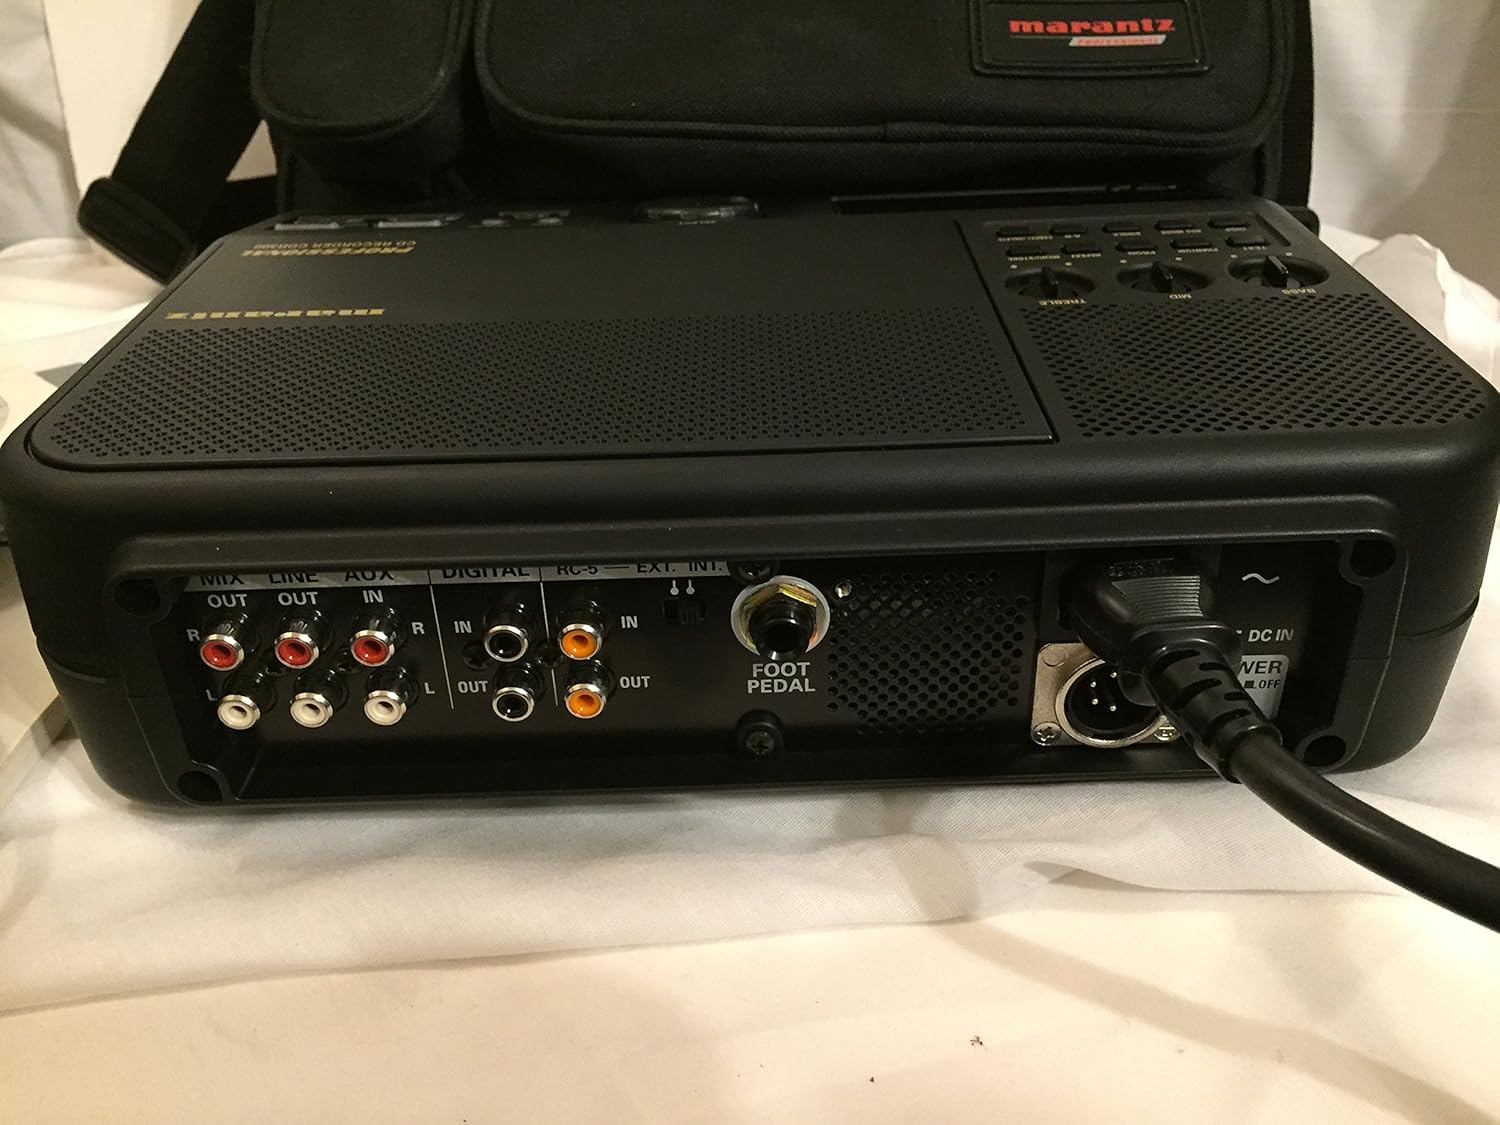
Figure 2: Rear panel connections of the Marantz CDR300.
The rear panel houses various input and output connections for external audio devices and power:
- Saídas de audio: MIX OUT (RCA), LINE OUT (RCA).
- Entradas de audio: LINE IN (RCA), AUX IN (RCA), DIGITAL IN (Coaxial/Optical).
- Portos de control: RC-5, EXT. INT. (External/Internal microphone selector), FOOT PEDAL input.
- Entrada de enerxía: DC IN (4-pin connector for optional RPS300 battery or external DC power), AC POWER ON/OFF switch.
3.3 Remote Control (RC300CDR)
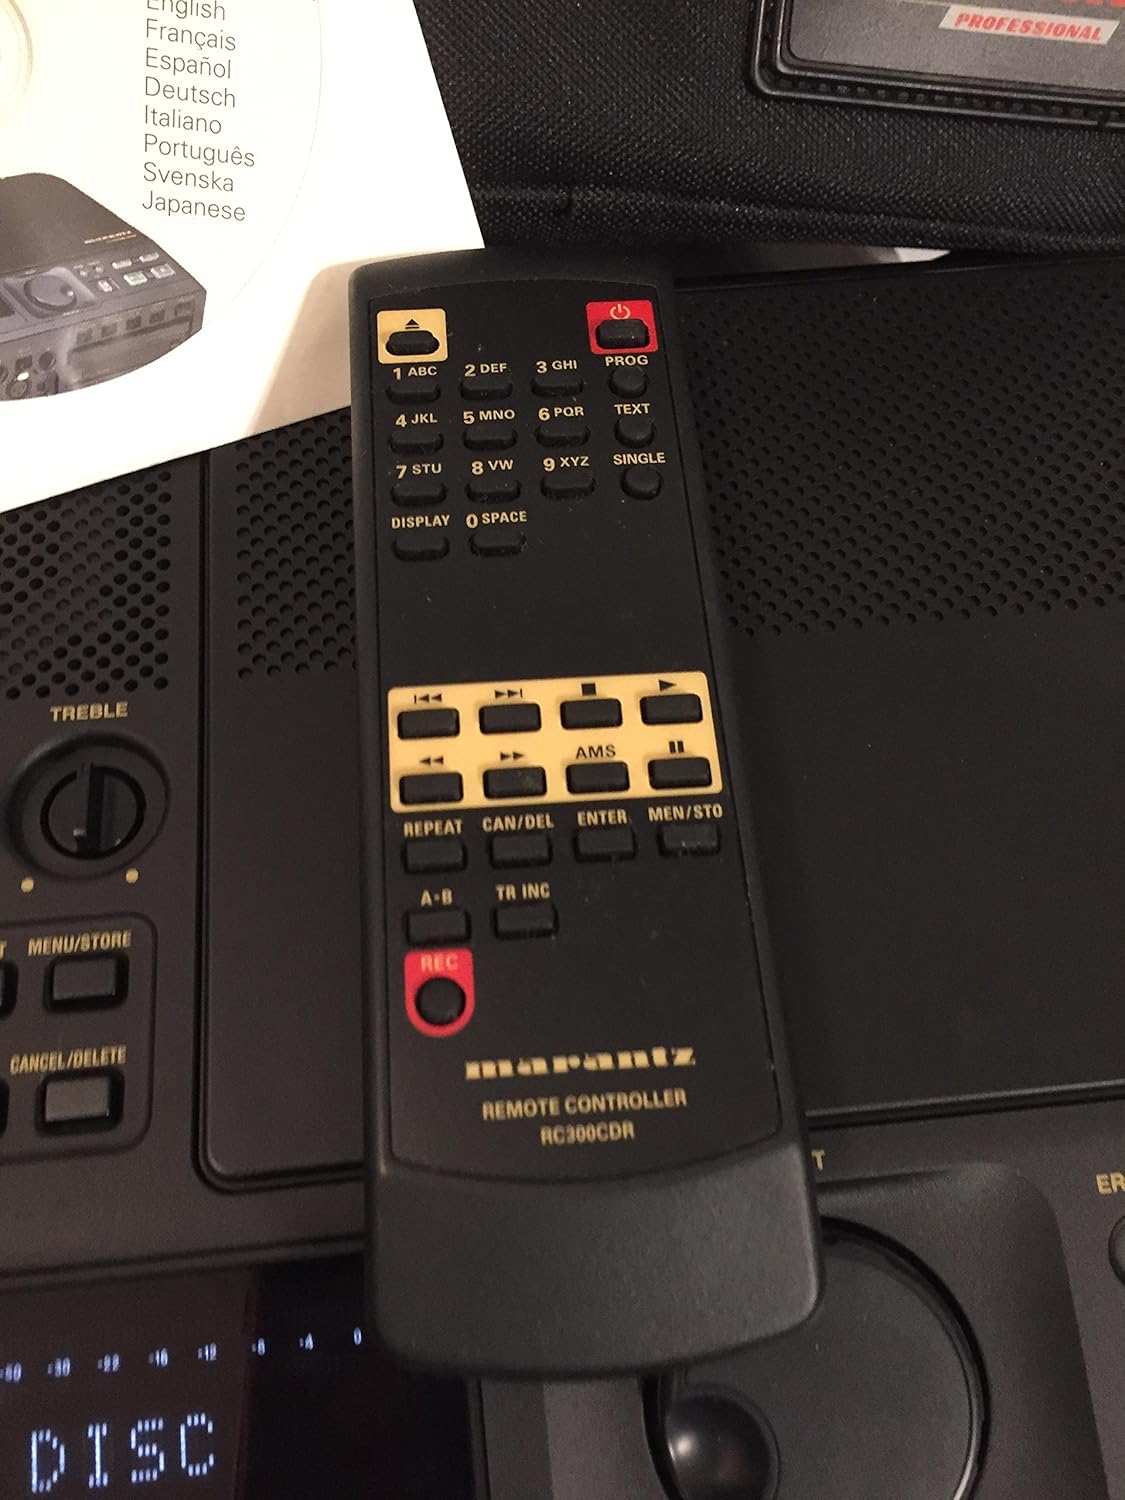
Figure 3: The RC300CDR remote control unit.
The included remote control provides convenient access to most functions from a distance. It includes buttons for power, numerical input, text entry, display options, AMS (Automatic Music Search), repeat functions, track increment, and full transport controls (REC, Play/Pause, Stop, Skip).
4. Configuración
4.1 Conexión de alimentación
- Connect the supplied AC power adapter to the AC POWER input on the rear panel and plug it into a standard wall outlet.
- Alternatively, for portable use, connect the optional RPS300 battery system to the 4-pin DC IN connector.
- Ensure the AC POWER ON/OFF switch on the rear panel is in the 'ON' position.
4.2 Cargar un disco
- Press the 'Push ENTER' button on the front panel to open the CD tray.
- Place a blank CD-R or CD-RW disc, label side up, into the tray.
- Press the 'Push ENTER' button again to close the tray. The display will show "READING DISC" then "READY" or "NO DISC" if no disc is detected or if the disc is incompatible.
4.3 Conexións de audio
- Micrófonos externos: Connect professional microphones to the XLR inputs (if available, typically via an external mixer or pre-amp connected to Line In). Ensure PHANTOM power is enabled if required by your microphones.
- Dispositivos de nivel de liña: Connect audio sources like mixers, preamplifiers, or other playback devices to the LINE IN (RCA) or AUX IN (RCA) ports.
- Fontes dixitais: For digital audio input, connect compatible devices to the DIGITAL IN (Coaxial or Optical) port.
- Seguimento: Connect headphones to the headphone jack for private monitoring or connect external speakers to the LINE OUT (RCA) ports.
5. Instrucións de funcionamento
5.1 Gravación básica
- Power on the unit and insert a blank CD-R or CD-RW disc.
- Select your desired input source (internal microphone, external microphone via LINE IN, or other line/digital inputs). Use the EXT. INT. switch on the rear panel for microphone selection.
- Adjust input levels using the ALC (Automatic Level Control) or manually set levels and apply mic filtering, limiter, or programmable EQ as needed via the menu.
- Preme o REC button to begin recording. The REC indicator will illuminate.
- Para deixar de gravar, prema o botón PARA botón.
5.2 Minute Track Mode (for Spoken Word)
The "Minute Track Mode" is ideal for recording interviews, lectures, or meetings, as it automatically creates a new track marker every minute. This allows for quick navigation to specific points during playback.
- Before recording, activate "Minute Track Mode" through the unit's menu settings. Refer to the on-screen display for navigation.
- Proceed with recording as described in Section 5.1. The unit will automatically insert track markers every 60 seconds.
5.3 Reprodución
- Insert a recorded CD into the tray.
- Preme o REPRODUCIR/PAUSA botón para iniciar a reprodución.
- Use the Skip Forward/Backward buttons to navigate between tracks. If "Minute Track Mode" was used, these buttons will jump to the next or previous minute marker.
- Preme o PARA botón para finalizar a reprodución.
5.4 Finalizing a Disc
After recording, a CD-R disc must be finalized to be playable on standard CD players. CD-RW discs do not always require finalizing for playback on the CDR300 itself, but it is recommended for universal compatibility.
- Ensure the disc contains all desired recordings.
- Preme o FINALIZAR botón no panel frontal.
- Follow the on-screen prompts to confirm the finalization process. This process is irreversible.
6. Mantemento
- Limpeza: Empregue un pano suave e seco para limpar o exterior da unidade. Non empregue produtos de limpeza líquidos nin disolventes.
- Manexo do disco: Always handle discs by their edges. Store discs in cases to prevent scratches and dust accumulation.
- Almacenamento: Garde a unidade nun lugar fresco e seco, lonxe da luz solar directa e de temperaturas extremas.
7 Solución de problemas
This section addresses common issues you might encounter with the Marantz CDR300.
- "NO DISC" displayed:
- Ensure a disc is properly inserted, label side up.
- Verify the disc is a compatible CD-R or CD-RW.
- Clean the disc if it appears dirty or scratched.
- No recording audio:
- Comprobe todas as conexións dos cables de son.
- Asegúrate de que estea seleccionada a fonte de entrada correcta.
- Verify input levels are not set too low or muted.
- If using external microphones, confirm phantom power is supplied if needed.
- Disc not playable on other devices after recording:
- Ensure the disc has been finalized (see Section 5.4).
- Some older CD players may not be compatible with CD-R/RW media.
- A unidade non se acende:
- Check AC power adapter connection and wall outlet.
- Verify the AC POWER ON/OFF switch on the rear panel is in the 'ON' position.
- If using battery power, ensure the battery is charged and properly connected.
8. Especificacións

Figure 4: Bottom label with model and power specifications.
- Modelo: CDR300
- Compatibilidade do disco: CD-R, CD-RW
- Requisitos de enerxía:
- AC: 120V, 60Hz, 0.35A
- DC: 13.2V, 2.0A (for optional RPS300 battery system)
- Entradas: Line In (RCA), Aux In (RCA), Digital In (Coaxial/Optical), External Microphone (XLR via Line In), Foot Pedal.
- Saídas: Mix Out (RCA), Line Out (RCA), Headphone.
- Características integradas: Microphone, Speaker, Automatic Level Control (ALC), Mic Filtering, Limiter, Programmable EQ.
- Peso do artigo: Aproximadamente 21 libras (9.5 kg)
- Data de primeira dispoñibilidade: 2 de outubro de 2001
9. Garantía e soporte
For warranty information, technical support, and service inquiries regarding your Marantz CDR300 Portable CD Recorder, please refer to the official Marantz website or contact your authorized Marantz dealer. Keep your purchase receipt as proof of purchase for warranty claims.


