
Introdución
The Kaito KA007 is a versatile portable emergency radio designed for reliable communication and illumination in various situations. It features multiple power sources, including solar, dynamo (hand crank), internal rechargeable battery, and external batteries, ensuring functionality even during power outages. This manual provides detailed instructions for setting up, operating, and maintaining your KA007 radio.
As características principais inclúen:
- Wide frequency coverage: AM, FM, Shortwave (SW1-4), Weather Band (WX), and TV Bands (TV1-2).
- Four power options: Solar panel, hand-crank dynamo, built-in rechargeable NiMH battery pack, and external batteries.
- Integrated LED flashlight for illumination.
- Lectura lamp for convenient low-light use.
- Deseño compacto e portátil.
Produto rematadoview

Figura 1: Fronte View. This image displays the front of the Kaito KA007 radio, highlighting the main speaker grille, the frequency display, tuning knob, and band selection switches. The Kaito KA007 logo is visible at the bottom left.

Figura 2: Lateral View. This image shows the left side of the Kaito KA007 radio, featuring the headphone jack, the switch for the flashlight/reading lamp, and the DC 4.5-6V input port for external power.

Figura 3: Parte superior-frontal View with Antenna. This image provides a top-front perspective of the radio with its telescopic antenna fully extended, illustrating its readiness for improved reception.
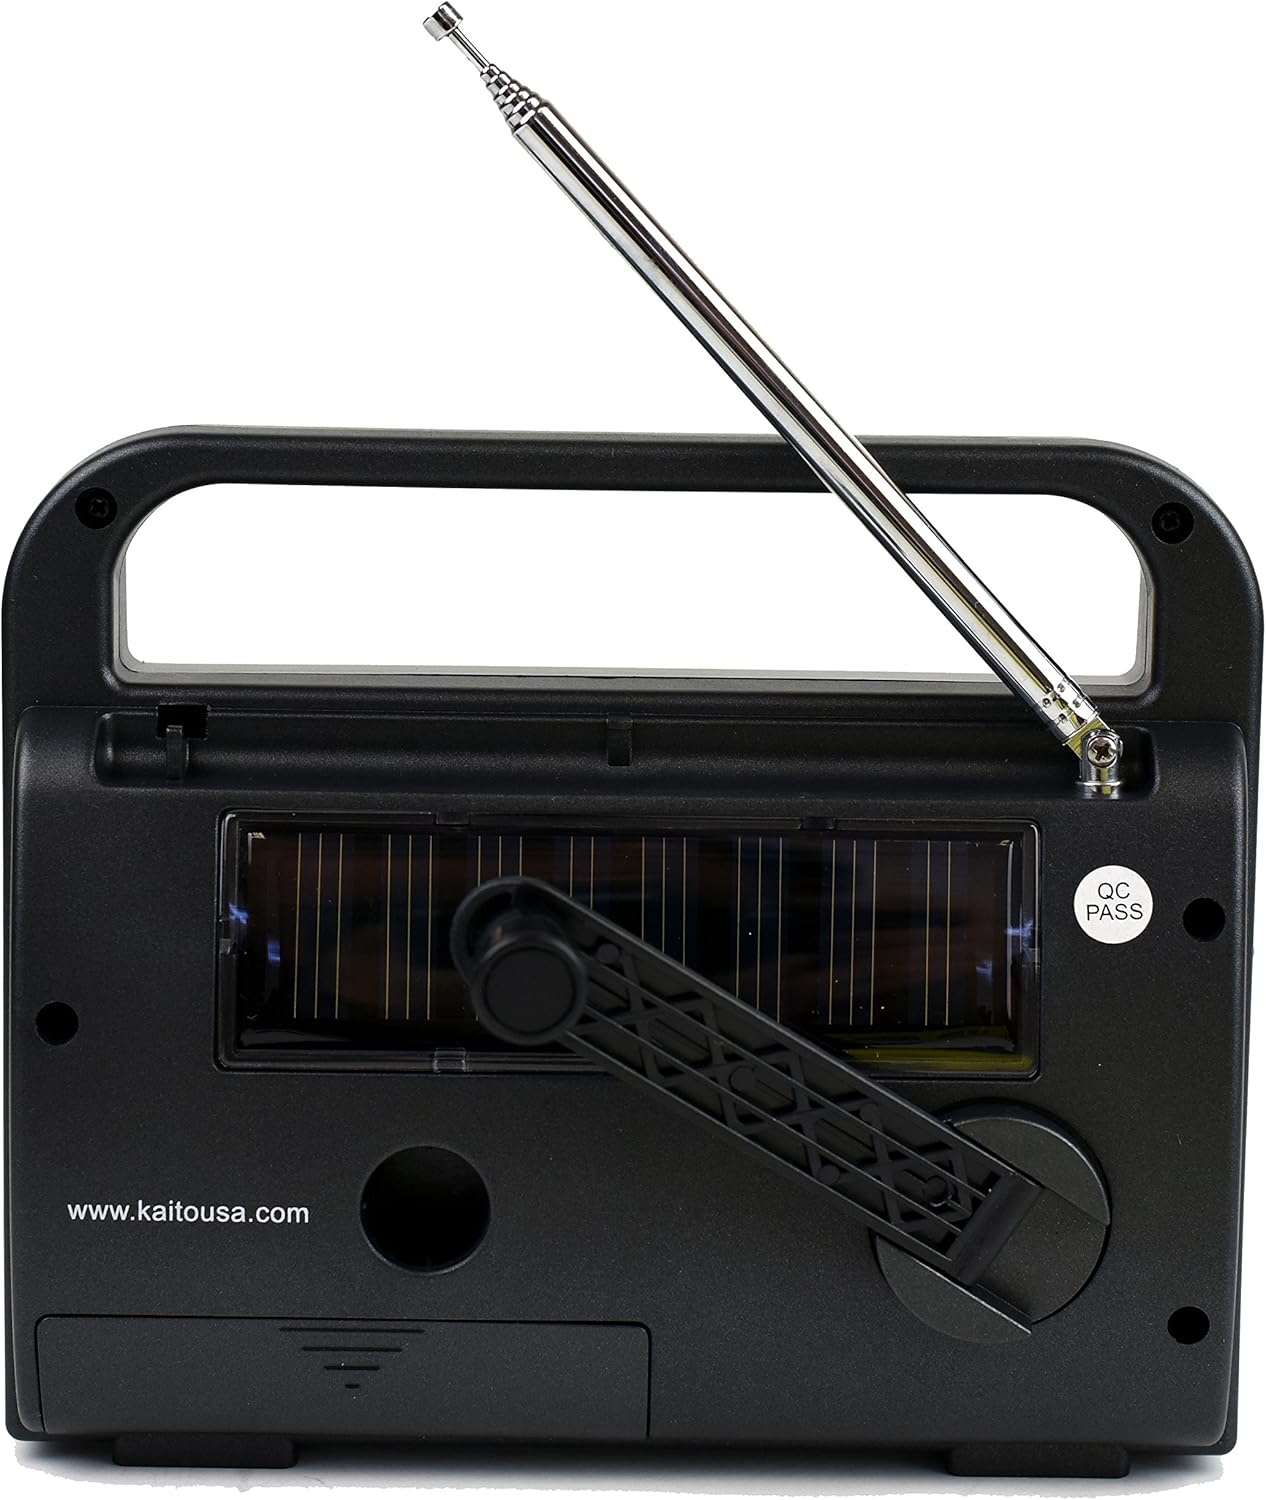
Figura 4: Traseira View. This image shows the back of the Kaito KA007 radio, prominently featuring the integrated solar panel and the foldable hand-crank dynamo for charging.
Configuración
1. Acendiendo a radio
The Kaito KA007 offers multiple power options:
- Internal NiMH Battery Pack: The radio comes with a built-in rechargeable NiMH battery pack. This pack can be charged via the AC/DC adapter, solar panel, or hand-crank dynamo.
- Baterías externas: For extended use or when the internal battery is depleted, you can insert standard batteries (type not specified in product data, typically AA or AAA for similar devices, refer to battery compartment markings).
- Adaptador AC/DC: Connect the included AC/DC adapter to the DC 4.5-6V input port on the side of the radio and plug it into a wall outlet. This will power the radio and charge the internal NiMH battery pack.
- Enerxía solar: Place the radio with the solar panel (located on the back) facing direct sunlight. The solar panel will slowly charge the internal NiMH battery pack. This method is best for maintaining charge or trickle charging.
- Dynamo (Hand Crank): Unfold the hand crank on the back of the radio and rotate it clockwise or counter-clockwise for approximately 1-3 minutes to provide power for immediate use or to charge the internal NiMH battery pack.
2. Configuración da antena
For optimal reception, especially for FM, Shortwave, and Weather bands, fully extend the telescopic antenna. For AM reception, the radio uses an internal ferrite bar antenna, so antenna extension is not typically required.
Instrucións de funcionamento
1. Acendido/apagado e control de volume
Locate the combined ON/OFF and Volume knob, typically on the right side of the radio. Rotate it clockwise to turn the radio on and increase the volume. Rotate counter-clockwise to decrease volume and turn the radio off.
2. Selección de bandas
Use the band selector switches, usually located on the front panel below the frequency display, to choose your desired band:
- AM: Para Amplitude Modulation broadcasts (525-1710 KHz).
- FM: For Frequency Modulation broadcasts (88-108 MHz).
- SW1-4: For Shortwave bands (SW1: 4.90-9.00 MHz, SW2: 9.00-13.50 MHz, SW3: 13.50-17.50 MHz, SW4: 17.50-22.00 MHz).
- WX: For Weather Band broadcasts (162.40-162.55 MHz).
- TV1-2: For TV audio broadcasts (TV1: Channel 2-6, TV2: Channel 7-13). Note: TV audio broadcasts are largely discontinued in many regions due to digital TV transition.
- VHF: For VHF band (145-175 MHz), which may include weather, taxi, and police frequencies.
3. Afinación
Once a band is selected, use the TUNING knob (typically on the right side, above the volume knob) to scan for stations. Rotate slowly for fine-tuning. The frequency display will indicate the current frequency.
4. Lanterna e lectura Lamp
A switch on the side of the radio controls the integrated lighting features. Toggle the switch to activate the LED flashlight or the reading lamp segundo sexa necesario.
5. Uso de auriculares
For private listening, plug standard 3.5mm headphones into the headphone jack located on the side of the radio.
Mantemento
- Limpeza: Limpe a radio cun suave, damp pano. Non use produtos de limpeza ou disolventes abrasivos.
- Coidado da batería:
- If using external batteries, remove them if the radio will not be used for an extended period to prevent leakage.
- Regularly charge the internal NiMH battery pack, especially if stored for long durations, to maintain its lifespan. Avoid over-discharging.
- Almacenamento: Store the radio in a cool, dry place away from direct sunlight and extreme temperatures. Ensure the antenna is retracted when not in use.
- Dynamo Crank: Operate the hand crank smoothly. Avoid excessive force, which could damage the mechanism.
Resolución de problemas
| Problema | Causa posible | Solución |
|---|---|---|
| A radio non se acende. | Internal battery depleted, external batteries dead or incorrectly inserted, power switch off. | Charge internal battery via AC adapter, solar, or dynamo. Replace external batteries. Ensure power/volume knob is turned on. |
| Mala recepción ou estática. | Antenna not extended, weak signal, interference from electronics, incorrect band selected. | Fully extend telescopic antenna. Try repositioning the radio. Tune slowly and carefully. Ensure correct band is selected for desired broadcast. |
| Solar charging light not on. | Insufficient sunlight, solar panel obstructed, internal wiring issue. | Ensure direct, strong sunlight on the solar panel. Check for any physical damage to the panel or connecting wires. |
| Difficulty fine-tuning stations. | Small tuning dial, sensitive tuning mechanism. | Rotate the tuning knob very slowly and gently. Use the telescopic antenna for better signal clarity. |
| FM bleed-over on TV bands. | Strong local FM signals interfering with TV band reception. | This can be a characteristic of the radio's design. Try adjusting antenna position or moving to an area with less FM interference. Note that TV audio broadcasts are largely obsolete. |
Especificacións
- Modelo: KA007
- Marca: Kaito
- Tecnoloxía do sintonizador: AM, FM
- Fonte de enerxía: Battery Powered (Internal NiMH, External), Solar, Dynamo, AC Adapter (DC 4.5-6V)
- Bandas de radio admitidas:
- AM: 525 - 1710 KHz
- FM: 88 - 108 MHz
- Weather Band (WX): 162.40 - 162.55 MHz
- TV1: Channel 2-6
- TV2: Channel 7-13
- VHF: 145 - 175 MHz (Weather, Taxi, Police)
- Shortwave 1 (SW1): 4.90 - 9.00 MHz
- Shortwave 2 (SW2): 9.00 - 13.50 MHz
- Shortwave 3 (SW3): 13.50 - 17.50 MHz
- Shortwave 4 (SW4): 17.50 - 22.00 MHz
- Peso do artigo: 12 onzas (aproximadamente 340 gramos)
- Voltage: 110 Volts (for AC adapter input)
- Modo de saída de audio: Mono / Stereo (via headphone jack)
- Característica especial: Portátil
Información da garantía
The Kaito KA007 radio comes with a manufacturer's limited warranty for 1 year from the date of purchase. Additionally, a 90-day money-back guarantee may apply. Please retain your proof of purchase for warranty claims. For specific terms and conditions, refer to the warranty card included with your product or contact Kaito customer support.
Atención ao cliente
For technical assistance, troubleshooting beyond this manual, or warranty inquiries, please visit the official Kaito websitio web ou póñase en contacto co seu departamento de atención ao cliente. A información de contacto adoita atoparse na páxina web do fabricante websitio ou embalaxe do produto.
Tamén podes visitar o Tenda Kaito en Amazon para obter máis información sobre o produto.