Raio de sol 005891-000-000
Sunbeam Programmable Bread Maker
Modelo: 005891-000-000
Marca: Sunbeam
Introdución
Benvido
Thank you for choosing the Sunbeam Programmable Bread Maker. This appliance is designed to simplify the bread-making process, allowing you to enjoy fresh, homemade bread with minimal effort. Please read this manual thoroughly before first use to ensure safe and efficient operation.
Garantías importantes
- Read all instructions before using the bread maker.
- Do not touch hot surfaces. Use oven mitts when handling hot parts.
- Para protexerse contra descargas eléctricas, non mergulle o cable, os enchufes nin o aparello en auga ou noutro líquido.
- É necesaria unha estreita supervisión cando calquera aparello é usado por nenos ou preto de eles.
- Desenchufe da toma cando non estea en uso e antes de limpalo. Deixar arrefriar antes de poñer ou quitar pezas.
- Evite o contacto coas pezas móbiles.
- Non faga funcionar ningún aparello cun cable ou enchufe danados ou despois de que o aparello funcione mal ou teña dano dalgún xeito.
Compoñentes do produto
Bread Maker Unit

Fronte view of the Sunbeam Programmable Bread Maker, showcasinpolo seu deseño compacto e o seu panel de control.
Panel de control e pantalla
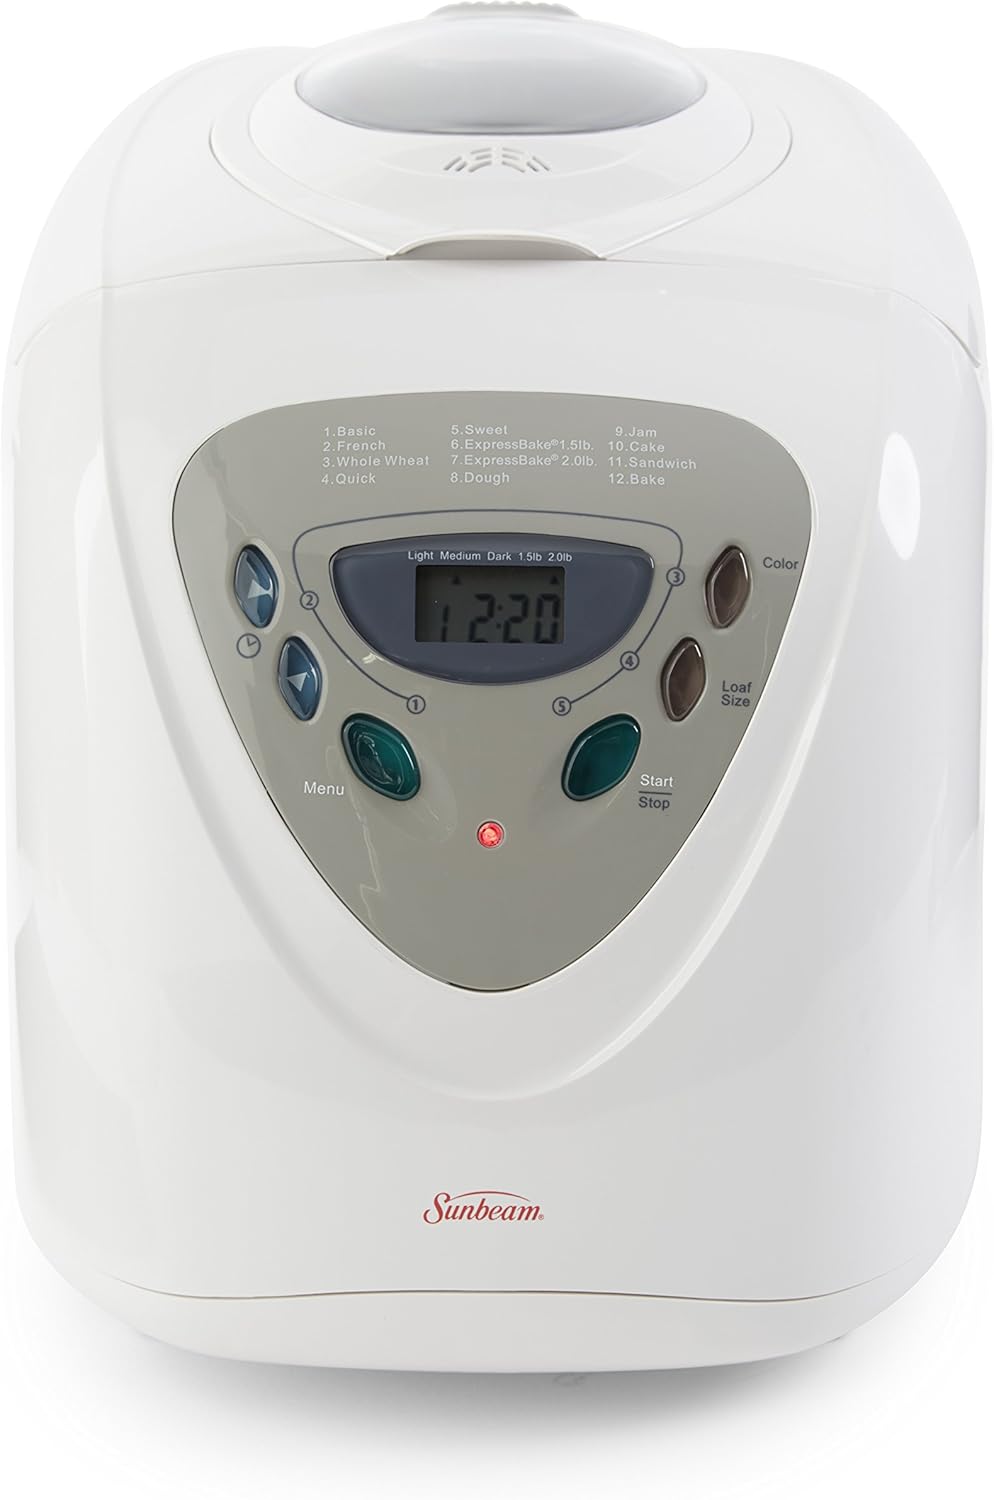
Close-up of the bread maker's control panel, featuring an LED display, menu buttons, and options for crust color and loaf size.
Removable Baking Pan & Kneading Paddle

The bread maker unit with its removable non-stick baking pan and included measuring cup and spoon, ready for use.

Arriba abaixo view of the non-stick baking pan, showing the central spindle for the kneading paddle.
Interior View

The bread maker with its lid open, revealing the interior cavity designed to hold the baking pan and the heating element.
Guía de configuración
Desembalaxe
- Remove all packaging materials and promotional labels from the bread maker.
- Wash the baking pan, kneading paddle, and any included accessories (measuring cup, spoon) with warm, soapy water. Rinse thoroughly and dry completely.
- Wipe the exterior of the bread maker unit with a damp pano.
Colocación
- Place the bread maker on a stable, flat, and heat-resistant surface.
- Ensure there is adequate space and ventilation around the unit, especially above the lid, to allow heat to escape during operation.
Primeiro uso
- Conecte a panificadora a unha toma de corrente con conexión a terra.
- It is recommended to run a short "Bake" cycle (Program 12) without any ingredients for about 10 minutes during the first use. This helps to burn off any manufacturing oils and may produce a slight odor, which is normal and will dissipate.
Instrucións de funcionamento
Engadindo ingredientes
- Ensure the kneading paddle is securely attached to the shaft at the bottom of the baking pan.
- Add ingredients to the baking pan in the following order: liquids (water, milk, eggs), then dry ingredients (flour, sugar, salt, dry milk), and finally yeast. Ensure yeast does not come into direct contact with liquids or salt initially.
- Place the filled baking pan into the bread maker unit. Twist gently to lock it into place.
- Pecha firmemente a tapa.
Selección dun programa
- Press the "Menu" button repeatedly to cycle through the 12 available baking programs. The corresponding program number will be displayed on the LED screen.
- Available Programs: 1. Basic, 2. French, 3. Whole Wheat, 4. Quick, 5. Sweet, 6. ExpressBake 1.5lb, 7. ExpressBake 2.0lb, 8. Dough, 9. Jam, 10. Cake, 11. Sandwich, 12. Bake.
Cor da codia e tamaño do pan
- Press the "Color" button to select your desired crust shade: Light, Medium, or Dark.
- Press the "Loaf Size" button to select the loaf weight: 1.5 lb or 2.0 lb. (Note: Not all programs support both loaf sizes.)
Delay Bake Function
- To delay the start of the baking cycle, use the timer buttons (up/down arrows) to set the desired delay time, up to 13 hours. The display will show the total time until completion.
- Atención: Do not use the delay bake function with perishable ingredients such as fresh milk, eggs, cheese, or fresh fruit, as they may spoil.
Comezando o Ciclo
- Once all settings are chosen, press the "Start/Stop" button to begin the program. The display will show the remaining time.
Durante o ciclo
- The bread maker will automatically perform kneading, rising, and baking stages.
- Some programs may beep during the kneading cycle to indicate the optimal time to add fruits, nuts, or other additional ingredients.
- Avoid opening the lid frequently during the baking stage to prevent heat loss, which can affect bread quality.
Fin de Ciclo
- When the baking cycle is complete, the bread maker will beep several times.
- Press and hold the "Start/Stop" button for a few seconds to turn off the unit and the keep-warm function.
- Carefully remove the baking pan from the bread maker using oven mitts, as it will be hot.
- Invert the pan to release the bread onto a wire cooling rack. If the kneading paddle remains embedded in the bread, carefully remove it using a non-metallic utensil.
- Allow the bread to cool completely on the wire rack before slicing for best results.
Coidados e Mantemento
Limpeza
- Desconecte sempre a panificadora da toma de corrente e deixe que arrefríe completamente antes de limpala.
- Baking Pan & Kneading Paddle: Wash the non-stick baking pan and kneading paddle with warm, soapy water. Do not use abrasive cleaners, metal scourers, or put them in a dishwasher, as this can damage the non-stick coating.
- Exterior: Limpa o exterior da panificadora cun pano suave eamp pano. Non mergulle a unidade principal en auga nin en ningún outro líquido.
- Interior: Usa anuncioamp cloth to wipe the interior cavity of the bread maker and the heating element. Remove any crumbs or residue.
Almacenamento
- Ensure all parts are thoroughly clean and dry before storing the appliance.
- Store the bread maker in a cool, dry place, away from direct sunlight or heat sources.
Resolución de problemas
If you encounter issues with your Sunbeam Bread Maker, please consult the following common problems and solutions:
- Bread Does Not Rise:
- Check the expiration date of your yeast. Old yeast will not activate.
- Ensure the liquid temperature is correct (around 105-115°F or 40-46°C). Too hot or too cold water can kill or inhibit yeast.
- Verify all ingredient measurements are accurate, especially yeast, sugar, and salt.
- Bread is Too Dense/Heavy:
- Too much flour or not enough liquid. Adjust measurements carefully.
- Yeast may be inactive or insufficient.
- Bread Collapses/Sinks:
- Too much liquid or too much yeast. Reduce slightly in future recipes.
- High humidity can sometimes cause bread to collapse.
- Kneading Paddle Stuck in Bread:
- This is common. Allow the bread to cool slightly.
- Use a non-metallic utensil (e.g., plastic spatula) to gently dislodge the paddle.
- A máquina non arranca:
- Asegúrate de que o cable de alimentación estea conectado correctamente a unha toma de corrente que funcione.
- Verify that the lid is fully closed and the baking pan is correctly seated.
- Check that a program has been selected on the control panel.
- Cheiro inusual durante o primeiro uso:
- A slight burning smell is normal during the first few uses as manufacturing oils burn off. This will dissipate with continued use.
Especificacións
| Característica | Detalle |
|---|---|
| Marca | Raio de sol |
| Número de modelo | 005891-000-000 |
| Cor | Branco |
| Wattage | 600 vatios |
| Número de programas | 12 |
| Loaf Capacity | Ata 2 lb |
| Dimensións do produto | 15 x 10 x 13 polgadas |
| Peso do elemento | 16.9 libras |
| Primeiro dispoñible | 2 de outubro de 2001 |
Garantía e Soporte
For detailed warranty information and customer support, please refer to the official user manual provided with your product. The manual contains specific terms, conditions, and contact information for service and inquiries. You can also visit the Sunbeam Store for additional resources. A downloadable PDF version of the user manual is available aquí.