
Mintcraft JL-45891-3L
ProSource JL-45891-3L Digital Electronic Safe User Manual
Model: JL-45891-3L
Brand: Mintcraft
1. Introdución
This manual provides detailed instructions for the safe and efficient operation, setup, and maintenance of your ProSource JL-45891-3L Digital Electronic Safe. Please read this manual thoroughly before using the product and retain it for future reference.
The ProSource JL-45891-3L Digital Electronic Safe is designed to provide secure storage for your valuables. It features a digital electronic keypad for access and is constructed from solid steel with a powder coating finish for durability.
2. Información de seguridade
AVISO:
- This safe is NOT fireproof. Do not store highly flammable materials inside.
- Keep emergency backup keys in a secure location away from the safe.
- Asegúrate de que a caixa forte estea ben montada para evitar a súa retirada non autorizada.
- Do not attempt to force the safe open if the electronic lock malfunctions. Refer to the troubleshooting section or contact support.
- Manteña as pilas fóra do alcance dos nenos.
3. Contido do paquete
Verifique que todos os elementos que se indican a continuación estean incluídos no seu paquete:
- 1 x Digital Electronic Safe (Model: JL-45891-3L)
- 4 pilas AA
- 2 x Emergency Back-Up Keys
- 4 x Anchor Bolts
- 1 x Manual de usuario (este documento)
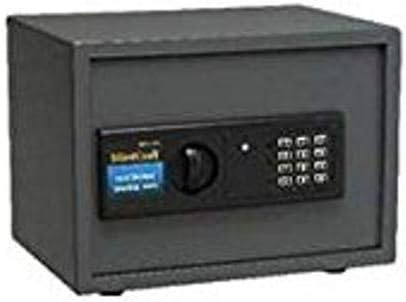
Figure 1: Mintcraft Digital Electronic Safe, showing the main unit with its electronic keypad and manual override knob.
4. Configuración
4.1. Instalación da batería
- Localiza o compartimento das baterías na parte interior da porta da caixa forte.
- Insira 4 pilas AA, asegurándose de polaridade correcta (+/-).
- Pecha a tapa do compartimento da batería.
4.2. Configuración inicial do código
- With the safe door open, press the red reset button located on the inside of the door near the hinge. A beep will sound, and the indicator light will flash.
- Enter your desired 3 to 8 digit code on the keypad.
- Press the "E" or "#" button to confirm. The light will flash green, indicating the code is set.
- Proba o novo código coa porta aberta antes de pechala.
4.3. Montaxe da caixa forte
The safe can be mounted to a wall or floor using the provided anchor bolts. Choose a secure, discreet location.
- Mark the desired drilling points through the pre-drilled holes on the back or bottom of the safe.
- Fai buratos guía na parede ou no chan cunha broca axeitada.
- Align the safe with the drilled holes and secure it using the anchor bolts.
- Asegúrate de que a caixa forte estea firmemente suxeita e que non se poida retirar facilmente.
5. Instrucións de funcionamento
5.1. Abrir a caixa forte cun código dixital
- Introduza o seu código persoal de 3 a 8 díxitos no teclado numérico.
- Press the "E" or "#" button.
- If the code is correct, the green light will illuminate. Within 5 seconds, turn the knob clockwise to open the door.
- If the code is incorrect, the yellow light will flash, and a beep will sound.
5.2. Abrir a caixa forte coa chave de emerxencia
In case of battery failure or forgotten code, the safe can be opened using the emergency key.
- Locate the keyhole cover, usually hidden behind the keypad or a removable panel.
- Retire a tapa.
- Insert the emergency key and turn it counter-clockwise while simultaneously turning the knob clockwise to open the door.
- Once opened, replace the keyhole cover.
5.3. Peche e bloqueo da caixa forte
To lock the safe, simply close the door and turn the knob counter-clockwise. The safe will automatically lock.
6. Mantemento
- Substitución da batería: Replace batteries annually or when the low battery indicator light (if present) illuminates. Always use 4 new AA batteries.
- Limpeza: Limpa o exterior da caixa forte cun pano suave eamp pano. Non use produtos de limpeza ou disolventes abrasivos.
- Coidado do teclado: Avoid pressing the keypad buttons with excessive force. Keep the keypad dry and free from dust.
- Lubricación: Periodically apply a small amount of lubricant to the door hinges and locking mechanism to ensure smooth operation.
7 Solución de problemas
| Problema | Causa posible | Solución |
|---|---|---|
| A caixa forte non abre con código. | Incorrect code entered; Batteries are low or dead; Keypad malfunction. | Re-enter code carefully. Replace batteries. Use emergency key to open, then reset code. |
| O teclado non responde. | Baterías gastadas; Conexión solta da batería. | Replace batteries. Ensure batteries are correctly inserted. |
| Door will not close or lock properly. | Obstrución no marco da porta; parafusos de peche desalinhados. | Check for obstructions. Gently push the door inward while turning the knob. |
| A chave de emerxencia non funciona. | Key not fully inserted; Internal mechanism jammed. | Ensure key is fully inserted and turned correctly. Do not force. Contact support if issue persists. |
8. Especificacións
| Característica | Detalle |
|---|---|
| Número de modelo | JL-45891-3L |
| Dimensións externas (H x W x D) | 9-7/8 in x 13-3/4 in x 9-7/8 in (25.08 cm x 34.93 cm x 25.08 cm) |
| Dimensións do produto (L x W x H) | 12.25 x 12.5 x 15.88 polgadas (31.12 x 31.75 x 40.34 cm) |
| Peso | 30.8 lb (13.97 kg) |
| Tipo de bloqueo | Digital Electronic with Emergency Key |
| Lonxitude do código | De 3 a 8 díxitos |
| Material | Solid Steel with Powder Coating Finish |
| Fonte de enerxía | 4 pilas AA (incluídas) |
| Tipo de montaxe | Soporte de parede |
| A proba de lume | Non |
| Nivel de resistencia á auga | Non resistente á auga |
9. Información da garantía
Please refer to the product packaging or contact the manufacturer directly for specific warranty details. Typically, products are covered against defects in materials and workmanship for a limited period from the date of purchase.
10. Atención ao cliente
For technical assistance, replacement parts, or any questions regarding your Mintcraft Digital Electronic Safe, please contact your retailer or the manufacturer directly.
Note: Specific contact information may be found on the product packaging or the manufacturer's official websitio.
Ask a question about this manual
Ask about setup, troubleshooting, compatibility, parts, safety, or missing instructions. Manuals+ will review the question and use this page’s manual context to help answer it.