1. Configuración
1.1 Desembalaxe e inspección inicial
Carefully remove your ASUS K52F-A2B laptop from its packaging. Inspect the laptop and all accessories for any signs of damage. The package should contain the laptop, AC adapter, power cord, and documentation.
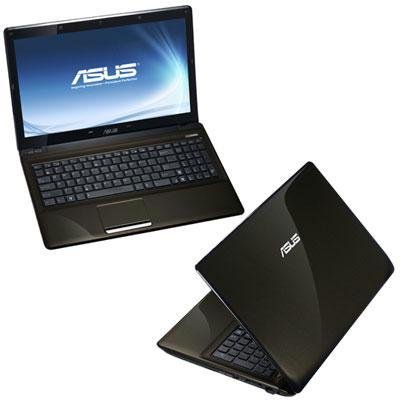
Image 1.1: The ASUS K52F-A2B laptop. This image shows the closed laptop from an angle, highlighting its dark brown finish and sleek design.
1.2 Conexión do adaptador de CA
Before initial use, connect the AC adapter to the laptop and a power outlet. This ensures the battery is charged and provides stable power for setup.
- Plug the AC adapter into the power connector on the side of your laptop.
- Conecte o cable de alimentación ao adaptador de CA.
- Conecte o outro extremo do cable de alimentación a unha toma eléctrica conectada a terra.
1.3 Encendido inicial
Once the AC adapter is connected, open the laptop lid and press the power button. The laptop will begin its initial boot sequence. Follow the on-screen instructions to complete the operating system setup (Windows 7 Professional 64-bit).
2. Operating Your ASUS K52F-A2B Laptop
2.1 Acendido/apagado e modo de repouso
- Encendido: Press the power button located above the keyboard.
- Apagado: Click the Start button, then select 'Shut down'.
- Modo de suspensión: Close the laptop lid or select 'Sleep' from the Start menu. Press the power button or any key to wake the laptop.
2.2 Uso do teclado e do panel táctil
The ASUS K52F-A2B features a full-sized keyboard and a multi-touch touchpad.
- Teclado: Standard QWERTY layout with function keys (Fn) for brightness, volume, and other system controls.
- Touchpad: Supports multi-touch gestures for scrolling, zooming, and navigation. Refer to the operating system's help for detailed gesture information.
2.3 Conexión de dispositivos externos
Your laptop provides various ports for connecting external devices:
- Portos USB: Para conectar dispositivos USB como ratos, teclados e almacenamento externo.
- Porto HDMI: Connects to external displays or TVs for high-definition video and audio output.
- Porto VGA: Connects to older external monitors or projectors.
- Conectores de son: For headphones and microphones.
- Porto Ethernet: Para conexións de rede por cable.
2.4 Using the Optical Disk Drive
The laptop includes a Super Multi Optical Disk Drive for reading and writing CDs and DVDs.
- Press the eject button on the drive to open the tray.
- Place a CD or DVD onto the tray with the label side facing up.
- Gently push the tray back into the laptop until it clicks shut.
3. Mantemento
3.1 Limpeza do portátil
Regular cleaning helps maintain the laptop's appearance and functionality.
- Pantalla: Use un pano suave e sen pelusa damplimpa con auga ou cun limpador de pantallas. Non pulverice líquido directamente sobre a pantalla.
- Teclado e Casing: Use un pano suave e seco. Para a sucidade persistente, un pano lixeiramente húmidoampened with mild soap and water can be used. Ensure the laptop is powered off and unplugged before cleaning.
- Reixas: Use compressed air to clear dust from the cooling vents to prevent overheating.
3.2 Coidado coa batería
Para maximizar a duración e o rendemento da batería:
- Evite descargar completamente a batería con frecuencia.
- Garda o portátil nun lugar fresco e seco cando non o uses durante períodos prolongados.
- Se garda a batería durante un período prolongado, cargue a batería aproximadamente ao 50 % antes de gardala.
3.3 Actualizacións de software
Regularly update your operating system and drivers to ensure optimal performance and security. Check the ASUS support website for the latest drivers for your K52F-A2B model.
4 Solución de problemas
This section addresses common issues you might encounter with your ASUS K52F-A2B laptop.
4.1 Problemas de enerxía
- O portátil non se acende: Ensure the AC adapter is securely connected to both the laptop and a working power outlet. Check if the power outlet is functional. If the battery is completely drained, allow it to charge for a few minutes before attempting to power on.
- Laptop shuts down unexpectedly: This could indicate overheating. Ensure cooling vents are clear and the laptop is on a hard, flat surface.
4.2 Problemas de visualización
- Sen visualización na pantalla: Connect an external monitor to the VGA or HDMI port to check if the issue is with the laptop's internal display. Press Fn+F8 to toggle display output modes.
- Pantalla tenue: Adjust screen brightness using the Fn+F5 (dim) and Fn+F6 (bright) function keys.
4.3 Problemas de conectividade
- Wi-Fi sen conexión: Ensure Wi-Fi is enabled (often via a function key, e.g., Fn+F2). Check network settings in Windows.
- Dispositivo USB non recoñecido: Tenta conectar o dispositivo a un porto USB diferente. Asegúrate de que os controladores do dispositivo estean instalados.
4.4 Operating System Recovery
The ASUS K52F-A2B comes with Windows 7 Professional. For system recovery or reinstallation, it is recommended to use the recovery partition or create recovery media as instructed by ASUS. Note that official support for downgrading to Windows XP Pro may be limited, and recovery media for Windows 7 Pro might need to be created by the user.
5. Especificacións técnicas
| Característica | Especificación |
|---|---|
| Número de modelo | K52F-A2B |
| Procesador | Intel Core i3-350M (2.26 GHz) |
| Sistema Operativo | Windows 7 Professional de 64 bits |
| Mostrar | 15.6-inch HD (1366x768) LED |
| Gráficos | Intel GMA HD (Integrated) |
| Memoria RAM | 3 GB DDR3 1066MHz (Max 8GB) |
| Almacenamento | 320 GB Hard Drive (5400 RPM) |
| Unidade óptica | DVD SuperMulti |
| Conectividade sen fíos | 802.11bgn |
| Portos | HDMI, VGA, USB, Audio Jacks |
| Webleva | 0.3 MP |
| Peso | 5.8 libras |
6. Garantía e soporte
6.1 Información da garantía
Your ASUS K52F-A2B laptop comes with the following warranty coverage:
- Garantía global de 2 anos
- 1-Year Accidental Damage Warranty
- 30-Day Zero Bright Dot Guarantee
- 2-way FREE shipping for repairs
6.2 Soporte técnico
For technical assistance, driver downloads, or further information, please visit the official ASUS support website. 24/7 technical support is available as part of your warranty.
For the most up-to-date support contact information, please refer to the documentation included with your product or visit www.asus.com/support.