
1. Introdución
This manual provides detailed instructions for the setup, operation, and maintenance of your Vivitek D511 Portable DLP Projector. The D511 is designed to deliver sharp, detailed images with 2600 lumens of brightness and a 3000:1 contrast ratio, utilizing DLP and BrilliantColor technologies. It is also 3D-ready, supporting future media content. Please read this manual thoroughly before using the projector to ensure proper and safe operation.
2. Información de seguridade
- Ventilación: Ensure adequate ventilation around the projector. Do not block any ventilation openings. Overheating can cause damage to the projector and pose a fire hazard.
- Fonte de enerxía: Use only the specified power adapter and connect to a grounded power outlet.
- Lamp Seguridade: O proxector lamp operates at high temperatures and pressure. Non intente substituír o lamp inmediatamente despois do uso. Allow the projector to cool down for at least 20 minutes before handling the lamp. Refer to the "Maintenance" section for lamp instrucións de substitución.
- Protección ocular: Evite mirar directamente a lente do proxector cando o lamp está acendido, xa que a luz intensa pode causar danos nos ollos.
- Colocación: Coloque o proxector sobre unha superficie estable e nivelada. Evite colocalo baixo a luz solar directa, preto de fontes de calor ou en ambientes con alta humidade ou po.
- Limpeza: Desconecte o cable de alimentación antes de limpar. Use un pano suave e seco. Non empregue produtos de limpeza líquidos nin en aerosol.
3. Produto rematadoview
3.1 Fronte View
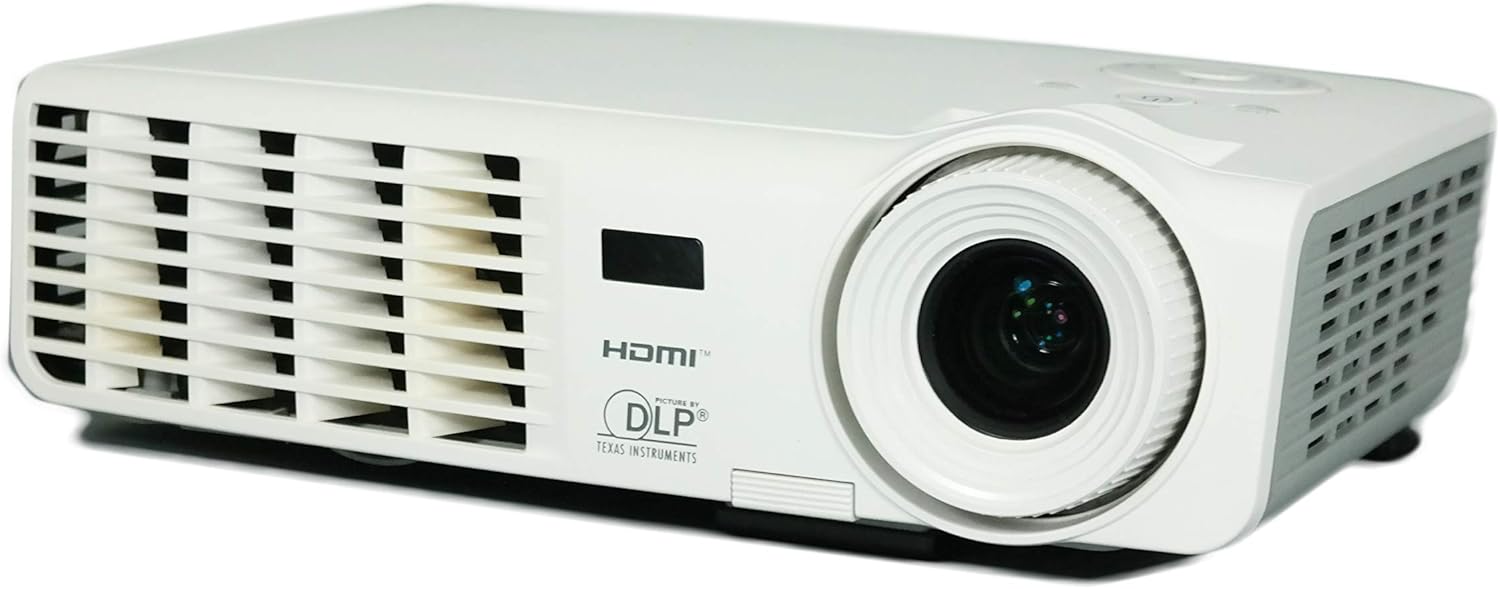
Imaxe 3.1: Fronte view of the Vivitek D511 projector, showing the projection lens and front ventilation grille.
The front of the projector features the main projection lens, which is used to focus the image onto your screen or surface. The front also includes ventilation openings to ensure proper airflow and cooling during operation.
3.2 Panel traseiro (conectividade)

Imaxe 3.2: Rear panel of the Vivitek D511 projector, displaying various input and output ports.
The rear panel provides a range of connectivity options for various devices:
- HDMI: High-Definition Multimedia Interface for digital audio and video input.
- VGA (Input 1 & 2): D-sub 15-pin connectors for analog video input from computers.
- Vídeo composto: RCA yellow jack for standard definition video input.
- Vídeo S: Mini-DIN 4-pin connector for enhanced standard definition video input.
- Audio In (L-Audio-R & Mini-Jack): RCA red/white jacks and a 3.5mm mini-jack for audio input.
- RS-232: Serial port for projector control via a computer or control system.
- Entrada de enerxía: AC power connector.
3.3 Top Panel (Control Buttons)

Imaxe 3.3: Top panel of the Vivitek D511 projector, showing the control buttons and indicator lights.
The top panel houses the primary control buttons for operating the projector without the remote control. These include the Power button, Source selection, Menu access, Auto adjustment, and navigation buttons. Indicator lights for LAMP and TEMP provide status information.
3.4 Laterais Views (Ventilation)

Imaxe 3.4a: Lado esquerdo view with ventilation.

Imaxe 3.4b: Lateral dereito view with ventilation.
Both sides of the projector feature ventilation grilles crucial for dissipating heat generated during operation. Ensure these areas are unobstructed to maintain optimal performance and prevent overheating.
3.5 Abaixo View (Label and Lamp Acceso)

Imaxe 3.5: Abaixo view of the Vivitek D511 projector, showing the product label and lamp panel de acceso.
The bottom of the projector contains the product information label, including the model number (D511), serial number, and regulatory compliance marks. It also features an access panel for lamp substitución. Always refer to the safety warnings regarding lamp replacement on this label.
4. Configuración
4.1 Colocación do proxector
Place the projector on a stable, flat surface. The D511 is designed for tabletop mounting. Ensure the projector is positioned at an appropriate distance from the screen to achieve the desired image size. Avoid placing it where ventilation grilles could be blocked.
4.2 Conexión de dispositivos
Connect your source devices (e.g., laptop, gaming console, DVD player) to the appropriate input ports on the projector's rear panel (refer to Image 3.2).
- HDMI: For high-quality digital video and audio, connect an HDMI cable from your source device to the projector's HDMI port.
- VGA: For analog video from a computer, connect a VGA cable to one of the VGA ports. If connecting a computer, you may also need to connect an audio cable to the Audio In mini-jack.
- Vídeo composto/S-Vídeo: For older video sources, connect the appropriate cable to the Composite Video or S-Video port. Connect audio cables to the L-Audio-R RCA jacks.
4.3 Acendido/Apagado
- Encendido: Connect the power cord to the projector and a power outlet. Press the Poder button on the top panel or the remote control. The projector will initiate its startup sequence.
- Apagado: Preme o Poder button again. A confirmation message may appear. Press the Power button a second time to confirm shutdown. The projector will enter a cooling cycle before completely shutting down. Do not unplug the projector during the cooling cycle.
5. Funcionamento do proxector
5.1 Controis básicos
The projector can be controlled using the buttons on the top panel (refer to Image 3.3) or the included remote control.
- FONTE: Press to cycle through available input sources (HDMI, VGA, Composite, S-Video).
- MENÚ: Press to open the On-Screen Display (OSD) menu for advanced settings. Use the arrow buttons to navigate and ENTRAR (often the central button) to select.
- AUTOMÁTICO: Automatically adjusts the image for optimal display, particularly useful for VGA sources.
- Botóns de frecha (Arriba/Abaixo/Esquerda/Dereita): Navegar polos menús e axustar a configuración.
5.2 Axustar a imaxe
- Foco: Xire o anel de enfoque da lente do proxector ata que a imaxe apareza nítida e clara.
- Corrección Keystone: If the image appears trapezoidal (wider at the top or bottom), use the keystone correction function (usually found in the OSD menu) to adjust it. The D511 supports vertical keystone correction up to 30 inches.
- Zoom: If available, use the zoom ring on the lens to adjust the image size without moving the projector.
5.3 Funcionalidade 3D
The Vivitek D511 is 3D-ready. To experience 3D content, you will need compatible 3D source material, a 3D-capable player, and active shutter 3D glasses (sold separately). Refer to your 3D source device's manual for specific setup instructions. The projector will automatically detect and display 3D signals when properly configured.
6. Mantemento
6.1 Lamp Substitución
O proxector lamp has an operating life of approximately 4000 hours. When the lamp chega ao final da súa vida, a LAMP indicator light may illuminate, or the image brightness may significantly decrease. Refer to the caution label on the bottom of the projector (Image 3.5) before attempting replacement.
- Enfriamento: Ensure the projector has been powered off and allowed to cool for at least 20 minutes before proceeding. The lamp operates at high temperatures.
- Desconectar a enerxía: Desenchufe o cable de alimentación do proxector.
- Panel de acceso: Localiza o lamp access panel on the bottom of the projector. Unscrew the retaining screw(s) and carefully remove the cover.
- Eliminar a antiga Lamp: Unscrew the screws holding the lamp module in place. Carefully pull the lamp module out by its handle.
- Instalar novo Lamp: Insira a nova lamp module, ensuring it is seated correctly. Secure it with the screws.
- Pechar o panel: Substitúe o lamp access cover and secure it with its screw(s).
- Restablecer Lamp Temporizador: Despois de substituír o lamp, you must reset the lamp timer in the projector's OSD menu to accurately track the new lamp's life.
6.2 Limpeza
- Proxector Casing: Use a soft, lint-free cloth to wipe the exterior of the projector. For stubborn marks, slightly dampEnxágüe o pano con auga. Evite produtos químicos agresivos.
- Lente do proxector: Gently clean the lens with a lens cleaning cloth or a soft, dry, lint-free cloth specifically designed for optical surfaces. Do not use abrasive materials or excessive force.
- Reixas de ventilación: Periodically check the ventilation grilles for dust accumulation. Use a soft brush or compressed air to clear any blockages.
7 Solución de problemas
| Problema | Causa posible | Solución |
|---|---|---|
| Non hai imaxe na pantalla |
|
|
| A imaxe está borrosa |
|
|
| A imaxe é trapezoidal |
|
|
| Projector overheats / TEMP indicator on |
|
|
| Sen audio |
|
|
8. Especificacións
| Característica | Detalle |
|---|---|
| Marca | Vivitek |
| Número de modelo | D511 |
| Tipo de visualización | DLP |
| Resolución nativa | 1024 x 768 (XGA) |
| Resolución máxima de visualización | 1600 x 1200 |
| Brillo | 2600 lúmenes |
| Relación de contraste | 3000:1 |
| Característica especial | Listo para 3D |
| Tecnoloxía de conectividade | HDMI, VGA, Composite Video, S-Video, RS-232 |
| Lamp Wattage | 180 vatios |
| Vida de funcionamento da fonte de luz | 4000 horas |
| Factor de forma | Portátil |
| Tipo de montaxe | Soporte de mesa |
| Peso do elemento | 4.2 libras |
| Cor | Branco |
| Método de control | Remote Control, On-device buttons |
| Picture Quality Enhancement | BrilliantColor |
9. Garantía e soporte
For warranty information, technical support, or service inquiries, please contact Vivitek customer support. Details regarding your product's specific warranty period and terms can typically be found on the Vivitek official website or included in your product packaging. Please have your model number (D511) and serial number ready when contacting support.