Casio PQ-11D-8RDF
Casio Digital Traveler's Alarm Clock
Model: PQ-11D-8RDF
Introdución
This manual provides detailed instructions for the proper use and maintenance of your Casio Digital Traveler's Alarm Clock, model PQ-11D-8RDF. Please read this manual thoroughly before using the clock to ensure optimal performance and longevity.
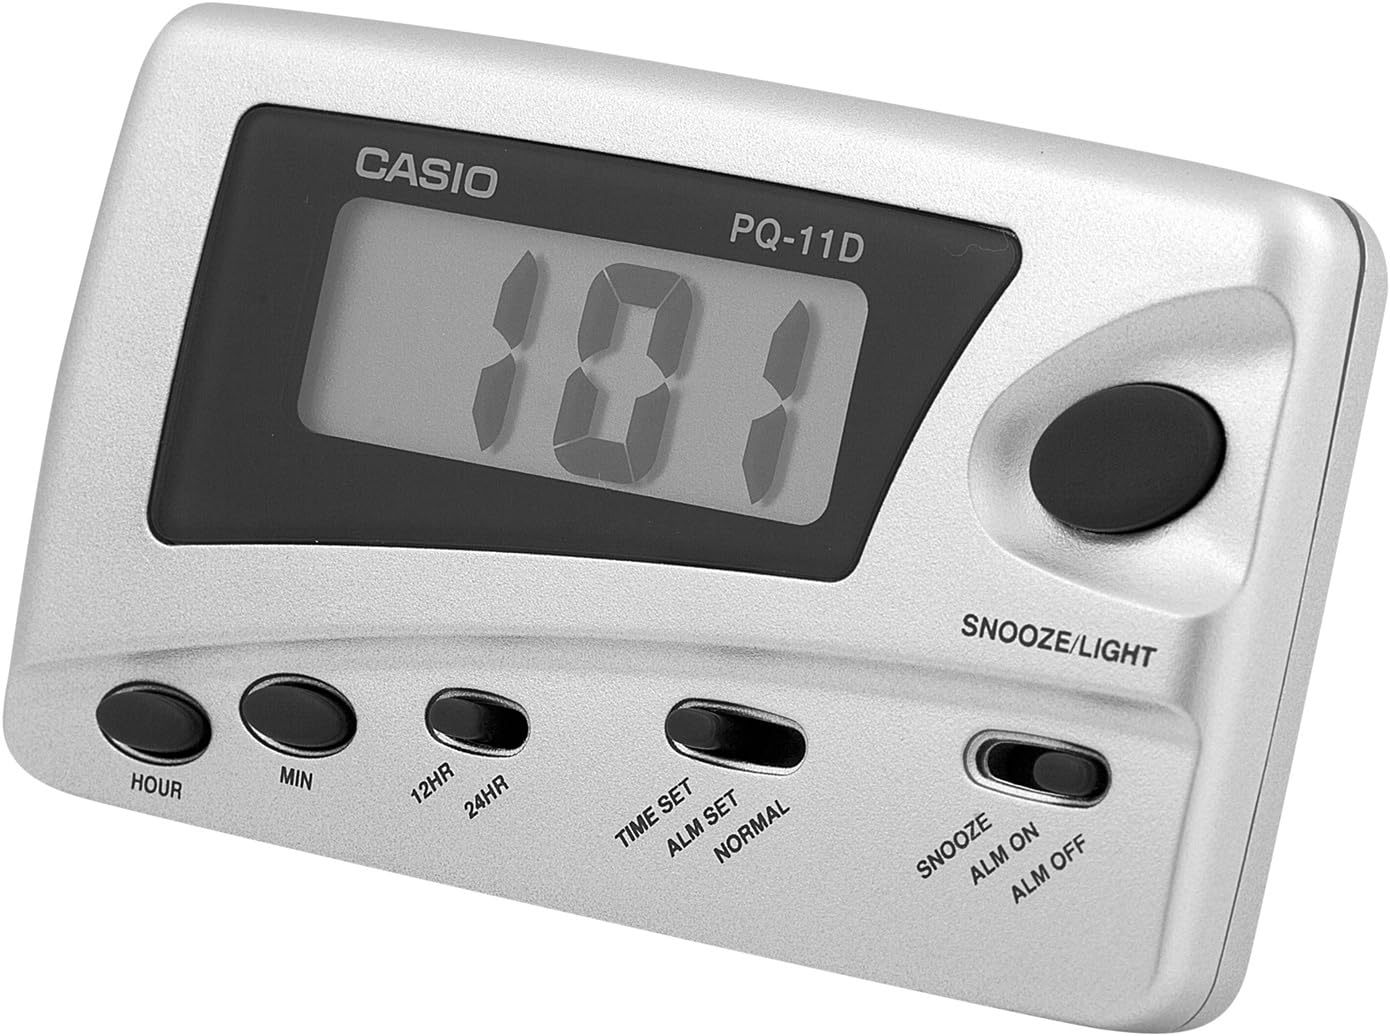
Imaxe: Fronte view of the Casio Digital Traveler's Alarm Clock. The clock features a digital display, a large snooze/light button on the top right, and smaller buttons for Hour, Min, 12HR/24HR, Time Set/Alarm Set/Normal switch, and Snooze/Alarm On/Alarm Off switch along the bottom.
Configuración
1. Instalación da batería
The clock operates on batteries. While a battery is typically included, you may need to remove a protective tab or replace it. The battery compartment is located on the back of the unit.
- Abra a tapa do compartimento das pilas na parte traseira do reloxo.
- Insert the required batteries (e.g., AAA, specific button cell) ensuring correct polarity (+/-). Refer to the markings inside the compartment.
- Pecha a tapa do compartimento da batería de forma segura.

Imaxe: Traseira view of the Casio Digital Traveler's Alarm Clock. The image shows the battery compartment cover on the right side and a foldable kickstand in the center, allowing the clock to stand upright.
2. Axuste da hora inicial
- Localiza o TIME SET / ALM SET / NORMAL slide switch on the front of the clock.
- Deslice o interruptor cara a HORARIO position. The hour digits will begin to flash.
- Preme o HORA button repeatedly to set the correct hour. Pay attention to AM/PM indicators if present.
- Preme o MIN botón repetidamente para axustar os minutos correctos.
- Once the time is set, slide the switch back to the NORMAL posición.
3. 12/24 Hour Format Selection
To switch between 12-hour and 24-hour (military) time format:
- In NORMAL time display mode, press the 12H/24H botón.
- The display will toggle between the 12-hour format (with AM/PM indicator) and the 24-hour format.
Instrucións de funcionamento
1. Axustar a hora da alarma
- Localiza o TIME SET / ALM SET / NORMAL interruptor deslizante.
- Deslice o interruptor cara a ALM CONFIGURAR position. The alarm time will be displayed, and the hour digits will flash.
- Preme o HORA button repeatedly to set the desired alarm hour.
- Preme o MIN button repeatedly to set the desired alarm minute.
- Once the alarm time is set, slide the switch back to the NORMAL posición.
2. Activación/desactivación da alarma
The alarm can be turned on or off using the dedicated switch.

Imaxe: Primeiro plano view of the control panel, highlighting the Snooze/Light button and the slide switch for Snooze, Alarm On, and Alarm Off functions. This switch controls the alarm's activation and the snooze feature.
- Localiza o SNOOZE / ALM ON / ALM OFF interruptor deslizante.
- To activate the alarm, slide the switch to the ALM ACTIVADA position. An alarm indicator (e.g., bell icon) will appear on the display.
- To deactivate the alarm, slide the switch to the ALM DESACTIVADA position. The alarm indicator will disappear.
3. Función de repetición da alarma
When the alarm sounds, you can temporarily stop it using the snooze function.
- When the alarm is sounding, press the large SNOOZE / LUZ botón.
- The alarm will stop and sound again after approximately 5 minutes.
- To fully stop the alarm, slide the SNOOZE / ALM ON / ALM OFF cambiar ao ALM DESACTIVADA posición.
4. Retroiluminación LED
The clock features an LED backlight for viewing the display in low light conditions.
- Preme o grande SNOOZE / LUZ button to illuminate the display.
- The backlight will remain on for a few seconds and then automatically turn off.
Mantemento
1. Substitución da batería
When the display becomes dim or the alarm sound weakens, it is time to replace the batteries. Follow the battery installation steps in the Setup section.
- Always use the specified battery type.
- Non mesture pilas antigas e novas, nin tipos diferentes de pilas.
- Retire as pilas se non vai usar o reloxo durante un período prolongado para evitar fugas.
- Elimina as baterías usadas de forma responsable segundo a normativa local.
2. Limpeza
To clean the clock, wipe it with a soft, dry cloth. Do not use abrasive cleaners, solvents, or chemical sprays, as these can damage the casing ou pantalla.
3. Almacenamento
Store the clock in a cool, dry place away from direct sunlight and extreme temperatures when not in use.
Resolución de problemas
| Problema | Causa posible | Solución |
|---|---|---|
| A pantalla está escura ou en branco. | Pilas baixas ou agotadas. | Replace batteries with new ones. Ensure correct polarity. |
| Non soa a alarma. | Alarm is not activated (ALM OFF). Alarm time is incorrectly set. | Desliza o SNOOZE / ALM ON / ALM OFF cambiar a ALM ACTIVADA. Comprobe que a hora da alarma estea configurada correctamente. |
| Display flickers or buttons are unresponsive during setting. | Slide switch (TIME SET/ALM SET/NORMAL) not fully engaged. Problema de conexión interna. | Ensure the slide switch is firmly in the desired position. Try removing and reinserting batteries. If problem persists, contact support. |
| Snooze function does not work. | Alarm is not active or switch is in ALM OFF position. | Ensure the alarm is set and active (ALM ON). Press the SNOOZE/LIGHT button only when the alarm is sounding. |
Especificacións
- Marca: Casio
- Número de modelo: PQ-11D-8RDF
- Dimensións do produto: 2.17 x 0.59 x 3.54 polgadas
- Peso do artigo: 1.94 onzas
- Características: LED Back Light, 12/24 Hour Format, Snooze Function (Beep Sound)
- Fonte de enerxía: Battery (type not specified in input, but implied by "BATTERY INCLUDED")
Garantía e Soporte
Para obter información sobre a garantía ou asistencia técnica, consulte a tarxeta de garantía incluída co produto ou visite o sitio web oficial de Casio. website. You may also contact Casio customer service directly for assistance with product inquiries or troubleshooting beyond this manual.
Casio Oficial Websitio: www.casio.com