
PeakTech P 3131
PeakTech True RMS P 3131 Clamp Manual do usuario do multímetro con medidor
Model: P 3131 | Brand: PeakTech
1. Introdución
This manual provides comprehensive instructions for the safe and effective use of the PeakTech True RMS P 3131 Clamp Meter with Multimeter. This device is designed for measuring AC/DC currents without circuit interruption, as well as AC/DC voltage and resistance, with continuity testing capabilities. It features a 3 3/4 digit LCD display with True RMS measurement for accurate readings.
Lea este manual detidamente antes de operar o dispositivo e gárdeo para futuras consultas.
2. Información de seguridade
WARNING: Improper use of this meter can cause damage, shock, injury, or death. Always follow all safety precautions.
- Cumpre sempre os códigos de seguridade locais e nacionais.
- Do not use the meter if it appears damaged or if the insulation on test leads is compromised.
- Asegúrese de que o medidor estea axustado na función e no rango correctos antes de realizar medicións.
- Avoid contact with live circuits. Use appropriate personal protective equipment (PPE).
- The device is rated for CAT II 600V. Do not exceed these limits.
- Substitúa as pilas canto antes apareza o indicador de pila baixa.
- Do not operate the meter in explosive atmospheres.
3. Produto rematadoview e Compoñentes
The PeakTech P 3131 is a robust and reliable clamp meter. Familiarize yourself with its main components:

Figura 1: Fronte view of the PeakTech P 3131 Clamp Medidor, mostrando o clamp jaw, function selector, LCD display, and input terminals.
- Clamp Mandíbula: Para medición de corrente CA/CC sen contacto.
- Selector de funcións: To select measurement modes (A~, A=, V~, V=, Ω/Continuity, OFF).
- Pantalla LCD: Mostra lecturas de medición, unidades e indicadores.
- Botóns: AC/DC, ZERO, H/MAX (Data Hold/Max Hold).
- Terminais de entrada: COM (common) and VΩ (voltage/resistance) for test leads.
- Guardamanos: Provides protection against accidental contact.
4. Configuración
4.1 Instalación da batería
The PeakTech P 3131 requires two 1.5V AAA batteries (included). To install or replace batteries:
- Asegúrese de que o dispositivo estea apagado.
- Localice a tapa do compartimento das baterías na parte traseira do medidor.
- Use un desaparafusador para abrir o compartimento.
- Insert the two AAA batteries, observing correct polarity (+ and -).
- Coloque a tapa do compartimento da batería e fíxaa co parafuso.
When the low battery indicator appears on the display, replace the batteries immediately to ensure accurate measurements.
4.2 Conexión dos cables de proba
Para o voltage, resistance, and continuity measurements, connect the supplied test leads:
- Insira o cable de proba negro no COM (common) input terminal.
- Insira o cable de proba vermello no VΩ terminal de entrada.

Figure 2: PeakTech P 3131 Clamp Meter shown with its carrying case, test leads, batteries, and user manual.
5. Instrucións de funcionamento
5.1 Encendido/apagado
Rotate the function selector dial from the "OFF" position to any desired measurement function to power on the meter. To power off, rotate the dial back to "OFF". The meter features an automatic power-off function (can be deactivated) to conserve battery life.
5.2 Medición de corrente CA/CC (Clamp)
To measure current without breaking the circuit:
- Xire o dial selector de funcións ata a posición A~ (corrente alterna) ou A= Posición (corrente continua).
- Preme o AC/DC button if you need to switch between AC and DC current modes (if the dial position combines them).
- Preme o CERO button to zero the display before measuring DC current, especially for small currents, to compensate for residual magnetism.
- Abre o clamp mandíbula premendo o gatillo.
- Enclose only un conductor with the clamp mandíbula. Asegúrate de que a mandíbula estea completamente pechada.
- Le o valor actual na pantalla LCD.
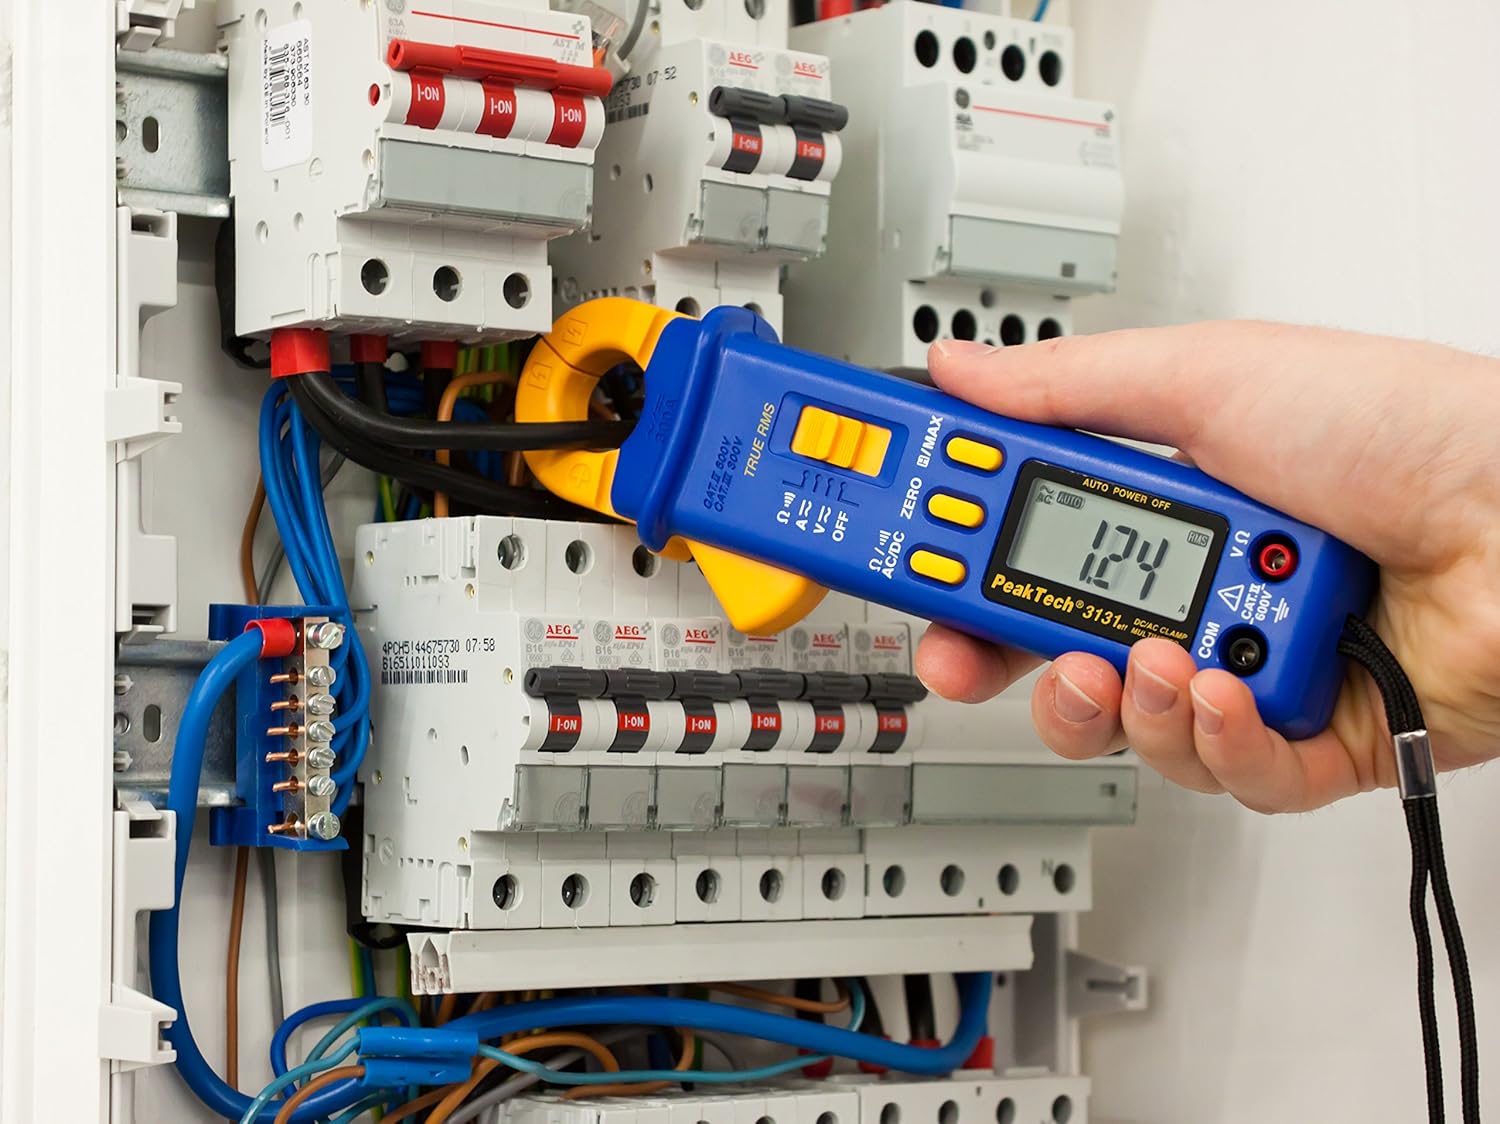
Figure 3: The PeakTech P 3131 Clamp Meter in use, measuring current on a single conductor within an electrical panel.
5.3 AC/DC Voltage Medición
Para medir voltage:
- Conecte os cables de proba como se describe na Sección 4.2.
- Xire o dial selector de funcións ata a posición V~ (Volumen da CA)tage) ou V= (DC Voltage) posición.
- Conecte as sondas de proba en paralelo ao circuíto ou compoñente que desexe medir.
- Le o voltago valor da pantalla LCD.
5.4 Medición de resistencia e continuidade
To measure resistance or check for continuity:
- Conecte os cables de proba como se describe na Sección 4.2.
- Xire o dial selector de funcións ata a posición Ω/))) (Resistance/Continuity) position.
- For resistance: Connect the test probes across the component. Ensure the circuit is de-energized.
- For continuity: Touch the test probes to the two points you want to check. A continuous beep indicates a low-resistance path (continuity).
- Lea o valor da resistencia na pantalla LCD.
5.5 Funcións especiais
- RMS verdadeiro: The meter measures True Root Mean Square values for AC voltage and current, providing accurate readings for non-sinusoidal waveforms.
- Retención de datos (H): Preme o H/MAX button briefly to freeze the current reading on the display. Press again to release.
- Maximum Value Hold (MAX): Manteña premido o H/MAX button to capture and display the maximum measured value. Press again to exit.
- Función CERO: Used to zero the display for DC current measurements to eliminate offset errors.
- Rango automático: The meter automatically selects the appropriate measurement range.
- Apagado automático: The meter automatically turns off after a period of inactivity to save battery. This feature can typically be disabled by holding a specific button during power-on (refer to the device's on-screen indicators or a more detailed manual if available).
6. Mantemento
6.1 Limpeza
Limpar a carcasa do medidor con publicidadeamp un pano e un deterxente suave. Non empregue abrasivos nin solventes. Asegúrese de que o medidor estea completamente seco antes de usalo.
6.2 Substitución da batería
Refer to Section 4.1 for instructions on battery replacement. Always use two fresh 1.5V AAA batteries. Remove batteries if the meter is not used for an extended period to prevent leakage.
6.3 Almacenamento
Store the meter in a cool, dry place, away from direct sunlight and extreme temperatures. Use the provided carrying case for protection.
7 Solución de problemas
| Problema | Causa posible | Solución |
|---|---|---|
| O medidor non se acende. | Baterías gastadas ou instaladas incorrectamente. | Comprobe a polaridade das baterías; substitúa as baterías. |
| "OL" or "OVER" displayed. | A medición supera o rango seleccionado ou a capacidade máxima do medidor. | Select a higher range (if manual ranging) or ensure measurement is within meter's limits. |
| Inaccurate DC current reading. | Residual magnetism in clamp mandíbula. | Preme o CERO button before measurement. |
| Sen pitido de continuidade. | Circuíto aberto ou alta resistencia. | Check connections; ensure circuit is complete. |
If problems persist, contact PeakTech customer support or a qualified service technician.
8. Especificacións técnicas
| Parámetro | Especificación |
|---|---|
| Mostrar | 3 3/4 digit LCD, max. 3999 counts |
| DC Voltage (DCV) | 0.1 mV to 600 V (Accuracy: 0.5% + 2 digits) |
| Vol. ACtage (ACV) | 1 mV to 600 V (Accuracy: 1.5% + 5 digits) |
| Corrente DC (DCA) | 10 mA to 300 A (Accuracy: 1% + 2 digits) |
| Corrente AC (ACA) | 10 mA to 300 A (Accuracy: 1% + 3 digits) |
| Resistencia (Ω) | 0.1 Ω to 40 MΩ (Accuracy: 0.9% + 2 digits) |
| Proba de continuidade | Función de zumbador |
| RMS verdadeiro | Yes, for AC measurements |
| Apertura da mandíbula | 22 mm max. conductor diameter |
| Valoración de seguridade | EN 61010-1, CAT II 600 V |
| Fonte de alimentación | 2 pilas AAA de 1.5 V |
| Dimensións (L x W x H) | 192 x 66 x 27 mm (aprox. 7.56 x 2.6 x 1.06 polgadas) |
| Peso | 205 g (aprox. 0.45 libras) |
9. Garantía e soporte
PeakTech products are manufactured under strict quality control. This product is covered by a standard manufacturer's warranty against defects in materials and workmanship. Please refer to the warranty card included with your product or visit the official PeakTech websitio web para obter información detallada sobre os termos e condicións da garantía.
For technical support, service, or calibration inquiries, please contact your local PeakTech distributor or the PeakTech customer service department. Contact information can typically be found on the PeakTech websitio ou na embalaxe do produto.
Ask a question about this manual
Ask about setup, troubleshooting, compatibility, parts, safety, or missing instructions. Manuals+ will review the question and use this page’s manual context to help answer it.