
1. Introdución
Grazas pola compraasing the Gemini PS3-USB 3 Channel 10-Inch Mixer. This manual provides essential information for the proper setup, operation, and maintenance of your mixer. Please read this manual thoroughly before use to ensure optimal performance and to prevent damage.
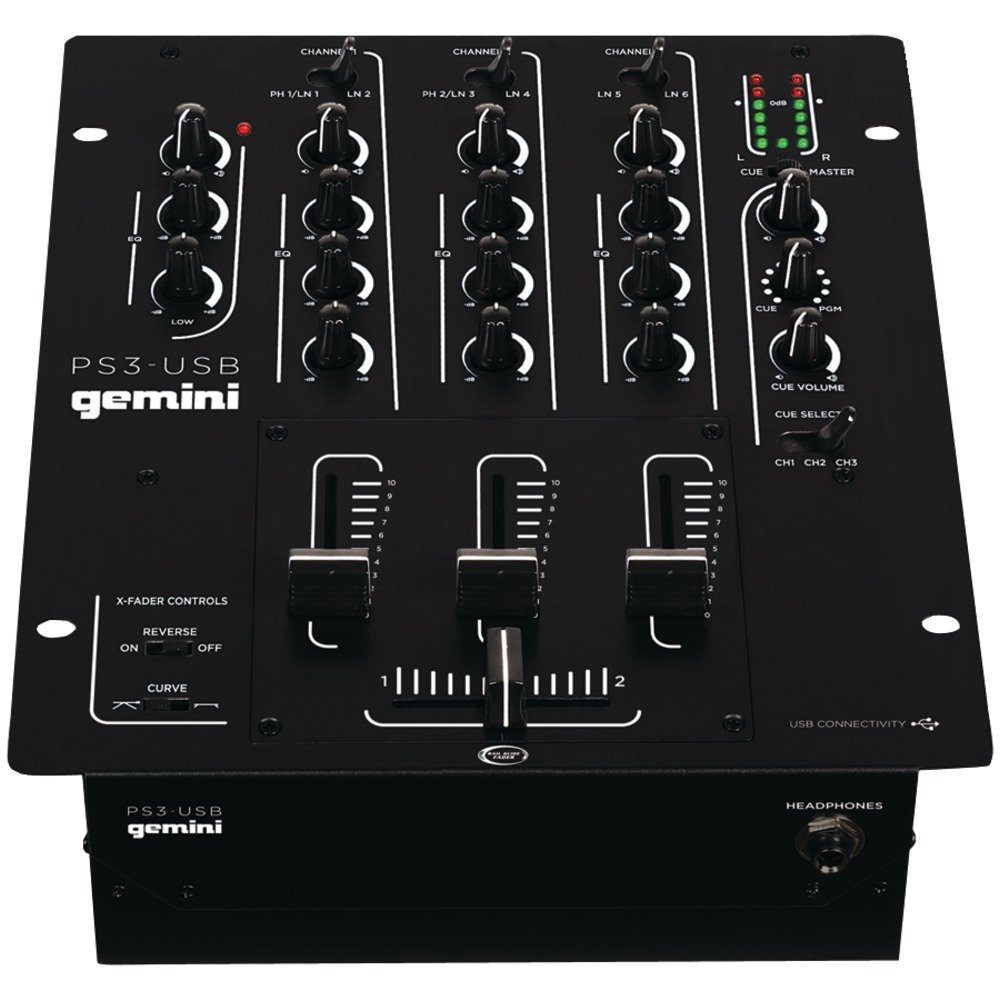
Figura 1: Fronte view of the Gemini PS3-USB Mixer, showing controls and inputs.
2. Instrucións de seguridade
- Fonte de enerxía: Conecte a unidade só á fonte de alimentación especificada.
- Ventilación: Asegúrese de que haxa unha ventilación axeitada. Non bloquee as aberturas de ventilación.
- Auga e humidade: Non expoña a unidade á choiva nin á humidade. Non coloque obxectos cheos de líquidos enriba da unidade.
- Calor: Manteña a unidade lonxe de fontes de calor como radiadores, rexistros de calor, estufas ou outros aparellos (incluídos amplificadores) que producen calor.
- Limpeza: Limpar só cun pano seco.
- Servizo: Encomende calquera tarefa de mantemento a persoal de servizo cualificado. Non intente reparar este produto vostede mesmo.
3. Configuración
3.1 Desembalaxe
Carefully unpack the mixer and check for any signs of damage. Retain the packaging materials for future transport or storage.
3.2 Conexión de enerxía
Conecta o adaptador de corrente fornecido á entrada de alimentación da batedora e despois a unha toma de corrente axeitada.
3.3 Conexións de audio
The PS3-USB features 5-line, 3-channel inputs with 2 convertible Phono/Line RCA inputs.
- Entradas de phono/liña: Connect turntables or line-level devices (CD players, media players) to the RCA inputs. Use the Phono/Line switch to select the appropriate input type for each channel.
- Saída principal: Connect the Master RCA outputs to your amplifier ou altofalantes alimentados.
- Saída de rexistro: Connect the Record RCA outputs to a recording device if you wish to record your mix.
- Auriculares: Plug your 1/4" (6.3mm) headphones into the front panel headphone connector.
3.4 Conexión USB
Connect the mixer to your Mac or PC using a standard USB cable. This allows for simultaneous playback and recording through your computer's media player software.
4. Instrucións de funcionamento
4.1 Controls and Functions Overview
Familiarize yourself with the mixer's layout:
- Channel Gain Control: Axusta o nivel de entrada para cada canal.
- 3-Band Rotary EQ: Provides control over High, Mid, and Low frequencies for each channel.
- Faders de canles: Control the volume of each individual channel.
- Crossfader: A user-replaceable Rail Glide crossfader with curve and reverse controls for blending between channels.
- Volume principal: Controla o nivel de saída xeral do mesturador.
- Medidores VU: Visual indicators for master or cue levels.
- Sección de sinalización: Includes rotary cue volume, CUE/PGM controls, and a split cue switch for headphone monitoring.
- Sección de micrófonos: Features a rotary microphone volume control and a 2-band EQ for microphone input.
4.2 Basic Mixing
- Connect your audio sources to the appropriate Phono/Line inputs.
- Set the Phono/Line switch for each channel to match your source.
- Adjust the Gain control for each active channel to achieve a healthy input level without clipping (distortion).
- Use the channel faders to bring up the volume of your desired audio sources.
- Utilize the 3-band EQ to shape the sound of each channel.
- Use the crossfader to smoothly transition between channels.
- Monitor your mix using headphones via the Cue section and adjust the Master Volume for the main output.
4.3 Reprodución e gravación por USB
Once connected via USB, your computer should recognize the PS3-USB as an audio device.
- Reprodución: Select the PS3-USB as the output device in your computer's sound settings or media player software to route audio through the mixer.
- Gravación: Select the PS3-USB as the input device in your recording software. The mixer's master output will be sent to your computer for recording.
5. Mantemento
- Limpeza: Use a soft, dry cloth to clean the exterior of the mixer. Do not use liquid cleaners or solvents.
- Crossfader Replacement: The Rail Glide crossfader is user-replaceable. Refer to the Gemini website or authorized service centers for replacement parts and instructions if needed.
- Almacenamento: When not in use for extended periods, store the mixer in a cool, dry place, preferably in its original packaging.
6 Solución de problemas
| Problema | Causa posible | Solución |
|---|---|---|
| No sound output from master. | Master volume too low; incorrect input selection; amplifier/speaker issues. | Increase Master Volume. Check Phono/Line switches. Verify ampconexións do amplificador/altofalante e alimentación. |
| Non se escoita son dunha canle específica. | Channel fader down; Gain too low; incorrect Phono/Line selection; source device off/muted. | Raise channel fader. Adjust Gain. Correct Phono/Line switch. Check source device. |
| Audio distorsionado. | Input Gain too high; Master Volume too high; faulty cable. | Reduce channel Gain. Reduce Master Volume. Replace cables. |
| USB recording/playback not working. | Incorrect USB connection; computer audio settings incorrect; driver issues. | Ensure USB cable is securely connected. Select PS3-USB as audio device in computer settings. Restart computer. |
7. Especificacións
- Modelo: PS3USB
- Canles: 3
- Entradas: 5-Line, 2 Convertible Phono/Line RCA, USB
- Saídas: Master RCA, Record RCA, 1/4" (6.3mm) Headphone
- EQ: 3-Band Rotary EQ per channel, 2-Band EQ for Microphone
- Crossfader: User-replaceable Rail Glide with Curve and Reverse controls
- Conectividade: USB for Mac/PC Playback & Recording
- Dimensions (Approximate Shipping): 12.00 polgadas x 10.00 polgadas x 3.25 polgadas
- Weight (Approximate Shipping): 6.2 libras (2.8 kg)
- UPC: 747705208149
8. Garantía e soporte
This Gemini product is covered by a Garantía de 90 días from the date of purchase. This warranty covers manufacturing defects and workmanship under normal use. It does not cover damage caused by misuse, accident, modification, or unauthorized repair.
For technical support, service inquiries, or warranty claims, please contact your authorized Gemini dealer or visit the official Gemini websitio para información de contacto.
Garde o comprobante de compra para validar a garantía.