1. Información de seguridade
Welding and cutting activities can be hazardous. Always follow proper safety precautions to prevent injury. This helmet provides eye and face protection during welding and cutting operations. It is crucial to use additional personal protective equipment (PPE) as recommended for your specific task.

Figura 1: Essential Personal Protective Equipment for Welding and Cutting. This infographic illustrates the importance of wearing safety glasses, welding gloves, a welding jacket, appropriate pants, safety boots, and ear protection in addition to the welding helmet.
Pautas xerais de seguridade:
- Protección ocular: Always wear approved safety glasses (ANSI Z87.1 compliant) under your welding helmet. The auto-darkening lens protects against arc flash, but safety glasses provide impact protection.
- Protección da cabeza: If required, wear a cap or other head covering to protect your head and neck from sparks and heat.
- Protección das mans: Use welding gloves to protect hands from heat, sparks, and electrical shock.
- Protección corporal: Wear a flame-resistant welding jacket, long-sleeved shirts, and pants without cuffs to prevent sparks from entering.
- Protección dos pés: Wear steel-toe boots or other protective footwear.
- Protección auditiva: Use earplugs or earmuffs to protect against loud noise.
- Ventilación: Ensure adequate ventilation to avoid inhaling hazardous fumes.
- Inspeccionar equipos: Before each use, inspect the helmet for damage, cracks, or loose parts. Replace any damaged components immediately.
2. Configuración e axuste
Proper setup ensures comfort and maximum protection. Follow these steps to prepare your welding helmet for use.
2.1 Axuste do arnés da cabeza
Adjust the headgear to fit snugly and comfortably on your head. The helmet should stay in the raised position when not welding and easily drop into the working position with a nod of your head.
- Axuste de tamaño: Rotate the knob at the back of the headgear to adjust the circumference for a secure fit.
- Axuste da correa superior: Axuste a correa superior para colocar o casco correctamente na cabeza, asegurándose de que viewA zona de atención está á altura dos ollos.
- Axuste de distancia: Adjust the distance between the helmet shell and your face using the side knobs. This prevents the helmet from hitting your nose or chin when lowered.
- Axuste de inclinación: Some headgears allow for tilt adjustment. Set it to your preferred angle for optimal viewing e confort.
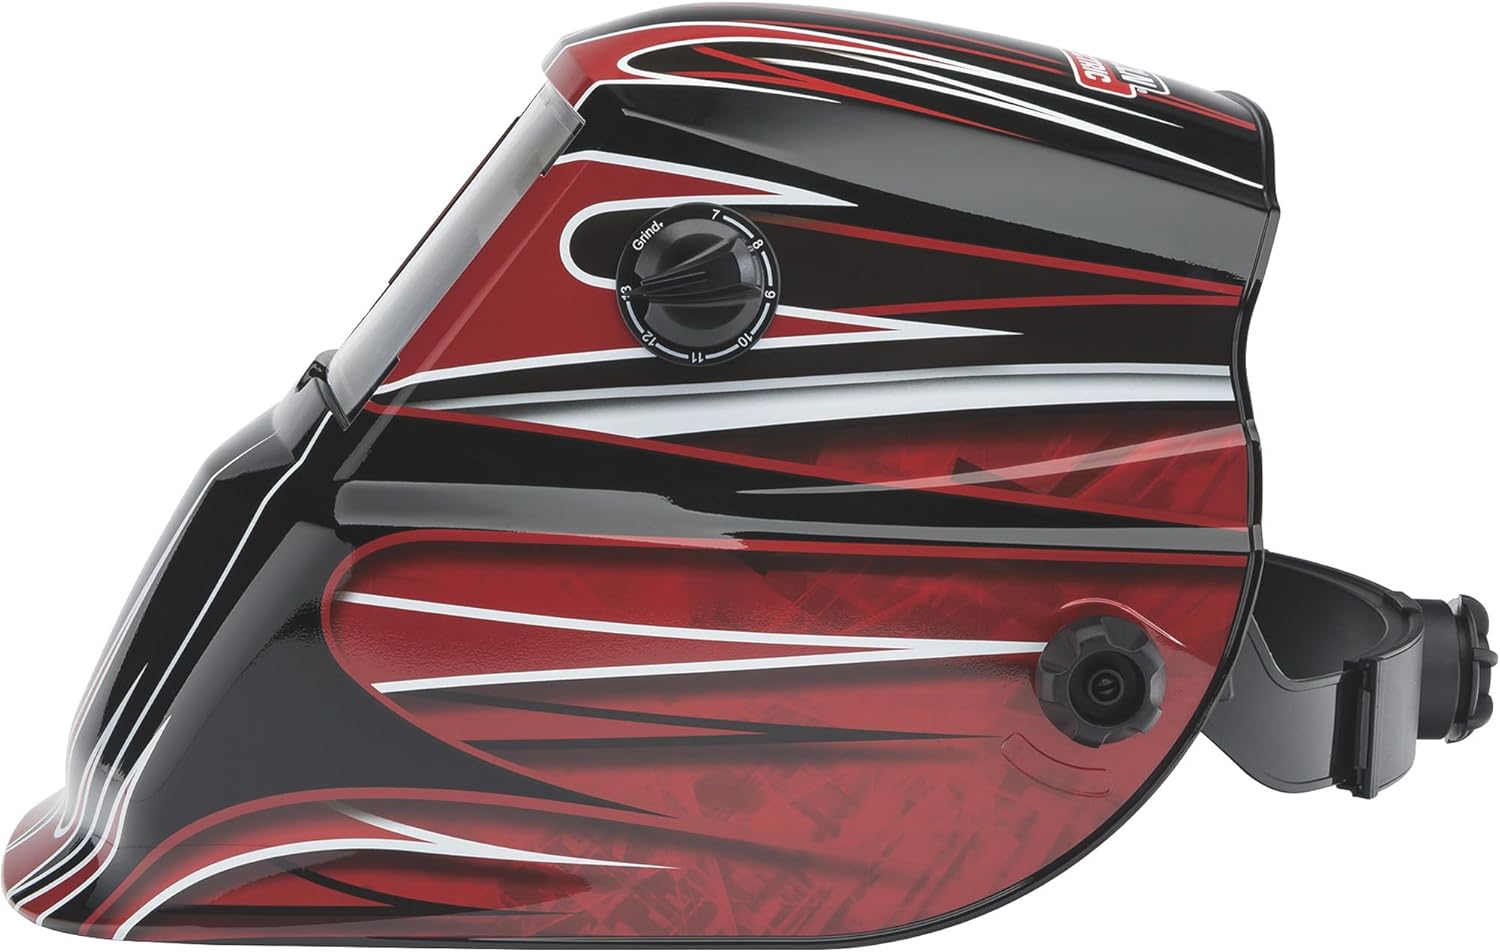
Figura 2: Lado view of the helmet, illustrating the headgear adjustment knob on the side for proper fit and balance.
2.2 Auto-Darkening Lens (ADF) Installation/Check
The auto-darkening filter (ADF) is pre-installed. Ensure it is clean and free from damage. This model does not require user-replaceable batteries for the ADF, as it is solar-powered.

Figura 3: Interno view of the Auto-Darkening Filter (ADF) module, showing controls for sensitivity and delay, along with a test button and low battery indicator. This unit is solar-powered and does not require battery replacement.
3. Funcionamento
This section details how to operate your auto-darkening welding helmet effectively and safely.
3.1 Acendido/Apagado
The auto-darkening filter (ADF) is solar-powered and automatically activates when exposed to light. There is no manual on/off switch. Ensure the solar cells on the front of the helmet are not obstructed.
3.2 Shade Adjustment (Variable Shade 7-13)
The helmet features a variable shade range from 7 to 13, allowing you to select the appropriate shade level for different welding processes and amperages. The shade level is adjusted via an external knob.
- Locate the external knob on the side of the helmet.
- Rotate the knob to select the desired shade number (7-13). Refer to welding safety standards for recommended shade levels for your specific application.

Figura 4: External control knob for selecting variable shade levels (7-13) and activating grind mode.
3.3 Modo de moenda
The helmet includes a grind mode feature, which locks the ADF in a light state (typically shade 3 or 4) for grinding operations. This prevents the lens from darkening, allowing clear vision without removing the helmet, while still providing impact protection.
- Rotate the external knob to the "Grind" position.
- Ensure the lens remains in the light state before beginning grinding.
- Remember to switch back to a welding shade before resuming welding operations.
3.4 Axuste da sensibilidade
The sensitivity control adjusts how much light is required to trigger the auto-darkening function. This is useful for different ambient light conditions and welding processes.
- Locate the sensitivity knob on the internal ADF module (refer to Figure 3).
- Turn the knob towards 'H' (High) for lower amperage welding or when working in low ambient light.
- Turn the knob towards 'L' (Low) for high amperage welding or when working in bright ambient light to prevent false triggering.
3.5 Axuste do retardo
The delay control determines how long the lens stays dark after the welding arc extinguishes. This prevents eye fatigue from residual glow and protects against bright flashes from adjacent welding operations.
- Locate the delay knob on the internal ADF module (refer to Figure 3).
- Set a shorter delay for tack welding or when moving quickly between welds.
- Set a longer delay for high amperage welding or when the weld puddle remains bright for an extended period.
3.6 Función de proba
The ADF module includes a test button to verify the auto-darkening function before welding. Pressing this button should momentarily darken the lens to the selected shade level.
- Press the "TEST" button on the internal ADF module (refer to Figure 3).
- The lens should darken and then return to its light state. If it does not, refer to the Troubleshooting section.

Figura 5: The Lincoln Electric Auto-Darkening Welding Helmet K3063-1 in use during a welding application, demonstrating proper eye and face protection.
4. Mantemento
Un mantemento regular garante a lonxevidade e o correcto funcionamento do seu casco de soldadura.
4.1 Cleaning the Helmet
- Carcasa do casco: Clean the helmet shell with a mild soap and water solution. Avoid harsh solvents or abrasive cleaners.
- Outer Cover Lens: Wipe the outer cover lens with a soft, clean cloth. If heavily scratched or pitted, replace it immediately.
- Inner Cover Lens: Clean the inner cover lens with a soft, clean cloth. Replace if scratched or damaged.
- Filtro de escurecemento automático (ADF): Gently wipe the ADF surface with a soft, dry cloth. Do not use cleaning solutions on the ADF itself. Ensure the solar cells are clean and unobstructed.
4.2 Replacing Cover Lenses
Cover lenses protect the ADF from sparks and spatter. Replace them regularly when they become scratched, pitted, or dirty to maintain clear vision.
- Carefully remove the retaining frame or clips holding the cover lens in place.
- Remove the old cover lens.
- Insert a new, clean cover lens, ensuring it is properly seated.
- Reinstall the retaining frame or clips securely.
4.3 Almacenamento
Store the helmet in a clean, dry place away from direct sunlight, extreme temperatures, and corrosive materials. Protect the ADF from impact and scratches.
5 Solución de problemas
Se tes problemas co teu casco de soldadura, consulta os seguintes problemas e solucións comúns.
| Problema | Causa posible | Solución |
|---|---|---|
| A lente non se escurece cando se acende o arco. |
|
|
| Lens flickers or darkens intermittently. |
|
|
| Mala visibilidade a través da lente. |
|
|
| Helmet is uncomfortable or unstable. |
|
|
6. Especificacións
Key technical specifications for the Lincoln Electric Auto-Darkening Welding Helmet K3063-1.
- Modelo: K3063-1
- Marca: Lincoln Electric
- Viewárea de ingreso: 1.73 x 3.82 polgadas
- Variable Shade Range: 7-13
- Estado de luz: (Typically Shade 3 or 4 in Grind Mode)
- Fonte de enerxía: Solar-powered (no user-replaceable batteries required)
- Material: Policarbonato (PC)
- Peso do artigo: Approximately 0.01 Ounces (Note: This weight appears to be a data entry error. Actual helmet weight is typically much higher.)
- Dimensións do produto: Aproximadamente 10 x 10 x 10 polgadas
- UPC: 015082913339
- Características especiais: Lightweight, Grind Mode, Adjustable Sensitivity, Adjustable Delay
7. Información da garantía
According to the product information, this item comes with Sen garantía. Please refer to your point of purchase for their return or exchange policies if applicable.
8. Atención ao cliente
For further assistance, technical questions, or to inquire about replacement parts, please contact Lincoln Electric customer service. You can typically find contact information on the official Lincoln Electric websitio web ou a través do vendedor do produto.
Recursos en liña: Visit the official Lincoln Electric website for product manuals, FAQs, and support contact details.