
1. Introdución
This manual provides comprehensive instructions for the installation, operation, and maintenance of your Defiant Hartford Aged Bronze Privacy Knob. Please read these instructions carefully before beginning installation to ensure proper function and longevity of your product. This privacy knob is designed for use on interior doors where a locking function is desired, such as bedrooms or bathrooms.
2. Información de seguridade
- Use sempre o equipo de protección individual axeitado, como lentes de seguridade, durante a instalación.
- Use the correct tools for the job. Refer to the 'Tools Required' section.
- Manteña as pezas pequenas lonxe dos nenos para evitar riscos de asfixia.
- Do not force components during installation. If parts do not fit, re-check the instructions.
- Ensure the door is properly supported if removed from its hinges during installation.
3. Contido do paquete
Verify that all components are present before beginning installation. If any parts are missing or damaged, do not proceed with installation and contact Defiant customer support.
- Exterior Knob Assembly
- Interior Knob Assembly
- Mecanismo de bloqueo
- Placa de folga
- Parafusos de montaxe
- Privacy Pin/Emergency Key
4. Configuración (Instalación)
Follow these steps for a successful installation of your Defiant Hartford Aged Bronze Privacy Knob.
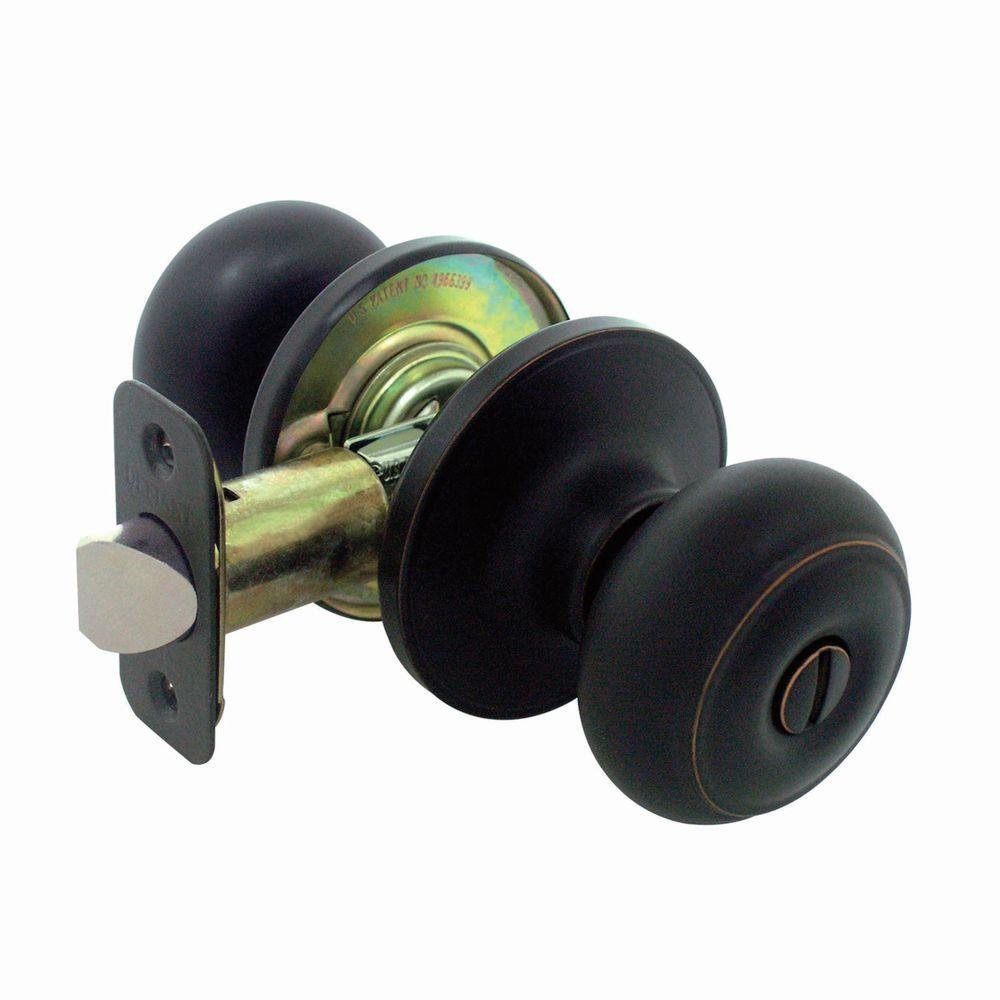
Figure 1: All components of the Defiant Hartford Aged Bronze Privacy Knob.
4.1. Ferramentas necesarias
- Destornillador Phillips
- Cinta métrica
- Lapis
- Chisel (optional, for strike plate)
4.2. Prepara a Porta
- Ensure your door has standard bore holes (typically 2-1/8 inches diameter for the knob and 1 inch diameter for the latch).
- Measure the backset (distance from the door edge to the center of the knob hole). This knob is designed for standard 2-3/8 inch or 2-3/4 inch backsets. Adjust the latch mechanism if necessary.
4.3. Install the Latch Mechanism
- Insert the latch mechanism into the hole on the edge of the door, ensuring the bevel of the latch bolt faces the door frame.
- Secure the latch mechanism with the two small screws provided. Ensure it is flush with the door edge.
4.4. Install the Exterior Knob
- Insert the spindle (the square shaft) of the exterior knob assembly through the square hole in the latch mechanism.
- Ensure the exterior knob is oriented correctly (e.g., the privacy pin hole on the interior side of the knob is facing the correct direction for the interior knob).
4.5. Instalar o pomo interior
- Align the interior knob assembly with the exterior knob assembly, ensuring the posts from the exterior knob pass through the holes in the interior knob's mounting plate.
- Secure the interior knob assembly to the exterior knob assembly using the longer mounting screws. Tighten evenly until snug, but do not overtighten.
4.6. Instalar a placa de peche
- Close the door and mark the door frame where the latch bolt strikes.
- Chisel out a shallow recess in the door frame to allow the strike plate to sit flush.
- Secure the strike plate to the door frame with the remaining screws.
4.7. Proba de funcionamento
- Turn both knobs to ensure the latch retracts smoothly.
- Test the privacy locking function by pressing the button/pin on the interior knob. The exterior knob should lock.
- To unlock from the exterior, use the emergency key/pin provided to insert into the small hole on the exterior knob and push.
5. Operating the Privacy Knob
- Para bloquear: From the interior side, press the button or insert and turn the privacy pin on the center of the interior knob. This will prevent the exterior knob from turning.
- Para desbloquear: From the interior side, simply turn the interior knob. This will automatically release the lock.
- Emergency Unlock (from exterior): In case of emergency or accidental lockout, insert the provided emergency key/pin into the small hole on the center of the exterior knob and push firmly to disengage the lock.
6. Mantemento
Your Defiant Hartford Aged Bronze Privacy Knob requires minimal maintenance to ensure long-lasting performance.
- Limpeza: Clean the knob surfaces with a soft, damp pano. Evite produtos de limpeza abrasivos, solventes ou produtos químicos agresivos, xa que poden danar o acabado.
- Lubricación: If the latch mechanism becomes stiff over time, a small amount of silicone-based lubricant can be applied to the moving parts of the latch bolt. Do not use oil-based lubricants as they can attract dust and grime.
- Parafusos de apriete: Periodically check and tighten any loose mounting screws to ensure the knob remains securely attached to the door.
7 Solución de problemas
If you encounter issues with your privacy knob, refer to the following common problems and solutions:
| Problema | Causa posible | Solución |
|---|---|---|
| Knob is loose or wobbly. | Os parafusos de montaxe están soltos. | Tighten the mounting screws on the interior knob assembly. |
| O pestillo non se retrae con suavidade. | Dirt buildup or lack of lubrication. | Limpa o mecanismo do pestillo e aplica un lubricante a base de silicona. |
| A porta non se tranca nin pecha correctamente. | Strike plate misalignment or incorrect installation. | Adjust the strike plate position on the door frame. Ensure the latch bolt is fully extending. |
| O peche de privacidade non se activa/desactiva. | Internal mechanism misalignment or damage. | Re-check installation steps. If issue persists, contact customer support. |
8. Especificacións
| Característica | Detalle |
|---|---|
| Número de modelo | TGX710 |
| Material | Bronce |
| Cor/Acabado | Bronce envellecido |
| Tipo de bloqueo | Privacy (Push-button/Pin Lock) |
| Usos específicos | Interior Doors (e.g., Bedroom, Bathroom) |
| Peso do elemento | 15.5 onzas (aprox.) |
| Fabricante | Taiwan Fu Hsing Industrial Company |
| UPC | 050134109490 |
9. Garantía e soporte
For warranty information and customer support, please refer to the documentation included with your purchase or visit the official Defiant websitio. Garda o comprobante de compra para calquera reclamación de garantía.
For further assistance, you may contact Defiant customer service directly through their official channels.