Garantías importantes
When using this appliance, basic safety precautions should always be followed to reduce the risk of fire, electric shock, and/or injury to persons, including the following:
- Le todas as instrucións antes de usar.
- Non toque superficies quentes. Use asas ou botóns.
- To protect against fire, electric shock, and injury to persons, do not immerse the appliance in water or other liquid.
- É necesaria unha estreita supervisión cando calquera aparello é usado por nenos ou preto de eles.
- Deixar arrefriar antes de poñer ou quitar pezas e antes de limpar o aparello.
- Do not operate any appliance that has been damaged in any manner.
- O uso de accesorios non recomendados polo fabricante do aparello pode provocar incendios, descargas eléctricas ou lesións ás persoas.
- Non use ao aire libre.
- Non o coloque sobre ou preto dun queimador eléctrico ou de gas quente, nin nun forno quente.
- Non use o aparello para outros usos que os previstos.
- This appliance is not suitable for induction cooktops.
Produto rematadoview
The Jocca Italian Coffee Maker is a classic stovetop moka pot designed to brew rich, aromatic espresso-style coffee. It consists of three main parts:
- Cámara inferior (depósito de auga): Holds the water that will be heated to create steam.
- Cesta de filtro: A funnel-shaped metal filter where ground coffee is placed.
- Cámara superior (pote de recollida): Where the brewed coffee collects.
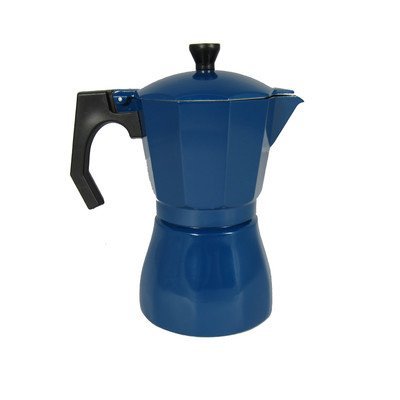
This image shows the Jocca Italian Coffee Maker, a classic stovetop moka pot, in its disassembled state, highlighting the water chamber, filter basket, and upper collection chamber. The navy blue aluminum finish is visible on the upper chamber.
Configuración
Antes do primeiro uso:
- Desembale todos os compoñentes e retire calquera material de embalaxe.
- Wash all parts (lower chamber, filter basket, upper chamber, gasket, filter plate) with warm soapy water. Rinse thoroughly and dry completely.
- Brew 2-3 batches of coffee using only water (no coffee grounds) to clean the interior and season the pot. Discard this water.
Assembling for Brewing:
- Fill the Lower Chamber: Unscrew the upper chamber from the lower chamber. Fill the lower chamber with cold water up to the level of the safety valve. Do not overfill.
- Engadir pos de café: Insert the filter basket into the lower chamber. Fill the filter basket with medium-fine ground coffee. Do not tamp o café. Nivele os posos con coidado.
- Assemble the Pot: Screw the upper chamber firmly onto the lower chamber. Ensure a tight seal to prevent steam from escaping. Do not overtighten.
Instrucións de funcionamento
- Colocar sobre unha fonte de calor: Place the assembled coffee maker on a stovetop burner. Use a heat setting that is appropriate for the size of the pot and your stove. For gas stoves, ensure the flame does not extend beyond the base of the pot.
- Proceso de elaboración: As the water in the lower chamber heats, steam pressure forces the hot water up through the coffee grounds in the filter basket and into the upper chamber.
- Monitor de elaboración de cervexa: Listen for a gurgling sound and observe the coffee flowing into the upper chamber. Once the upper chamber is full and you hear a sputtering sound, remove the coffee maker from the heat source immediately.
- Servir: Carefully pour the freshly brewed coffee into cups. The handle may be hot, so use caution or an oven mitt.
Nota: This coffee maker is suitable for all cooktops except induction cookers.
Limpeza e Mantemento
Limpeza diaria:
- After each use, allow the coffee maker to cool completely.
- Desmontar todas as pezas.
- Desbota os posos de café usados.
- Wash all parts with warm water and a mild detergent. Avoid abrasive sponges or harsh chemicals, as these can damage the aluminum finish.
- Rinse thoroughly and dry completely before reassembling or storing. Ensure all parts are dry to prevent mineral buildup and corrosion.
Mantemento periódico:
- Gasket and Filter Plate: Periodically check the rubber gasket and metal filter plate located under the upper chamber for wear or damage. Replace them if they appear brittle, cracked, or if you notice leaks during brewing.
- Descalcificación: If you notice mineral buildup (white deposits) inside the lower chamber, you can descale the pot. Fill the lower chamber with a solution of equal parts water and white vinegar. Place the filter basket (without coffee) and upper chamber on top. Brew the solution as you would coffee. Discard the vinegar solution and brew 2-3 batches of plain water to rinse thoroughly.
Resolución de problemas
| Problema | Causa posible | Solución |
|---|---|---|
| No coffee brews or very little coffee. |
|
|
| O café ten un sabor débil ou aguado. |
|
|
| Steam or water leaks from the side. |
|
|
Especificacións
- Marca: Jocca
- Número de modelo: 1909A
- Material: Aluminio
- Cor: Azul marino
- Capacidade: 385 mililitros
- Peso do artigo: 0.82 libras (uns 372 gramos)
- Compatibilidade: All cooktops except induction.
Garantía e Soporte
For warranty information or product support, please refer to the documentation provided at the time of purchase or contact your retailer. Keep your proof of purchase for any warranty claims.