
1. Introdución
The U.S. Solid Portable Handheld Induction Sealer is designed for airtight sealing of liners to the top of plastic and other non-metallic containers. This device utilizes electromagnetic induction to generate heat, melting the foil liner to the bottle opening. This method helps prevent leaks, preserves product freshness, and provides evidence of tampering. It is suitable for sealing bottle caps with diameters ranging from 15mm to 100mm.
2. Información de seguridade
- Alto VoltagAviso: This machine operates with high voltage electromagnetic induction. Only qualified professionals should attempt disassembly or repair.
- Entorno operativo: Use the machine in a dry, well-ventilated, and dust-free environment to ensure proper function and safety.
- Compatibilidade de materiais: This sealer is designed for plastic, glass, or other non-metallic bottles and cup-shaped containers. Do not use this machine to seal metallic containers, as this can cause damage to the device and pose a safety risk.
- Proper Liner Selection: Ensure that the induction seal liners used are compatible with both the bottle material (e.g., PET, PE, PP, Glass) and the product being sealed. Incorrect liners may result in poor seals or damage.
- Mantéñase claro: Keep hands and other body parts away from the sealing head during operation to avoid burns or injury.
- Desconexión de alimentación: Always disconnect the power cord from the outlet before cleaning or performing any maintenance.
3. Compoñentes do produto
The U.S. Solid Portable Handheld Induction Sealer consists of a main control unit and a handheld sealing head.

Figure 3.1: Main control unit with the handheld sealing head connected.
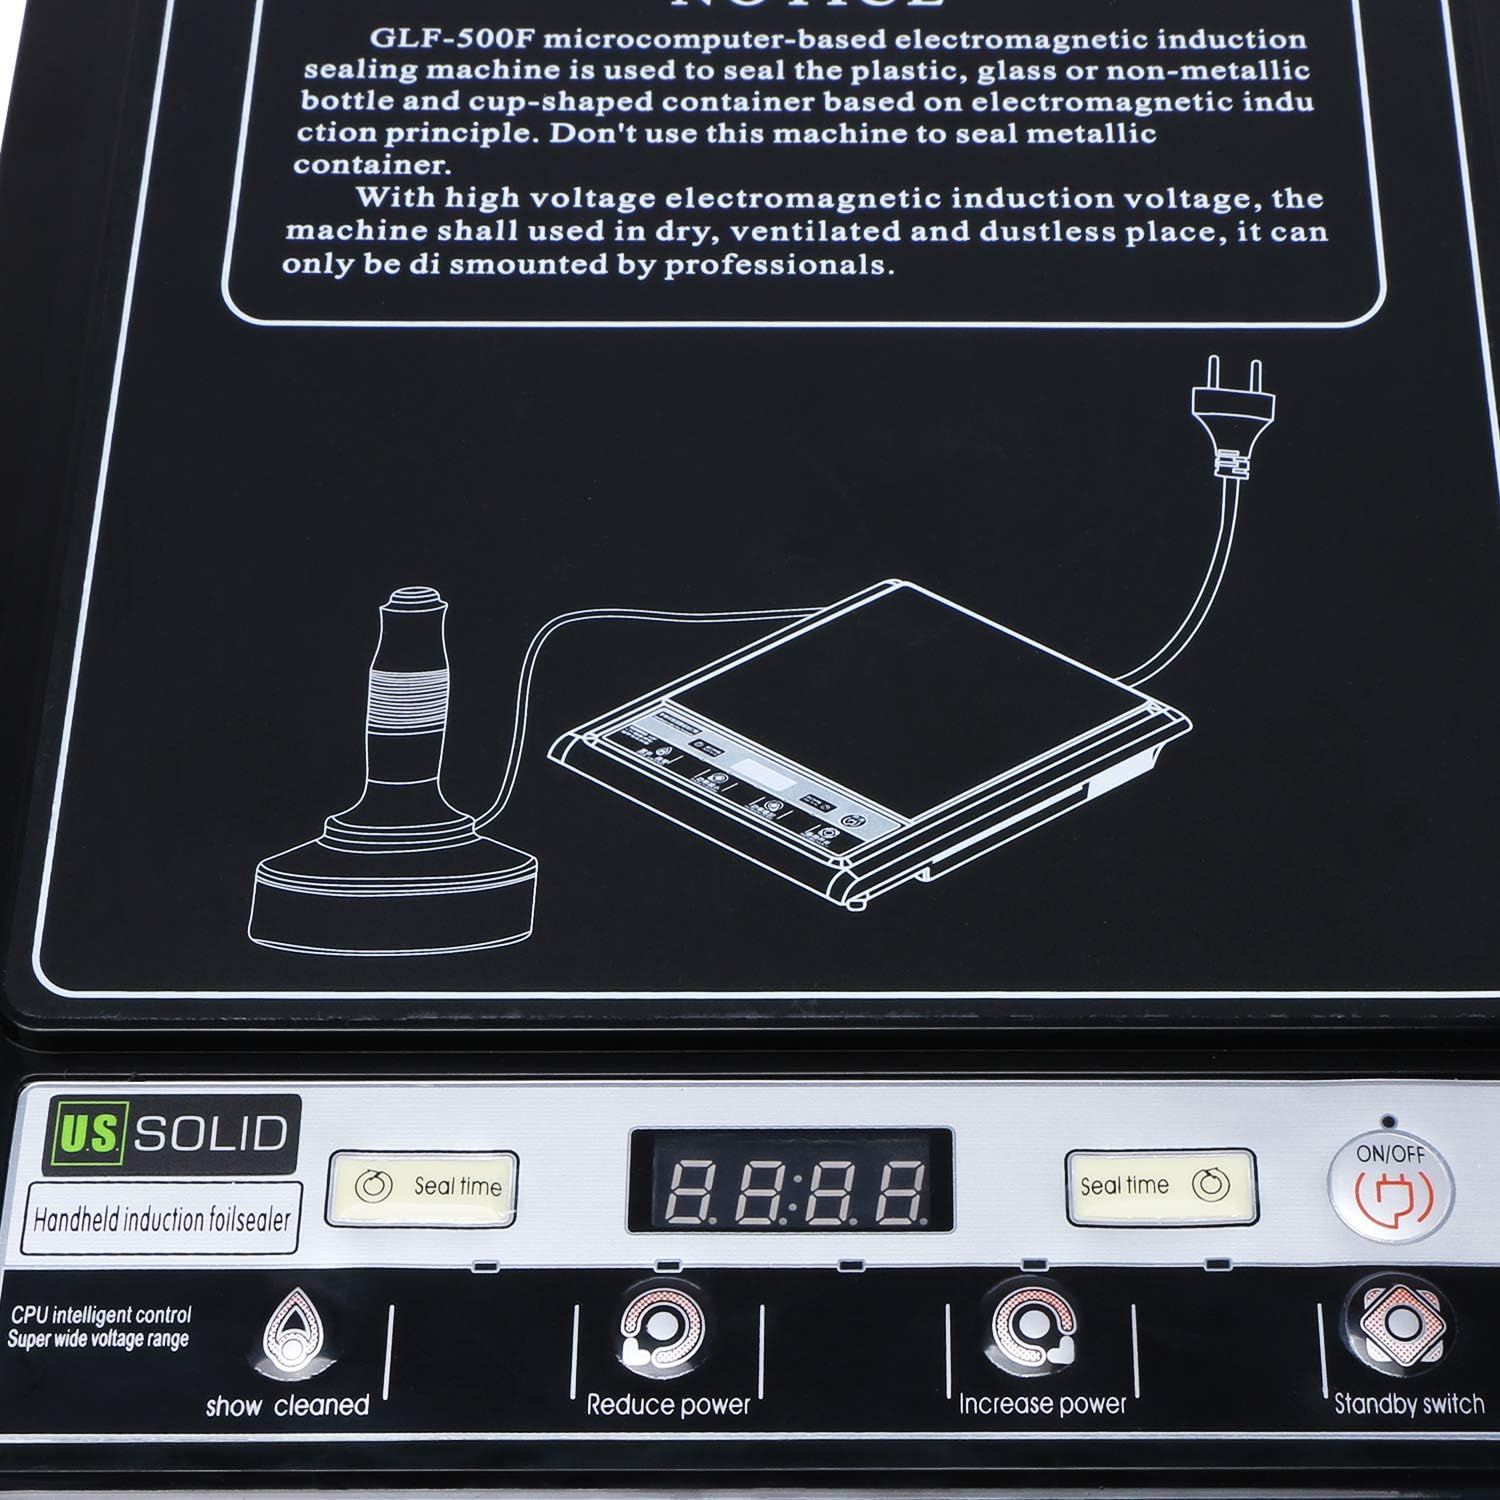
Figure 3.2: The handheld sealing head, showing the ergonomic design and connecting cable.
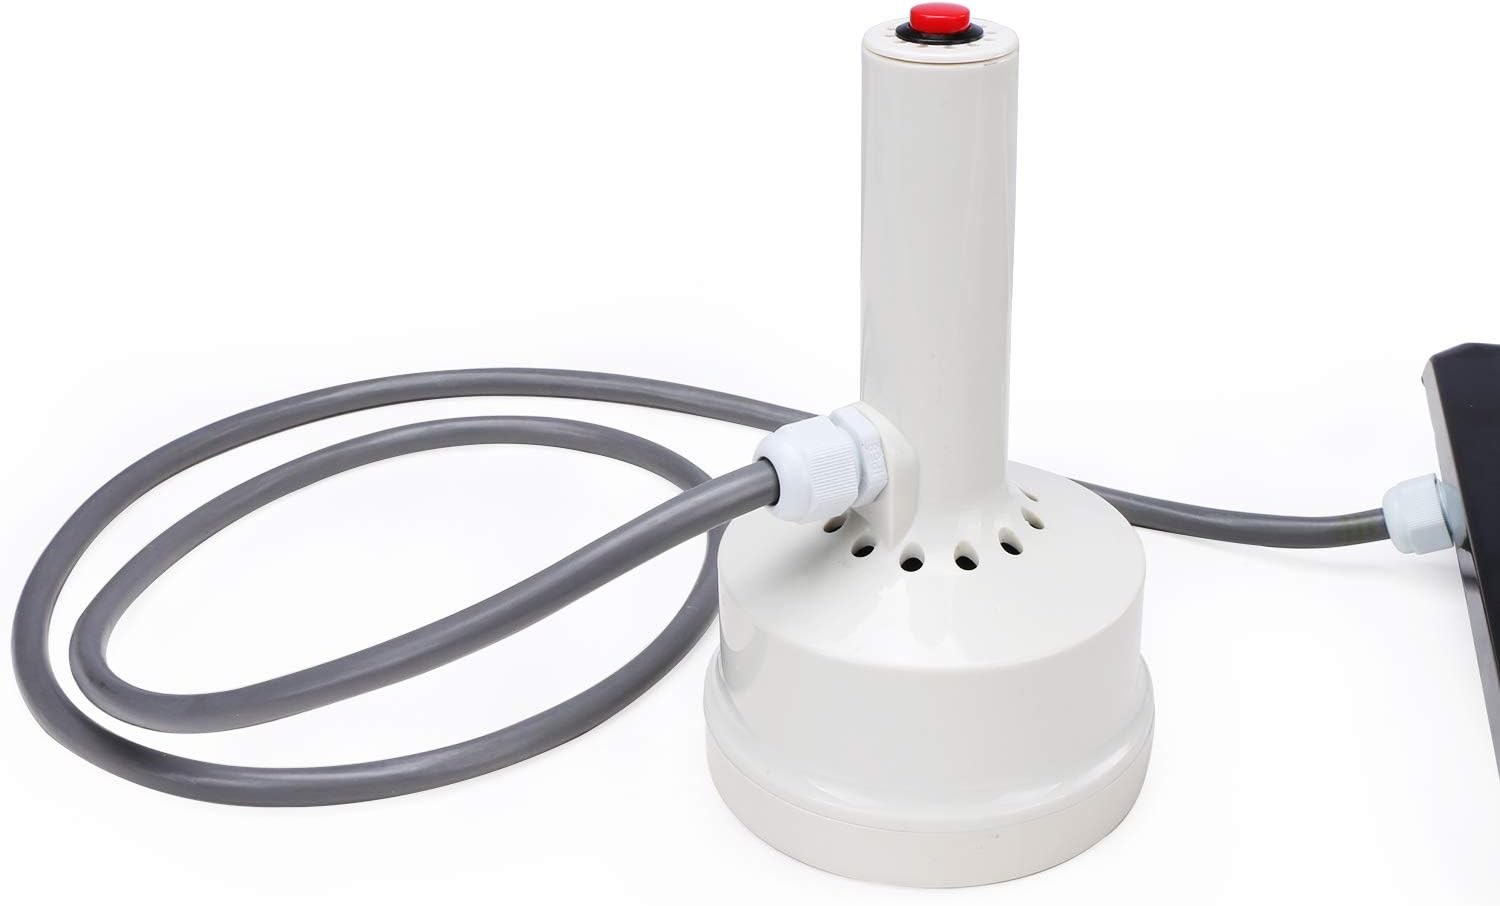
Figure 3.3: Underside of the handheld sealing head, revealing the induction coil responsible for heat generation.
4. Configuración
- Desempaquetar: Carefully remove the induction sealer and all components from the packaging. Inspect for any signs of damage.
- Colocación: Place the main control unit on a stable, flat, dry, and well-ventilated surface. Ensure there is adequate space around the unit for heat dissipation.
- Conectar a unidade portátil: Connect the cable of the handheld sealing head securely to the designated port on the main control unit.
- Conexión de alimentación: Plug the power cord into a standard 110V AC electrical outlet. The unit will typically power on or enter standby mode.
5. Instrucións de funcionamento
Follow these steps for effective and safe operation of your induction sealer:
- Encendido: Press the 'ON/OFF' button on the control panel to power on the device. The display will illuminate.
- Adjust Sealing Time: Use the 'Reduce power' and 'Increase power' buttons to adjust the sealing time (displayed as 'seal time'). The optimal sealing time depends on the cap material, liner thickness, and bottle size. Start with a lower setting and increase gradually if the seal is not complete.
- Preparar botella: Ensure the bottle cap is securely tightened over the induction liner. The liner must be in direct contact with the bottle rim for a proper seal.
- Position Sealing Head: Place the handheld sealing head directly and firmly onto the center of the bottle cap. Ensure it is stable and not wobbling, especially for smaller caps.
- Initiate Sealing: Press the red button on top of the handheld sealing head to begin the induction process. The unit will count down the set sealing time.
- Remove Sealing Head: Once the countdown is complete and the sealing process finishes, remove the handheld sealing head from the bottle cap.
- Verificar o selo: Allow the sealed cap to cool for a few seconds, then check the integrity of the seal. If the seal is incomplete, adjust the sealing time or ensure the cap was tightened sufficiently and the sealing head was stable.
- Automatic Counting: The unit features an automatic counting function to track the number of sealed bottles. This can be reset if needed.

Figura 5.1: Example of bottles suitable for induction sealing.
6. Características
- Advanced Sealing Principle: Utilizes electromagnetic induction for efficient and secure cap sealing.
- Funcións diversas: Includes automatic counting, power adjustment, and various protection features.
- Rápido e eficiente: Seals aluminum foil liners in seconds.
- Deseño portátil: Lightweight and compact, suitable for industrial sealing in limited spaces.
- Ampla aplicación: Compatible with plastic and non-metallic bottles with cap sizes from 15mm to 100mm.

Figura 6.1: Máisview of the sealer's key features.
Aplicacións
This induction sealer is suitable for various industries requiring secure bottle sealing:
- Pharmaceutical: Sealing medicine bottles to ensure product integrity and prevent contamination.
- Cosméticos: Sealing cosmetic products to maintain freshness and prevent leaks.
- Pesticide: Securing pesticide containers for safety and spill prevention.
- Food & Beverage: Sealing food and beverage containers to extend shelf life and prevent spoilage.

Figure 6.2: Common applications for the induction sealer.
7. Mantemento
- Limpeza: Regularly wipe the exterior of the main unit and handheld sealing head with a soft, dry cloth. Do not use abrasive cleaners or solvents. Ensure the unit is unplugged before cleaning.
- Almacenamento: Store the induction sealer in a cool, dry, and dust-free environment when not in use. Protect it from direct sunlight and extreme temperatures.
- Inspección de cables: Periodically inspect the power cord and the cable connecting the handheld unit for any signs of damage. Do not operate the machine with damaged cables.
8 Solución de problemas
If you encounter issues with your induction sealer, refer to the following common problems and solutions:
| Problema | Causa posible | Solución |
|---|---|---|
| Seal is incomplete or uneven |
|
|
| Liner burns or melts excessively |
|
|
| A unidade non se acende |
|
|
9. Especificacións
| Especificación | Valor |
|---|---|
| Número de modelo | USS-PHIS00001 |
| Dimensións do produto | 11.4 x 11.4 x 13.4 polgadas |
| Peso do elemento | 4.85 libras |
| Vol. De entradatage | 110 V |
| Cap Size Range | 15 mm - 100 mm |
| Fabricante | Sólido estadounidense |
10. Garantía e soporte
This U.S. Solid product comes with a 1 ano de garantía from the date of purchase. If the machine becomes defective within this period, please contact U.S. Solid customer service for assistance. Our support team will work with you to either repair or replace the machine.
For technical support, troubleshooting assistance, or warranty claims, please refer to the contact information provided with your purchase or visit the official U.S. Solid websitio.