
1. Introdución
Thank you for choosing the AUDIOTEK AT820S 2-Channel Class AB Car Amplificador. Isto amplifier is designed to provide high-quality audio performance for your vehicle's sound system. Please read this manual thoroughly before installation and operation to ensure proper use and to maximize the amplifier's performance and longevity.
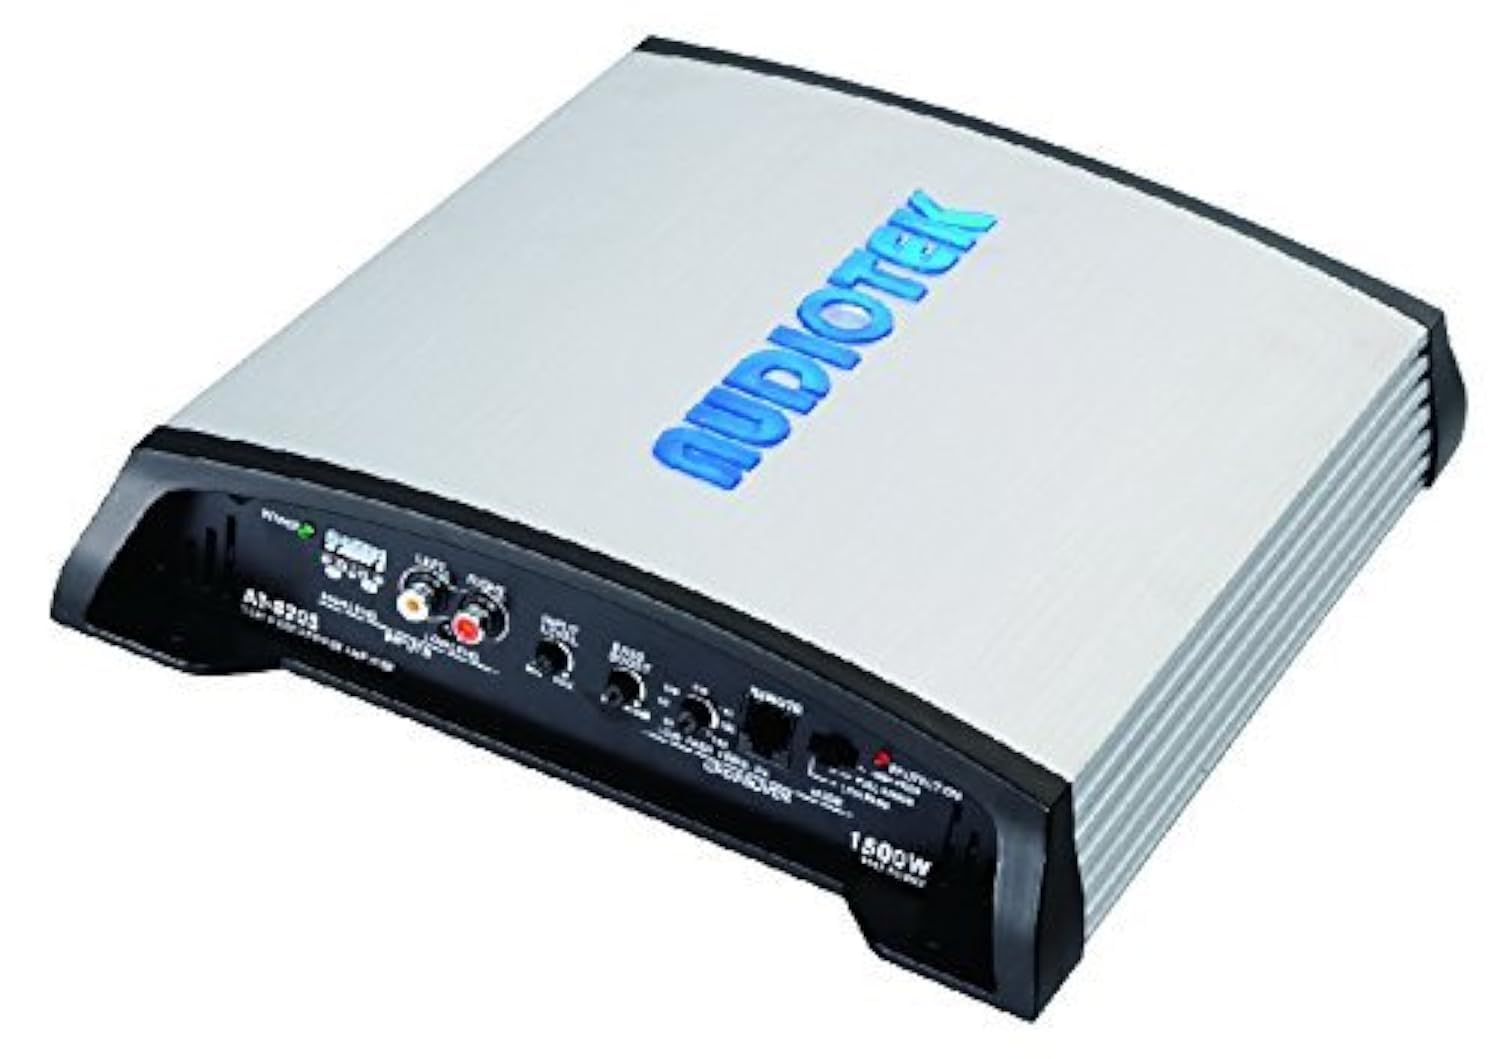
Figure 1.1: AUDIOTEK AT820S 2-Channel Car Ampvidador, superior view.
2. Información de seguridade
Observe sempre as seguintes precaucións de seguridade durante a instalación e o funcionamento:
- Instalación profesional recomendada: A instalación de compoñentes de audio para automóbiles require experiencia en cableado eléctrico e procedementos de automoción. Se non tes dúbidas, busca axuda profesional.
- Desconectar batería: Desconecte sempre o terminal negativo da batería do vehículo antes de iniciar calquera traballo eléctrico para evitar curtocircuítos.
- Cableado adecuado: Ensure all wiring is correctly connected and insulated to prevent damage to the amplifier, vehicle, or personal injury. Use appropriate gauge wires for power and ground connections.
- Protección por fusibles: Install an external fuse on the main power cable within 18 inches (45 cm) of the battery. The fuse rating should match the amprequisitos do vivificador.
- Ventilación: Monte o ampo refrigerador nun lugar que permita unha circulación de aire axeitada para evitar o sobrequecemento. Non cubra o ampaletas de arrefriamento do transformador.
- Evitar a humidade: Non expoña o ampsobrevivente á humidade ou á auga.
- Niveis de volume: A exposición prolongada a niveis de volume elevados pode causar danos auditivos.
3. Características clave
The AUDIOTEK AT820S ampLifier ofrece as seguintes características:
- 2-Channel Design: Provides stereo output for speakers or can be bridged for mono subwoofer applications.
- Topoloxía de clase AB: Delivers a balance of sound quality and efficiency.
- 1500W Max Power: High power output for robust audio performance.
- 2 Ohm Stable: Capable of driving speakers with 2-ohm impedance for increased power output.
- Crossover variable: Built-in high-pass and low-pass filters for precise sound tuning.
- Control de aumento de graves: Ecualización de graves axustable para unha resposta de baixa frecuencia mellorada.
- High and Low-Level Inputs: Versatile input options for compatibility with various head units.
- Control remoto de graves: Allows for convenient adjustment of bass levels from the driver's seat.
4. Configuración e instalación
Proper installation is crucial for optimal performance. Follow these steps carefully:
4.1. Contido do paquete
Before installation, verify that all items are present:
- AUDIOTEK AT820S Ampmáis vivo
- Remote Bass Control Knob with Cable
- Ferraxes de montaxe (parafusos)
- Manual de usuario (este documento)

Figura 4.1: Amplifier, packaging, and remote bass control knob.
4.2. Montaxe do Ampmáis vivo
Choose a secure location that provides adequate ventilation and is protected from moisture. Common locations include under a seat, in the trunk, or behind a panel. Ensure the mounting surface is solid and can support the amppeso do viveiro.
- Coloca o amplifier in the desired mounting location and mark the screw holes.
- Drill pilot holes if necessary, ensuring no wires or fuel lines are behind the drilling surface.
- Asegure o amplificador usando os parafusos de montaxe fornecidos.
4.3. Conexións de cableado
Refer to the diagrams below for proper wiring. Use high-quality wiring kits for best results.

Figure 4.2: Rear panel connections (Power, Ground, Remote, Speaker Outputs).

Figure 4.3: Front panel connections (Inputs, Crossover, Bass Boost, Remote).
4.3.1. Conexións de alimentación
- BATT (+12V): Connect a heavy-gauge power cable (e.g., 8 AWG or larger) directly from the positive terminal of the vehicle's battery to the BATT terminal on the amplifier. Install an in-line fuse holder with an appropriate fuse (e.g., 40A) within 18 inches of the battery.
- GND (terra): Conecte un cable de terra de grosor grosor (do mesmo calibre que o de alimentación) desde o terminal GND do amplifier to a clean, unpainted metal surface of the vehicle's chassis. Ensure a good electrical connection.
- REM (activación remota): Connect a smaller gauge wire (e.g., 18 AWG) from the REM terminal on the amplifier to the remote turn-on output of your head unit. This wire turns the ampacende e apaga o activador coa unidade principal.
4.3.2. Conexións de entrada de audio
- Entradas de baixo nivel (RCA): If your head unit has RCA pre-outs, connect RCA cables from the head unit's pre-outs to the LOW LEVEL INPUTS on the ampmáis vivo.
- Entradas de alto nivel: If your head unit does not have RCA pre-outs, use the HIGH LEVEL INPUTS. Connect the speaker wires from your head unit's speaker outputs to the high-level input terminals on the amplifier. Observe correct polarity (+/-).
4.3.3. Conexións de saída de altofalantes
- Connect your speakers to the SPEAKER CONNECTIONS terminals on the amplifier. Ensure correct polarity (+/-) for each speaker.
- For stereo operation, connect one speaker to the Left (+) and Left (-) terminals, and another speaker to the Right (+) and Right (-) terminals.
- For bridged mono operation (e.g., for a subwoofer), connect the subwoofer to the Left (+) and Right (-) terminals. Refer to your speaker's impedance to ensure it is compatible with the amplifier's 2-ohm stable rating in bridged mode.
4.3.4. Control remoto de graves
Connect the remote bass control knob to the REMOTE port on the amplifier using the provided cable. Mount the knob in a convenient location for easy access.
5. Funcionamento e axustes
Unha vez instalado, podes axustar con precisión o amplifier's settings for optimal sound.
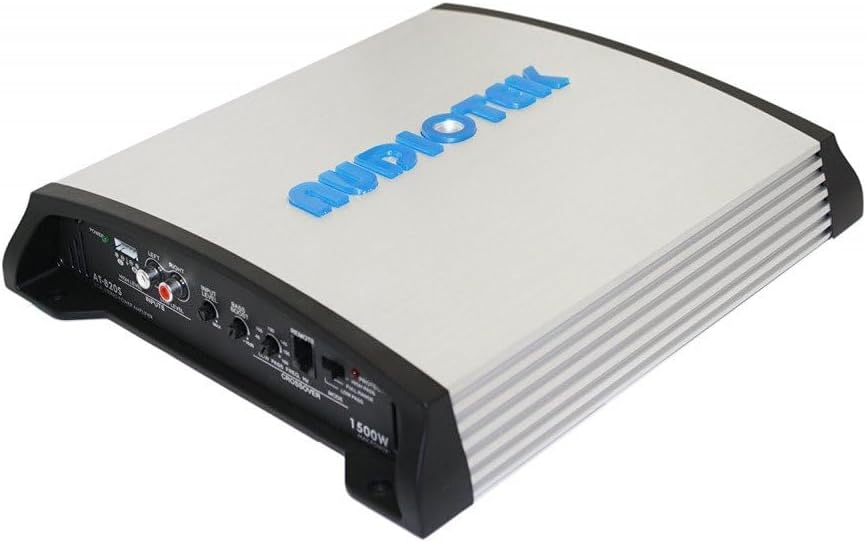
Figura 5.1: Amplifier control panel for adjustments.
5.1. Acendamento inicial
After all connections are made, reconnect the vehicle's negative battery terminal. The amplifier's POWER indicator should illuminate. If the PROTECTION indicator illuminates, refer to the troubleshooting section.
5.2. Input Level (Gain) Adjustment
The INPUT LEVEL control matches the amplifier's input sensitivity to the output level of your head unit. This is not a volume control.
- Turn the INPUT LEVEL control to its minimum (MIN) position.
- Axusta o volume da unidade principal a aproximadamente o 75-80 % do seu máximo.
- Slowly increase the INPUT LEVEL control on the amplifier until you hear slight distortion, then back it off slightly until the sound is clear.
5.3. Configuración do crossover
The crossover allows you to direct specific frequency ranges to your speakers or subwoofer.
- Interruptor de MODO:
- GAMA COMPLETA: All frequencies are passed through. Use for full-range speakers.
- PASO ALTO: Only frequencies above the set LOW PASS FREQ. Hz knob are passed. Use for component speakers or full-range speakers to prevent low bass.
- PASE BAIXO: Only frequencies below the set LOW PASS FREQ. Hz knob are passed. Use for subwoofers.
- LOW PASS FREQ. Hz Knob: Adjusts the cutoff frequency for the high-pass or low-pass filter (e.g., 40Hz to 160Hz).
5.4. Reforzo de graves
The BASS BOOST control provides an adjustable boost to low frequencies (0 to +18dB).
- Adjust this control to enhance bass response to your preference.
- Úseo con moderación para evitar distorsións e posibles danos nos altofalantes.
5.5. Control remoto de graves
The remote bass control knob allows you to adjust the bass boost level conveniently from your driving position.
6. Mantemento
The AUDIOTEK AT820S ampO lificador require un mantemento mínimo.
- Limpeza: Limpar periodicamente o ampo exterior do lifador cun pano suave e seco. Non empregue produtos químicos agresivos nin produtos de limpeza abrasivos.
- Ventilación: Asegúrate de que as aletas de refrixeración estean libres de po e residuos para manter unha disipación da calor axeitada.
- Conexións: De cando en vez, comproba todas as conexións do cableado para asegurarte de que estean ben fixadas e libres de corrosión.
7 Solución de problemas
Se tes problemas co teu amplifer, consulte a seguinte táboa antes de contactar co servizo de asistencia.
| Problema | Causa posible | Solución |
|---|---|---|
| Sen alimentación (LED de alimentación apagado) | Fusible fundido Poor power/ground connection Sen sinal de acendido remoto | Comprobar e substituír amplifier fuse and in-line battery fuse. Verifique que todas as conexións de alimentación e terra estean seguras. Comprobe a conexión do cable remoto á unidade principal e ampmáis vivo. |
| LED de protección encendido | Sobrequecemento Curtocircuíto do altofalante Impedancia do altofalante demasiado baixa | Asegurar unha ventilación axeitada; permitir amplifier para arrefriar. Check speaker wiring for shorts to chassis or between wires. Verificar que a impedancia do altofalante estea dentro de amplifier's specifications (2 ohms stable). |
| Sen son | O nivel de entrada é demasiado baixo RCA cables disconnected/faulty Speaker wires disconnected/faulty Head unit issue | Adjust INPUT LEVEL control. Check RCA cable connections and test cables. Comprobe as conexións dos cables do altofalante. Verify head unit is functioning correctly. |
| Son distorsionado | Nivel de entrada demasiado alto Ganancia axustada demasiado alta Mala conexión a terra Danos no altofalante | Reduce head unit volume. Reduce INPUT LEVEL control on ampmáis vivo. Asegúrate de que a conexión a terra estea limpa e segura. Inspect speakers for damage. |
| Ruído/xinxido do motor | Mala conexión a terra RCA cables routed near power wires Bucle de terra | Mellorar a conexión á terra. Reroute RCA cables away from power cables. Install a ground loop isolator if necessary. |
8. Especificacións
The following are the technical specifications for the AUDIOTEK AT820S ampmáis vivo:
- Modelo: AT820S
- Marca: AUDIOTECA
- Número de canles: 2
- Potencia de saída: 1500 vatios (máx.)
- Clase: AB
- Stable Impedance: 2 ohmios
- Dimensións do artigo (L x W x H): 8 x 11 x 3 polgadas
- Peso do artigo: 7 libras
- Tipo de montaxe: Autónomo
- UPC: 701160332689
9. Garantía e soporte
AUDIOTEK products are designed for reliability and performance. For specific warranty details, please refer to the warranty card included with your product or contact AUDIOTEK customer support.
For technical assistance or service inquiries, please contact your authorized AUDIOTEK dealer or visit the official AUDIOTEK websitio para recursos de apoio.