
1. Produto rematadoview
The Thermaltake The Tower 900 is a full tower PC case designed for high-end PC enthusiasts and modders. Developed in collaboration with Watermod France, this chassis emphasizes a unique vertical installation layout and features durable 5mm tempered glass panels to showcase internal components. It supports extensive liquid cooling configurations and offers ample space for various hardware components.

Figura 1: Fronte view of the Thermaltake The Tower 900 showcasing internal components and custom liquid cooling setup.
Key features include a spacious interior for custom liquid cooling loops, support for XL ATX motherboards, and multiple drive bays for storage. The design prioritizes both aesthetic display and functional cooling performance.
2. Configuración e instalación
This section provides general guidelines for assembling your PC components within The Tower 900 chassis. Due to its modular design, many parts can be disassembled for easier installation.
2.1 Desembalaxe e inspección inicial
Carefully remove the chassis from its packaging. Inspect for any damage that may have occurred during transit. Keep all packaging materials for future transport or warranty claims.

Figura 2: Explotado view illustrating the modular components of The Tower 900 for easier assembly.
2.2 Removing Side Panels
The tempered glass side panels are secured with thumbscrews. Unscrew these to remove the panels, providing full access to the interior for component installation.
2.3 Instalación da placa base
- Install the necessary motherboard standoffs onto the motherboard tray according to your motherboard's form factor (XL ATX, ATX, microATX).
- Coloca con coidado a placa base sobre os separadores, aliñando os orificios dos parafusos.
- Asegure a placa base con parafusos.
2.4 Instalación da Unidade de Alimentación (PSU).
The PSU is mounted at the rear of the chassis. Ensure proper orientation and secure it with screws. Route cables through the designated cutouts for clean management.

Figura 3: View of the power supply unit mounting area at the rear of the chassis.
2.5 Instalación da unidade de almacenamento
The case features multiple drive bays for 3.5-inch HDDs and 2.5-inch SSDs. Utilize the removable drive trays for easy installation. The case supports up to six 3.5-inch drives or twelve 2.5-inch drives.
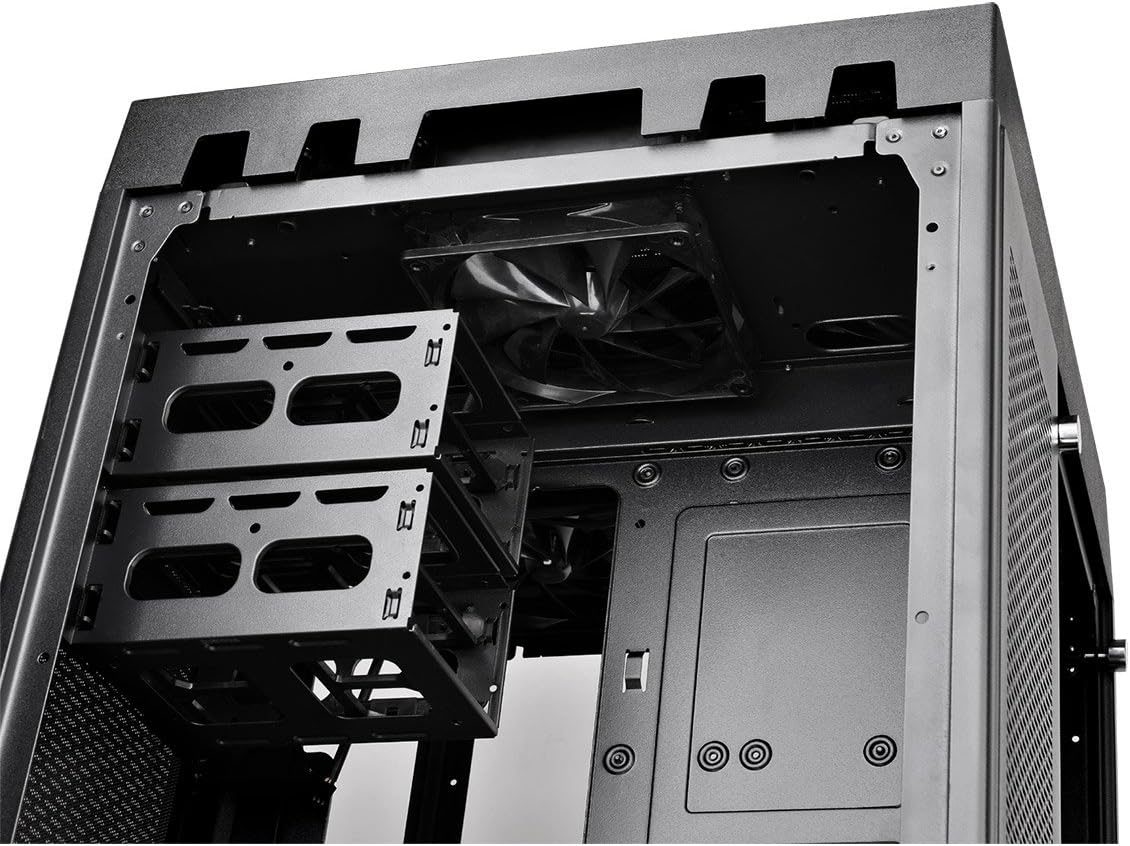
Figure 4: Removable drive trays for 3.5-inch and 2.5-inch storage devices.
2.6 Cooling System Installation (Fans/Radiators)
The Tower 900 is optimized for liquid cooling, supporting up to two 560mm radiators. Install fans and radiators in the designated areas, ensuring proper airflow direction. The case comes with two pre-installed 140mm fans at the top.

Figura 5: Lateral view showing fan mounting locations, ideal for radiator installation.
For custom liquid cooling, the case provides dedicated space for pumps and reservoirs. Note that pump brackets are designed for Thermaltake D5 pumps; other pump models may require custom mounting solutions.
2.7 Xestión de cables
Utilize the numerous cable routing holes and tie-down points behind the motherboard tray to ensure a clean build and optimal airflow. Long SATA and PSU cables are recommended for this large chassis.
3. Instrucións de funcionamento
Once all components are installed and secured, and the side panels are reattached, connect your peripherals and power cable.
3.1 Panel frontal de E/S
The top front panel provides convenient access to essential ports and controls:
- Botón de encendido: To turn the system on/off.
- Botón de reinicio: Para reiniciar o sistema.
- Portos USB 3.0 (x4): Para a transferencia de datos a alta velocidade.
- Audio Jacks (Headphone/Microphone): Para entrada/saída de son.

Figure 6: Close-up of the top I/O panel featuring USB 3.0 ports, audio jacks, and power/reset buttons.
3.2 Acendido do sistema
Press the power button on the front I/O panel to start your system. Ensure all cables are securely connected before powering on.
4. Mantemento
Un mantemento regular axuda a garantir un rendemento óptimo e unha maior duración dos compoñentes do teu PC.
4.1 Limpeza do filtro de po
The Tower 900 is equipped with magnetic dust filters on various intake points. These filters should be cleaned regularly (e.g., monthly in a living area) to prevent dust buildup inside the chassis, which can impede airflow and cooling efficiency.

Figure 7: Various magnetic dust filters included with the chassis for easy removal and cleaning.
- Gently remove the magnetic dust filters from their respective locations.
- Clean the filters using compressed air or by rinsing them with water. Ensure they are completely dry before reattaching.
4.2 Tempered Glass Panel Care
Clean the tempered glass panels with a soft, lint-free cloth and a glass cleaner. Avoid abrasive materials that could scratch the surface.
4.3 Limpeza interna
Periodically, use compressed air to remove dust from internal components such as fans, heatsinks, and graphics cards. Ensure the system is powered off and unplugged before performing internal cleaning.
5 Solución de problemas
This section addresses common issues that may arise during or after PC assembly.
5.1 O sistema non se acende
- Verifique que o cable de alimentación estea conectado correctamente tanto á fonte de alimentación como á toma de corrente.
- Ensure the PSU's power switch is in the "ON" position.
- Check all internal power connections, especially the 24-pin ATX and 8-pin CPU power cables to the motherboard.
- Confirm that the front panel power switch cable is correctly connected to the motherboard's header.
5.2 Ruído excesivo
- Identifica a fonte do ruído (por exemplo, ventilador, disco duro).
- Ensure all fans are securely mounted and free from obstructions.
- Check for loose cables or components that might be vibrating against the chassis.
- If using HDDs, ensure they are properly secured in their drive bays to minimize vibration.
5.3 Poor Cooling Performance
- Limpe todos os filtros de po e os compoñentes internos como se describe na sección de Mantemento.
- Verify that all fans are spinning and oriented correctly for optimal airflow (intake/exhaust).
- Ensure radiators are not obstructed and have adequate airflow.
- For liquid cooling systems, check pump operation and coolant levels.
6. Especificacións
| Característica | Detalle |
|---|---|
| Marca | Thermaltake |
| Nome do modelo | Torre 900 |
| Tipo de caso | Torre chea |
| Compatibilidade da placa base | XL ATX, ATX, Micro ATX |
| Material | Aceiro, vidro temperado |
| Cor | Negro |
| Dimensións (D x W x H) | 48.3P x 42.6L x 75.2H cm (19.02 x 16.77 x 29.61 polgadas) |
| Peso | 24.5 kg (54 lb) |
| Unidade Bays | 6 x 3.5" or 12 x 2.5" (internal) |
| Ranuras de expansión | 7 |
| Portos de E / S dianteiros | 4 x USB 3.0, HD Audio |
| Método de arrefriamento | Air, Liquid (supports up to 2x 560mm radiators) |
| Ventiladores preinstalados | 2 x 140mm (top) |
| Tipo de fonte de alimentación | Standard PS2 PSU (rear mount) |
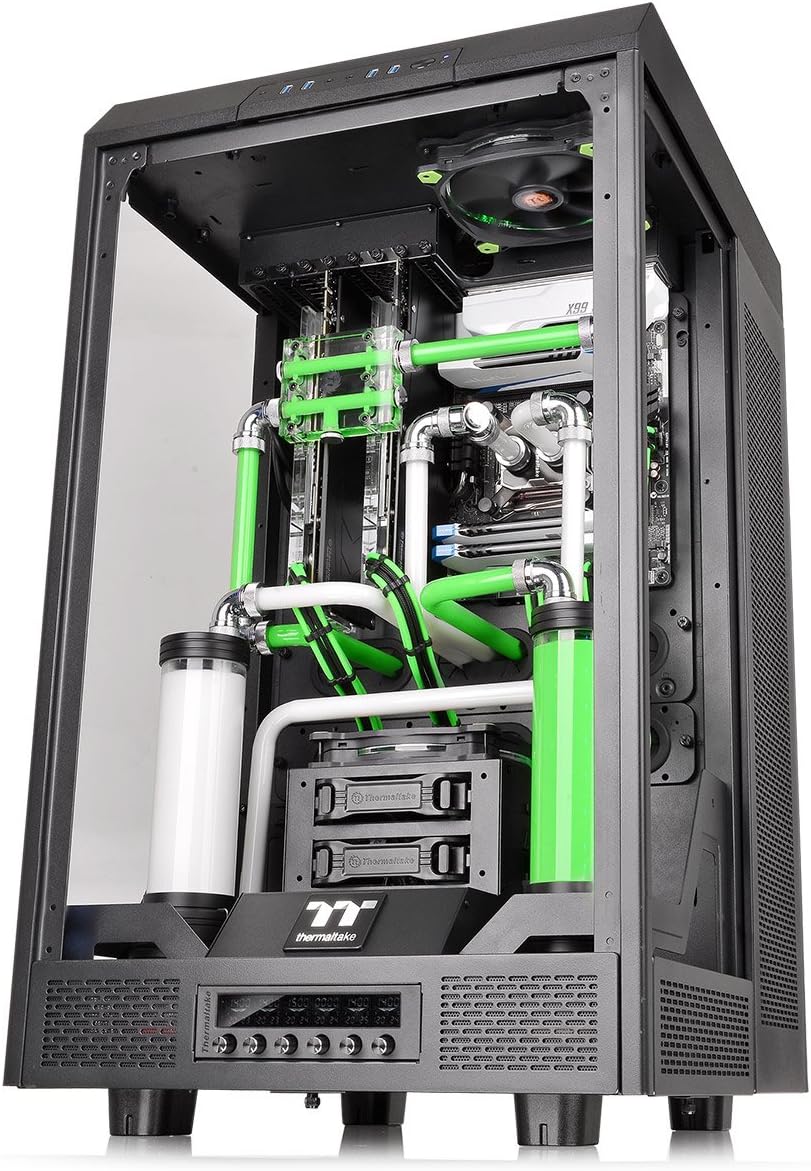
Figure 8: Diagram illustrating the dimensions of The Tower 900 chassis.
7. Garantía e soporte
7.1 Información da garantía
The Thermaltake The Tower 900 comes with a 2 anos de garantía do fabricanteConserva o comprobante de compra para reclamacións de garantía. A garantía cobre defectos de materiais e fabricación en condicións normais de uso.
7.2 Atención ao cliente
For technical assistance, troubleshooting, or warranty inquiries, please contact Thermaltake customer support. Refer to the official Thermaltake websitio para obter a información de contacto e os recursos de asistencia máis actualizados.
- Soporte en liña: Visit the Thermaltake official website for FAQs, driver downloads, and support tickets.
- Información de contacto: Specific regional contact details can be found on the support section of the Thermaltake websitio.
Thermaltake is committed to providing excellent support and innovative products, driven by a passion for DIY and PC modding.


