
Introdución
Thank you for choosing the Atlanta Digital LCD Radio Alarm Clock, Model 1882-0. This compact and easy-to-use alarm clock features a clear LCD display, temperature indication, and a radio-controlled time function for automatic synchronization. This manual provides detailed instructions for setup, operation, and maintenance to ensure optimal performance.
Información de seguridade
- Seguridade da batería: Use only the specified battery type. Ensure correct polarity (+/-) when inserting batteries. Do not mix old and new batteries, or different types of batteries. Remove batteries if the device will not be used for an extended period. Dispose of used batteries responsibly according to local regulations.
- Colocación: Place the clock on a stable, flat surface. Avoid direct sunlight, extreme temperatures, high humidity, or dusty environments.
- Limpeza: Do not use abrasive cleaners or solvents. Wipe with a soft, dry cloth.
- Exposición á auga: Este dispositivo non é impermeable. Evite a exposición á auga ou a outros líquidos.
Contido do paquete
- Atlanta Digital LCD Radio Alarm Clock (Model 1882-0)
- Manual de instrucións (este documento)
- (As baterías non adoitan estar incluídas e deben mercarse por separado)
Produto rematadoview
Familiarízate cos principais compoñentes e controis do teu reloxo despertador.

Figura 1: Fronte View. This image displays the front of the Atlanta Digital LCD Radio Alarm Clock. The large LCD screen shows the current time (10:40), radio control signal indicator, DST indicator, alarm time (6:00), and temperature (24.6°C). Below the screen are three buttons: "TIME", "ALARM", and "+ / -". A red snooze/light button is visible on the top edge.
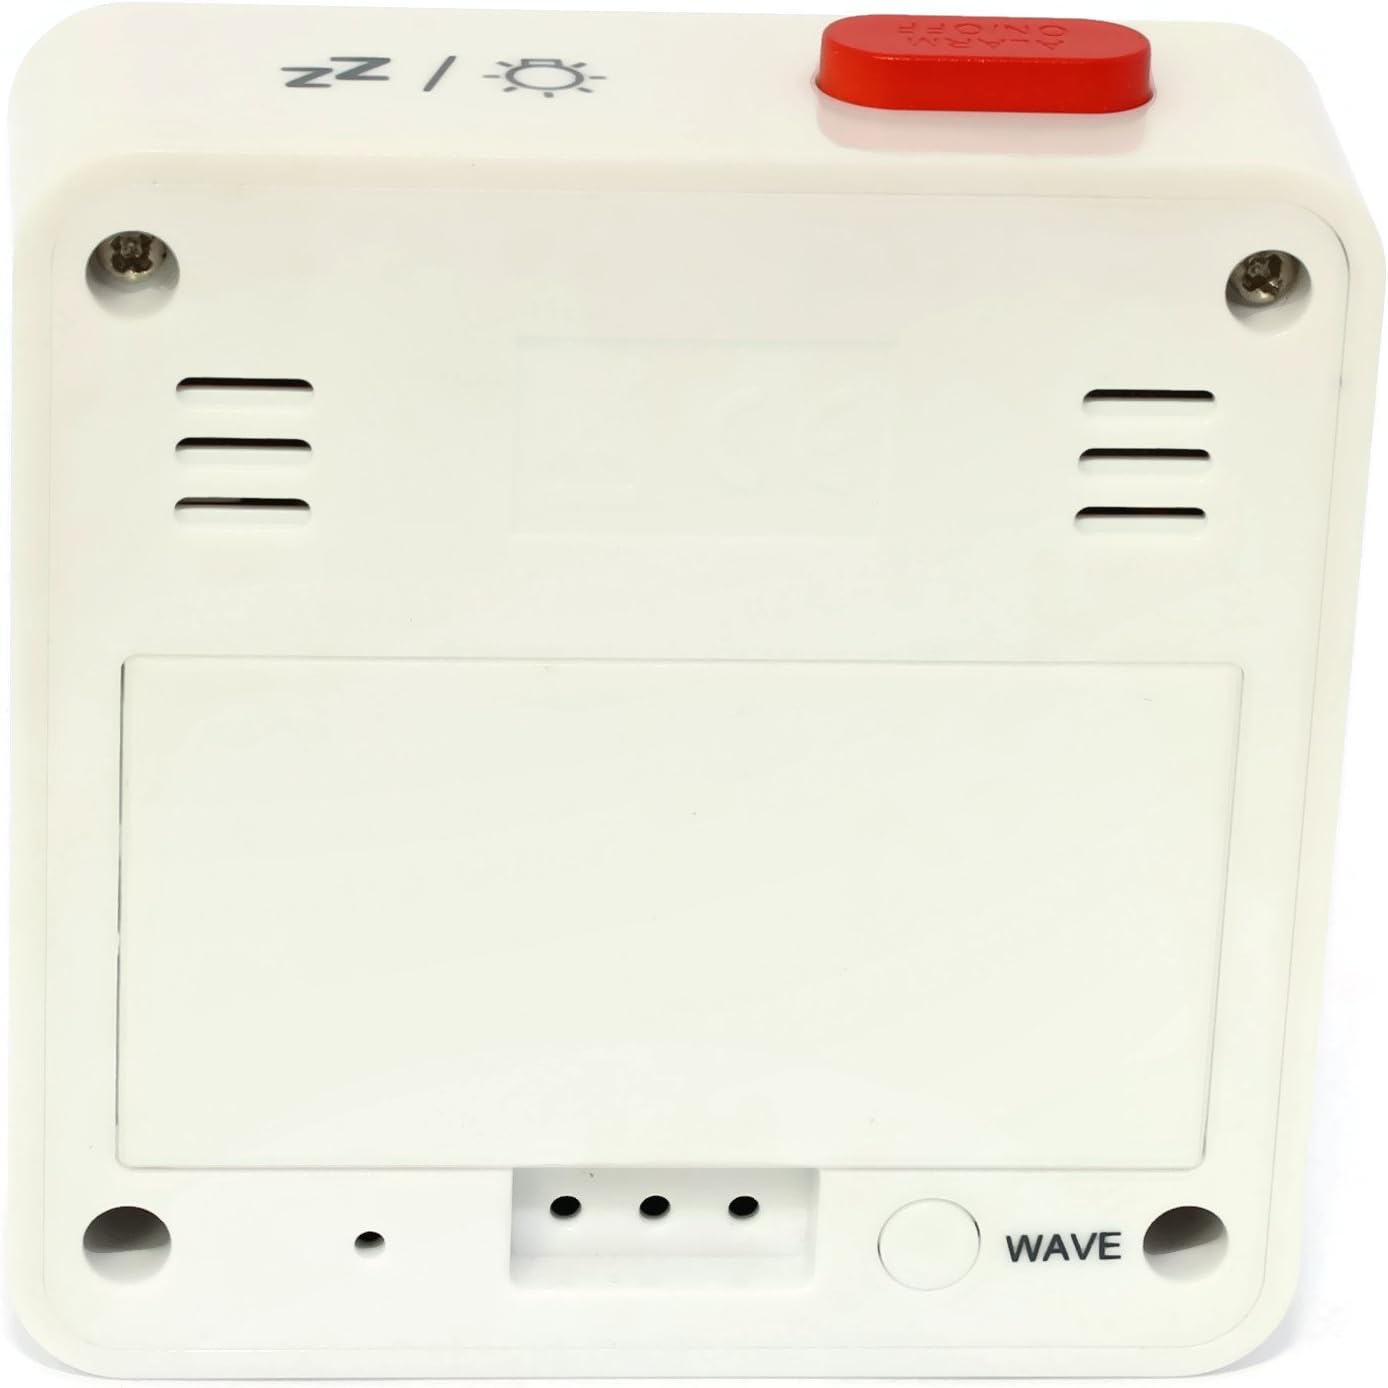
Figura 2: Atrás View. This image shows the back of the Atlanta Digital LCD Radio Alarm Clock. The large rectangular cover for the battery compartment is prominent. Below it, a circular "WAVE" button is visible, used for manual radio signal reception. Ventilation slots are present on both sides of the upper back panel.
Elementos de control e visualización:
- Pantalla LCD: Shows time, alarm time, temperature, and radio control status.
- Botón TIME: Used to set the current time manually.
- Botón ALARMA: Úsase para configurar e activar/desactivar a alarma.
- Botóns + / -: Used to adjust values (time, alarm) and potentially toggle settings.
- SNOOZE / LIGHT Button (Top): Activates snooze function during an alarm; illuminates the display backlight.
- WAVE Button (Back): Initiates manual radio signal reception for time synchronization.
- Battery Compartment (Back): Holds the required batteries.
Configuración
1. Instalación da batería
- Open the battery compartment cover located on the back of the clock (refer to Figure 2).
- Insert the required batteries (e.g., 2x AAA, not included) according to the polarity markings (+ and -) inside the compartment.
- Pecha a tapa do compartimento da batería de forma segura.
- The clock will power on and attempt to receive the radio-controlled time signal.
2. Sincronización inicial da hora (control por radio)
Upon battery insertion, the clock will automatically search for the radio time signal. This process may take several minutes. During this time, a signal icon (e.g., ((()))) parpadeará na pantalla.
- For best reception, place the clock near a window and away from electronic devices that may cause interference.
- Once the signal is successfully received, the time will be set automatically, and the signal icon will appear solid.
- If the signal is not received after a few minutes, press the ONDA button on the back of the clock to initiate a manual search.
3. Manual Time Setting (If Radio Control is Unavailable)
- Manteña premido o TEMPO durante aproximadamente 3 segundos ata que os díxitos das horas comecen a parpadear.
- Usa o + or - botóns para axustar a hora.
- Preme o TEMPO de novo para confirmar a hora e pasar ao axuste dos minutos.
- Usa o + or - botóns para axustar os minutos.
- Preme o TEMPO unha vez máis para confirmar e saír do modo de axuste da hora.
Instrucións de funcionamento
1. Configuración da alarma
- Manteña premido o ALARMA durante aproximadamente 3 segundos ata que os díxitos da hora da alarma comecen a parpadear.
- Usa o + or - buttons to adjust the desired alarm hour.
- Preme o ALARMA button again to confirm the hour and move to the alarm minute setting.
- Usa o + or - botóns para axustar os minutos da alarma desexados.
- Preme o ALARMA botón unha vez máis para confirmar e saír do modo de configuración da alarma.
2. Activación/desactivación da alarma
- Prema brevemente o ALARMA button to toggle the alarm on or off.
- When the alarm is active, an alarm icon (e.g., a bell symbol) will appear on the display.
- Cando soe a alarma, prema o botón SNOOZE / LUZ button on top to activate the snooze function. The alarm will sound again after a few minutes.
- Para desactivar a alarma completamente, prema calquera outro botón (por exemplo, TEMPO, ALARMA, +, -) or let it sound for its full duration.
3. Función de retroiluminación
Preme o SNOOZE / LUZ button on the top of the clock to illuminate the display for a few seconds, allowing for easy viewing en condicións de pouca luz.
4. Visualización da temperatura
The clock continuously displays the ambient temperature. The unit of temperature (Celsius or Fahrenheit) may be switchable by a dedicated button or a combination of existing buttons (refer to specific model variations if applicable, otherwise it defaults to Celsius as shown in the image).
Mantemento
Limpeza
- Wipe the clock's exterior with a soft, dry, lint-free cloth.
- Do not use liquid cleaners, aerosol sprays, or abrasive materials, as these can damage the finish or internal components.
Substitución da batería
- When the display becomes dim or the clock functions erratically, it is time to replace the batteries.
- Siga os pasos de instalación da batería descritos na sección "Configuración".
- Ensure proper disposal of old batteries.
Resolución de problemas
| Problema | Causa posible | Solución |
|---|---|---|
| A pantalla está en branco ou escura. | As pilas están agotadas ou están inseridas incorrectamente. | Substitúa as pilas, asegurándose de que a polaridade sexa correcta. |
| A hora é incorrecta. | Poor radio signal reception or manual time not set. | Move the clock to a location with better reception (near a window). Press the ONDA button for manual synchronization. If still incorrect, set the time manually. |
| Non soa a alarma. | A alarma non está activada ou está configurada incorrectamente. | Ensure the alarm icon is visible on the display. Recheck alarm time settings. |
| A función de posposición non funciona. | A alarma foi desactivada en vez de pospoñela. | Asegúrate de premer o botón SNOOZE / LUZ button when the alarm sounds, not other buttons. |
Especificacións
- Modelo: 1882-0
- Marca: Atlanta
- Cor: Branco
- Material: Plástico
- Tipo de visualización: LCD dixital
- Dimensións (L x W x H): 6.5 x 2.1 x 6.5 cm (aproximadamente 2.56 x 0.83 x 2.56 polgadas)
- Peso: 65 gramos (aproximadamente 2.29 onzas)
- Fonte de enerxía: Battery powered (e.g., 2x AAA, not included)
- Características especiais: Temperature Display, Alarm, Radio-Controlled Time, Backlight, Snooze
- Uso previsto: Interior
Garantía e Soporte
Specific warranty information for your Atlanta product may vary by region and retailer. Please refer to the documentation provided at the time of purchase or visit the official Atlanta websitio web para obter información detallada sobre os termos e condicións da garantía.
For technical support or inquiries, please contact your retailer or the manufacturer's customer service department. Contact information can typically be found on the product packaging or the official brand websitio.
Nota: O fabricante non proporciona información sobre a dispoñibilidade de pezas de reposto.