
1. Introdución
Grazas pola compraasing the Sharp R-752IN Microwave Oven. This appliance is designed for efficient and convenient cooking, reheating, and defrosting. Please read this manual thoroughly before operating your new microwave oven to ensure safe and optimal performance. Keep this manual for future reference.
The Sharp R-752IN features an 800W microwave, a 1000W quartz grill, 10 automatic cooking menus, and 3 combination cooking modes. It has a 25-liter capacity and comes with a 315mm glass turntable and a high grill rack.
2. Instrucións de seguridade
Para reducir o risco de incendio, descarga eléctrica, lesións persoais ou exposición excesiva a enerxía de microondas ao usar o electrodoméstico, siga as precaucións de seguridade básicas, incluíndo as seguintes:
- Le todas as instrucións antes de usar o aparello.
- Non intente usar este forno coa porta aberta, xa que isto pode resultar nunha exposición prexudicial á enerxía das microondas.
- Non coloque ningún obxecto entre a cara frontal do forno e a porta nin permita que se acumule terra ou residuos de limpeza nas superficies de selado.
- Non accione o forno se está danado. É particularmente importante que a porta do forno se peche correctamente e que non se danen as seguintes: (1) porta (dobrada), (2) bisagras e pestillos (rotos ou soltos), (3) selos e superficies de selado.
- Só o persoal de servizo cualificado debe axustar ou reparar o forno.
- Non quentes líquidos ou outros alimentos en recipientes selados, xa que poden explotar.
- Do not use metal utensils, foil, or dishes with metallic trim in the microwave mode.
- Garantir unha ventilación adecuada ao redor do aparello.
- Always supervise children when the microwave oven is in use.
For detailed safety information, refer to the complete safety guidelines provided in the printed manual.
3. Produto rematadoview
Familiarize yourself with the components of your Sharp R-752IN microwave oven.
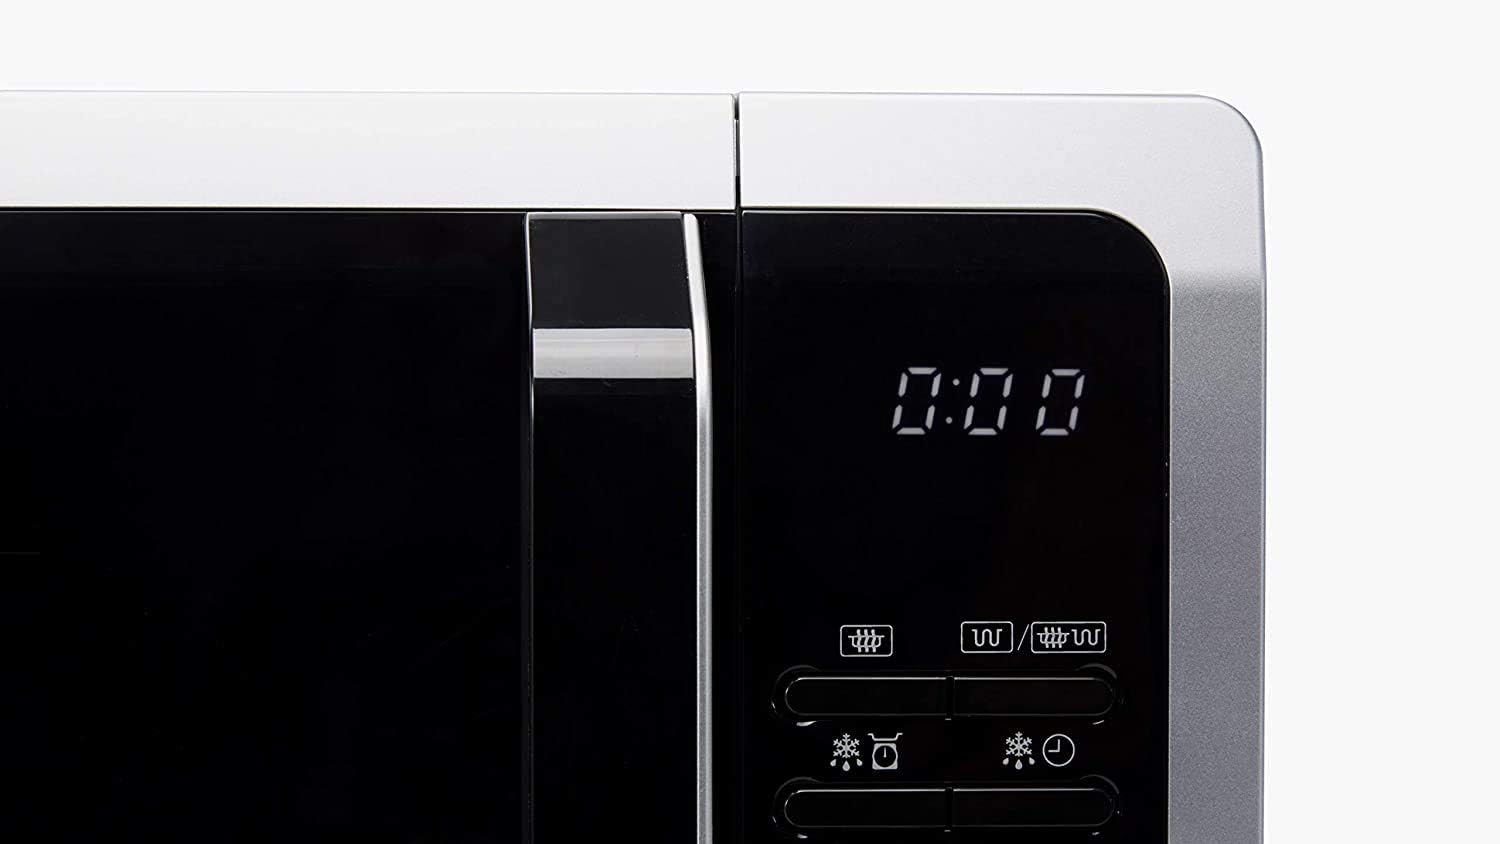
Figura 3.1: Fronte view of the Sharp R-752IN Microwave Oven. This image shows the silver exterior, black door, and the digital display and control panel on the right side.

Figura 3.2: Close-up of the Sharp logo prominently displayed on the upper left corner of the microwave oven door.
Panel de control
The control panel allows you to select cooking functions, set time, and adjust power levels.

Figura 3.3: Close-up of the Sharp R-752IN Microwave Oven control panel, showing the digital display, function buttons for microwave, grill, defrost, auto menu, and the rotary dial for time/weight selection.
- Pantalla dixital: Shows time, power level, and selected functions.
- Botóns de función: For selecting Microwave, Grill, Combination, Defrost, and Auto Menu modes.
- Botón Inicio / Parada: To begin or cancel cooking.
- Dial rotativo: Used to set cooking time, weight for defrost, or select auto menu options.
- +30s Button: Adds 30 seconds of cooking time.
4. Configuración
Desembalaxe
- Retire todos os materiais de embalaxe do interior e do exterior do forno.
- Comprobe se o forno ten algún dano, como amoseduras ou unha porta desalinhada. Non o faga funcionar se está danado.
- Ensure all accessories are present: glass turntable, turntable support, and grill rack.
Colocación
- Coloque o forno sobre unha superficie plana e estable que poida soportar o seu peso e o alimento máis pesado que probablemente se vaia cociñar nel.
- Ensure there is adequate space for ventilation: at least 20 cm (8 inches) above the oven, 10 cm (4 inches) at the rear, and 5 cm (2 inches) on each side. Do not block any ventilation openings.
- Manteña o forno lonxe de fontes de calor e campos magnéticos fortes.
Uso Inicial
- Clean the interior of the oven and the glass turntable with a damp pano.
- Place the turntable support and glass turntable inside the oven.
- Enchufe o cable de alimentación a unha toma eléctrica conectada a terra.
- Set the clock (refer to the 'Operating Instructions' section for details).
5. Instrucións de funcionamento
Cociña básica no microondas
- Coloque os alimentos nun recipiente apto para microondas no prato xiratorio de vidro.
- Pecha a porta do forno de forma segura.
- Press the 'Microwave' button repeatedly to select the desired power level (e.g., 800W, 600W, etc. - 8 levels available).
- Xire o selector rotatorio para axustar o tempo de cocción.
- Prema o botón "Inicio" para comezar a cociñar.
Cociña á prancha
Use the included grill rack for optimal grilling results.
- Place food on the grill rack, then place the rack on the glass turntable.
- Pecha a porta do forno.
- Prema o botón "Grellar".
- Turn the rotary dial to set the grilling time.
- Prema o botón "Inicio".
Cociña combinada
The R-752IN offers 3 combination cooking modes, combining microwave and grill functions for faster and more even cooking.
- Coloque os alimentos nun recipiente axeitado na grella ou no prato xiratorio.
- Press the 'Combi' button repeatedly to select one of the 3 combination modes.
- Xire o selector rotatorio para axustar o tempo de cocción.
- Prema o botón "Inicio".
Menús automáticos
The oven has 10 pre-programmed auto menus for common food items.
- Coloque os alimentos no forno.
- Press the 'Auto Menu' button.
- Turn the rotary dial to select the desired auto menu number.
- Press 'Start'. The oven will automatically set the cooking time and power level.
Función de desconxelación
A función de desconxelación permíteche desconxelar alimentos por tempo ou por peso.
- Coloque os alimentos conxelados nun recipiente apto para microondas.
- Prema o botón "Desconxelar".
- Turn the rotary dial to select either defrost by time or defrost by weight. Adjust the time or weight accordingly.
- Prema o botón "Inicio".
Configuración do reloxo
- In standby mode, press the 'Clock' button (if available, or refer to manual for specific button).
- Turn the rotary dial to set the hour. Press 'Clock' again.
- Turn the rotary dial to set the minutes. Press 'Clock' again to confirm.
Bloqueo infantil
To activate the child lock, press and hold the 'Stop/Cancel' button for 3 seconds. The display will show a lock indicator. To deactivate, repeat the process.
6. Mantemento e Limpeza
Unha limpeza e un mantemento regulares garantirán a lonxevidade e o funcionamento eficiente do seu forno microondas.
- Interior: Wipe the oven cavity after each use with a damp cloth to prevent food splatters from drying. For stubborn stains, use a mild detergent. Do not use abrasive cleaners or scouring pads.
- Exterior: Limpar a superficie exterior cun pano suave eamp pano. Evite a entrada de auga nas aberturas de ventilación.
- Porta e xuntas: Limpe a porta, as xuntas da porta e as pezas adxacentes coidadosamente con adamp pano para eliminar calquera vertedura ou salpicadura.
- Tocadiscos de vidro: O prato xiratorio de vidro e o soporte do prato xiratorio pódense lavar con auga morna e xabón ou no lavalouza. Asegúrate de que estean completamente secos antes de volvelos colocar no forno.
- Parrilla: Wash the grill rack in warm soapy water and dry thoroughly.
Atención:
- Desenchufe sempre o forno antes de limpar.
- Non mergulle o cable de alimentación, a clavija nin o propio aparello en auga ou outros líquidos.
7 Solución de problemas
Se tes algún problema co teu forno microondas, consulta os seguintes problemas e solucións comúns:
| Problema | Causa posible | Solución |
|---|---|---|
| O forno non arranca | Cable de alimentación non conectado; Porta non pechada correctamente; Fusible fundido ou disyuntor saltado. | Asegúrese de que o enchufe estea ben conectado; peche a porta con firmeza; comprobe o fusible da casa ou reinicie o disxuntor. |
| Comida que non se cociña/quenta | Door not closed properly; Cooking time/power level set incorrectly; Food not suitable for microwave. | Ensure door is closed; Adjust time/power; Use microwave-safe dishes. |
| A placa xiratoria non xira | Prato xiratorio non asentado correctamente; Obstrución debaixo do prato xiratorio. | Reposition turntable and support; Remove any obstructions. |
| Ruído inusual durante o funcionamento | Turntable or roller ring not correctly placed; Food container touching oven walls. | Adjust turntable/roller ring; Ensure container is centered and not too large. |
Se o problema persiste despois de probar estas solucións, póñase en contacto co persoal de servizo cualificado.
8. Especificacións
Key technical specifications for the Sharp R-752IN Microwave Oven:

Figura 8.1: Dimensions of the Sharp R-752IN Microwave Oven: 51 cm width, 43 cm depth, 31 cm height.
| Característica | Especificación |
|---|---|
| Marca | Agudo |
| Número de modelo | R-752IN |
| Capacidade | 25 litros |
| Potencia de microondas | 800 W (8 niveis de potencia) |
| Poder da parrilla | 1000 W (Quartz Grill) |
| Cociña combinada | 3 modos |
| Automatic Menus | 10 programas |
| Tipo de instalación | Encimera |
| Cor | Prata |
| Voltage | 230 voltios |
| Consumo de enerxía | 1450 W |
| Material | Plástico |
| Peso do elemento | 14.9 kg |
| Dimensións (ancho x profundo x alto) | 51 cm x 43 cm x 31 cm |
| Características especiais | Programable |
9. Garantía e soporte
Your Sharp R-752IN Microwave Oven is covered by a manufacturer's warranty. Please refer to the warranty card included with your product for specific terms, conditions, and duration.
For technical support, service, or to inquire about replacement parts, please visit the official Sharp website or contact their customer service department. Contact details can typically be found in the original packaging or on the Sharp brand websitio.