Introdución
The MXR M76 Studio Compressor is an analog guitar effect pedal designed to provide precise control over guitar dynamics. This pedal features dedicated controls for Attack, Release, Ratio, Input, and Output, enabling users to fine-tune compression levels from subtle to pronounced. A bright LED gain-reduction status meter offers visual feedback on the compression activity. Built with Constant Headroom Technology (CHT), the M76 ensures clear and transparent audio performance with ample headroom. Its durable, lightweight aluminum housing is designed for seamless integration into any pedalboard setup.

Fronte view of the MXR M76 Studio Compressor pedal, showcasing its control knobs and LED meter.
O que hai na caixa
Your MXR M76 Studio Compressor package includes the following items:
- MXR M76 Studio Compressor Pedal
- Fuente de alimentación de 9 voltios
- 2 cables de conexión
- 6 assorted Dunlop picks

The included 9-volt power supply.

One of the two included patch cables.

The set of six assorted Dunlop guitar picks.
Configuración
Follow these steps to connect your MXR M76 Studio Compressor:
- Conecta a túa guitarra ao ENTRADA jack, typically located on the right side of the pedal.
- Conecta o SAÍDA jack, typically located on the left side of the pedal, to your amplifier or the input of the next effect pedal in your signal chain.
- Connect the included 9-volt power supply to the power input jack, usually found at the top or side of the pedal.
- Ensure all cable connections are secure before powering on your amplifier and engaging the pedal.
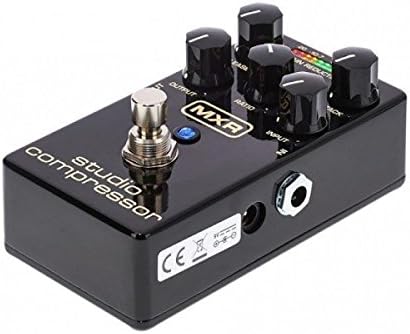
En ángulo view of the pedal, highlighting the input, output, and power connections.
Controis operativos
The MXR M76 Studio Compressor features the following controls for precise dynamic shaping:
- ENTRADA: This knob adjusts the input level of your guitar signal entering the compressor circuit. Proper setting ensures the signal is strong enough to trigger compression without clipping.
- SAÍDA: Controls the overall output volume of the effect. Use this to match the compressed signal level with your bypassed signal or to boost the signal.
- ATAQUE: Determines how quickly the compressor reacts to signals that exceed the set threshold. Faster attack times (lower settings) will compress the initial transient of a note more aggressively, while slower attack times (higher settings) allow more of the initial transient to pass through uncompressed.
- EMISIÓN: Sets the duration for the compressor to return to its uncompressed state after the input signal drops below the threshold. Shorter release times (lower settings) can make the compression more noticeable, while longer release times (higher settings) result in a smoother, more sustained sound.
- RELACIÓN: Defines the amount of compression applied once the signal exceeds the threshold. For example, a ratio of 4:1 means that for every 4dB the input signal goes over the threshold, the output signal will only increase by 1dB. Higher ratios result in more aggressive compression.
- GAIN REDUCTION LED METER: This 10-segment LED display provides a visual indication of the amount of gain reduction being applied in real-time. More illuminated LEDs signify greater compression.

The MXR M76 Studio Compressor with its gain reduction LED meter active, indicating compression.
Mantemento
To ensure optimal performance and longevity of your MXR M76 Studio Compressor, follow these maintenance guidelines:
- Clean the pedal periodically with a soft, dry cloth. Avoid using abrasive cleaners, solvents, or harsh chemicals, as these can damage the finish or internal components.
- Store the pedal in a dry environment, away from extreme temperatures, direct sunlight, and high humidity.
- Disconnect the power supply when the pedal is not in use for extended periods to prevent unnecessary wear and tear.
- Handle the pedal with care to avoid physical damage to the enclosure, knobs, or jacks.
Resolución de problemas
If you encounter any issues with your MXR M76 Studio Compressor, consider the following troubleshooting steps:
- Sen son:
- Check all cable connections (input, output, and power supply) to ensure they are securely plugged in.
- Verify that the 9-volt power supply is correctly connected and functional.
- Ensure the pedal is engaged (footswitch pressed).
- Weak or Distorted Signal:
- Axustar o SAÍDA knob to increase the volume.
- Comproba o ENTRADA knob to ensure the signal is not being excessively attenuated or overdriven.
- Inspect all cables for damage or faulty connections.
- Unwanted Noise (Hum, Hiss):
- Asegúrate de que todos os cables estean en bo estado e debidamente blindados.
- Try isolating the pedal from other effects pedals and power sources to identify if the noise originates from another component in your signal chain.
- Verify that the power supply is providing clean, stable 9V DC power.
- No Compression Effect:
- Verifique que o RELACIÓN, ATAQUE, e LANZAR knobs are set appropriately for the desired compression.
- Asegurar o ENTRADA level is sufficient to trigger compression, as indicated by the Gain Reduction LED Meter.
Especificacións
Key product specifications for the MXR M76 Studio Compressor:
| Característica | Detalle |
|---|---|
| Número de modelo | M76 |
| Peso do elemento | 1 kg |
| Dimensións do produto | 6 x 3 x 3 polgadas (15.24 x 7.62 x 7.62 cm) |
| Tipo de material | Aluminio |
| Fonte de enerxía | Eléctrico |
| Voltage | 9 voltios DC |
| Tipo de conector | Conector de alimentación de 9V CC |
| Formato de sinal | Analóxico |
| True Bypass | Si |
Garantía e Soporte
For detailed warranty information, product registration, and technical support, please visit the official MXR websitio web ou póñase en contacto directamente co seu departamento de atención ao cliente. Recoméndase conservar o recibo de compra como proba de compra para calquera reclamación de garantía.