
1. Introdución
Grazas pola compraasing the CONTEC SolarView Compact SV-CPT-MC310. This device is designed for efficient monitoring and data logging of solar power generation. It integrates essential functions such as power measurement, data display, and storage into a compact form factor. This manual provides detailed instructions for the proper setup, operation, and maintenance of your device.
Lea este manual detidamente antes de usar o produto para garantir un rendemento seguro e óptimo. Garde este manual para futuras consultas.
2. Produto rematadoview
The CONTEC SolarView Compact SV-CPT-MC310 is a versatile device for solar power monitoring. Its slim design houses comprehensive features including a screen display, network connectivity, RS-485 communication, and an SD card slot for data storage.
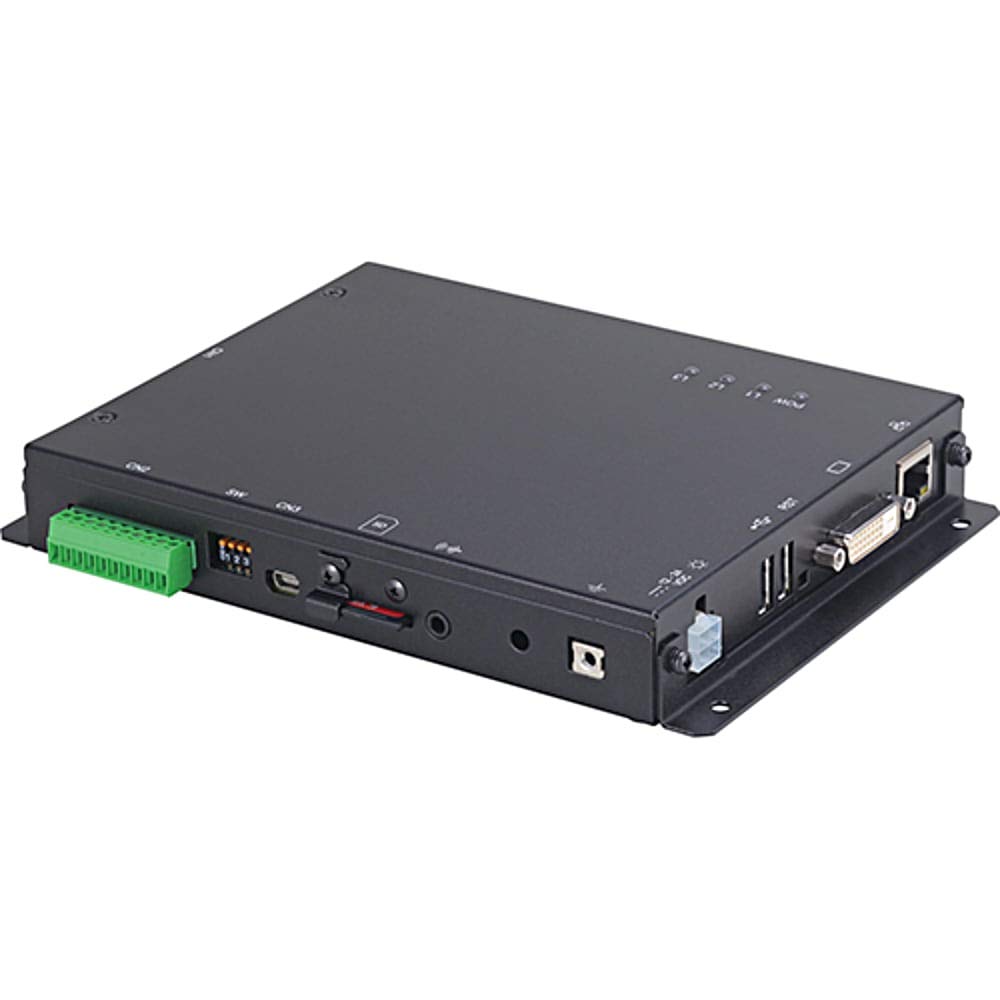
Figura 1: Fronte view of the CONTEC SolarView Compact SV-CPT-MC310. This image illustrates the compact size and the integrated display panel of the device, highlighting its user-friendly interface for monitoring solar power data.
3. Información de seguridade
Observe sempre as seguintes precaucións de seguridade para evitar lesións e danos no dispositivo:
- Ensure the device is installed by qualified personnel.
- Non expoña o dispositivo a temperaturas extremas, humidade ou luz solar directa.
- Desconecte a alimentación antes de realizar calquera procedemento de mantemento ou instalación.
- Use only specified power adapters and cables.
- Do not attempt to open or repair the device yourself. Refer to authorized service personnel.
4. Configuración
4.1 Desembalaxe e inspección
Carefully remove the device from its packaging. Inspect for any signs of damage during transit. If any damage is found, contact your supplier immediately.
4.2 Montaxe do dispositivo
O SolarView Compact SV-CPT-MC310 is designed for indoor installation. Choose a location that is dry, well-ventilated, and free from direct sunlight or excessive heat sources. Ensure adequate space around the device for ventilation and cable connections.
- Identify a suitable mounting surface.
- Secure the device using appropriate screws or mounting brackets (not included).
4.3 Conexións eléctricas
Connect the power supply and communication cables as follows:
- Entrada de enerxía: Connect the DC power adapter to the device's power input port. Ensure the power source matches the device's voltage requisitos.
- Comunicación RS-485: Connect the RS-485 cable to the designated port for communication with other devices or systems.
- Rede (Ethernet): For network connectivity, plug an Ethernet cable into the RJ45 port.
- Tarxeta SD: Insert a compatible SD card into the SD card slot for data logging. Ensure the card is correctly oriented.
Warning: Ensure all connections are secure before applying power.
5. Instrucións de funcionamento
5.1 Acendido e arranque inicial
Once all connections are made, apply power to the device. The device will perform a self-test and the display will show the boot-up sequence. After successful boot, the main monitoring screen will appear.
5.2 Navegación pola interface de usuario
The device features an integrated display and control buttons. Use the navigation buttons to scroll through menus and select options.
- Botóns arriba / abaixo: Navigate through menu items or adjust values.
- Botón Intro: Confirma a selección ou accede a un submenú.
- Botón Atrás/Saída: Volver á pantalla anterior ou saír dun menú.
5.3 Monitoring Solar Power Data
The main screen typically displays real-time data such as:
- Current Power Generation (W)
- Daily Energy Yield (Wh)
- Total Energy Yield (kWh)
- Estado do sistema
Refer to the on-screen menu for detailed historical data and system settings.
5.4 Rexistro e exportación de datos
The device automatically logs data to the inserted SD card. To access or export data:
- Navigate to the "Data Management" or "Log" menu.
- Select the desired time range or data type.
- Choose the "Export" option (if available) to transfer data via network or remove the SD card and access data on a computer.
6. Mantemento
6.1 Limpeza
Keep the device clean and free from dust. Use a soft, dry cloth to wipe the exterior. Do not use liquid cleaners or abrasive materials.
6.2 Actualizacións de firmware
Periodically check the CONTEC website for firmware updates. Follow the provided instructions carefully for any update procedures to ensure optimal performance and access to new features.
6.3 Xestión de tarxetas SD
Regularly back up data from the SD card. Consider replacing the SD card periodically, especially if it shows signs of wear or data corruption, to ensure reliable data logging.
7 Solución de problemas
| Problema | Causa posible | Solución |
|---|---|---|
| O dispositivo non se acende. | Sen fonte de alimentación; adaptador de corrente defectuoso; conexión solta. | Check power cable connection. Ensure power adapter is functional. Verify power outlet. |
| No data displayed. | Sensor not connected; communication error; incorrect settings. | Verify sensor connections. Check RS-485 or network settings. Restart the device. |
| Erro na tarxeta SD. | SD card not inserted correctly; incompatible card; corrupted card. | Reinsert SD card. Try a different compatible SD card. Format the SD card (data will be lost). |
| Fallo da conexión de rede. | Ethernet cable disconnected; incorrect network settings; router issue. | Check Ethernet cable. Verify network settings on the device. Restart router/modem. |
If the problem persists after attempting these solutions, please contact CONTEC technical support.
8. Especificacións
| Característica | Detalle |
|---|---|
| Número de modelo | SV-CPT-MC310 |
| Dimensións (L x W x H) | 14 x 17 x 3 cm |
| Peso | 650 g |
| Interfaces de comunicación | Network (Ethernet), RS-485 |
| Almacenamento de datos | Tarxeta SD |
| Fabricante | CONTEC |
9. Garantía e soporte
9.1 Información da garantía
CONTEC warrants this product against defects in materials and workmanship for a period specified at the time of purchase. Please retain your proof of purchase. The warranty does not cover damage caused by improper installation, misuse, unauthorized repairs, or natural disasters.
For detailed warranty terms and conditions, please refer to the warranty card included with your product or visit the official CONTEC websitio.
9.2 Soporte técnico
If you require technical assistance or have questions regarding the operation of your SolarView Compact SV-CPT-MC310, please contact CONTEC technical support through their official websitio web ou a información de contacto proporcionada na documentación do produto.
When contacting support, please have your model number (SV-CPT-MC310) and a detailed description of the issue ready.