
1. Introdución
Thank you for choosing the Rampage SMX-R12 Hawker Gaming Mouse. This manual provides detailed instructions for setting up, operating, and maintaining your new gaming mouse. The SMX-R12 Hawker is designed for precision and comfort, featuring an advanced optical sensor, adjustable DPI settings, and multiple programmable buttons to enhance your gaming experience.
2. Produto rematadoview
Familiarize yourself with the components of your Rampage SMX-R12 Hawker Gaming Mouse:
- Botón esquerdo para premer: Función de clic principal estándar.
- Botón dereito do rato: Función de clic secundario estándar.
- Roda de desprazamento: For scrolling and can also function as a middle click button.
- Botóns de axuste de DPI: Buttons to cycle through different DPI sensitivity levels.
- Botóns de avance/retroceso: Side-mounted buttons for navigation or custom functions.
- Sensor óptico: Located on the bottom, provides high-resolution tracking.
- Interruptor On/Off: Located on the bottom, to power the mouse on or off.
- Porto de carga micro USB: Located at the front, for charging the internal battery.
- Receptor USB: Small dongle for wireless connectivity, often stored in a compartment on the mouse's bottom.

Figura 2.1: Arriba view of the Rampage SMX-R12 Hawker Gaming Mouse, showing the left/right click buttons, scroll wheel, and DPI adjustment buttons.

Figura 2.2: Lateral view of the Rampage SMX-R12 Hawker Gaming Mouse, highlighting the ergonomic design and side buttons.

Figura 2.3: Abaixo view of the Rampage SMX-R12 Hawker Gaming Mouse, showing the optical sensor, On/Off switch, and USB receiver storage compartment.
3. Configuración
- Desembalar o rato: Carefully remove the mouse and its accessories from the packaging. Ensure you have the Rampage SMX-R12 Hawker mouse, the USB wireless receiver, and the micro USB charging cable.
- Localiza o receptor USB: The small USB wireless receiver is typically stored in a compartment on the bottom of the mouse for safe keeping during transport. Remove it from its slot.
- Conecte o receptor USB: Plug the USB wireless receiver into an available USB port on your computer. Your operating system should automatically detect and install the necessary drivers.
- Acender o rato: Locate the On/Off switch on the bottom of the mouse and slide it to the 'On' position. The mouse should now connect wirelessly to your computer.
- Initial Charge (Recommended): For optimal performance, it is recommended to fully charge the mouse before first use. Connect the micro USB charging cable to the mouse's charging port and the other end to a USB power source (e.g., computer USB port, USB wall adapter).
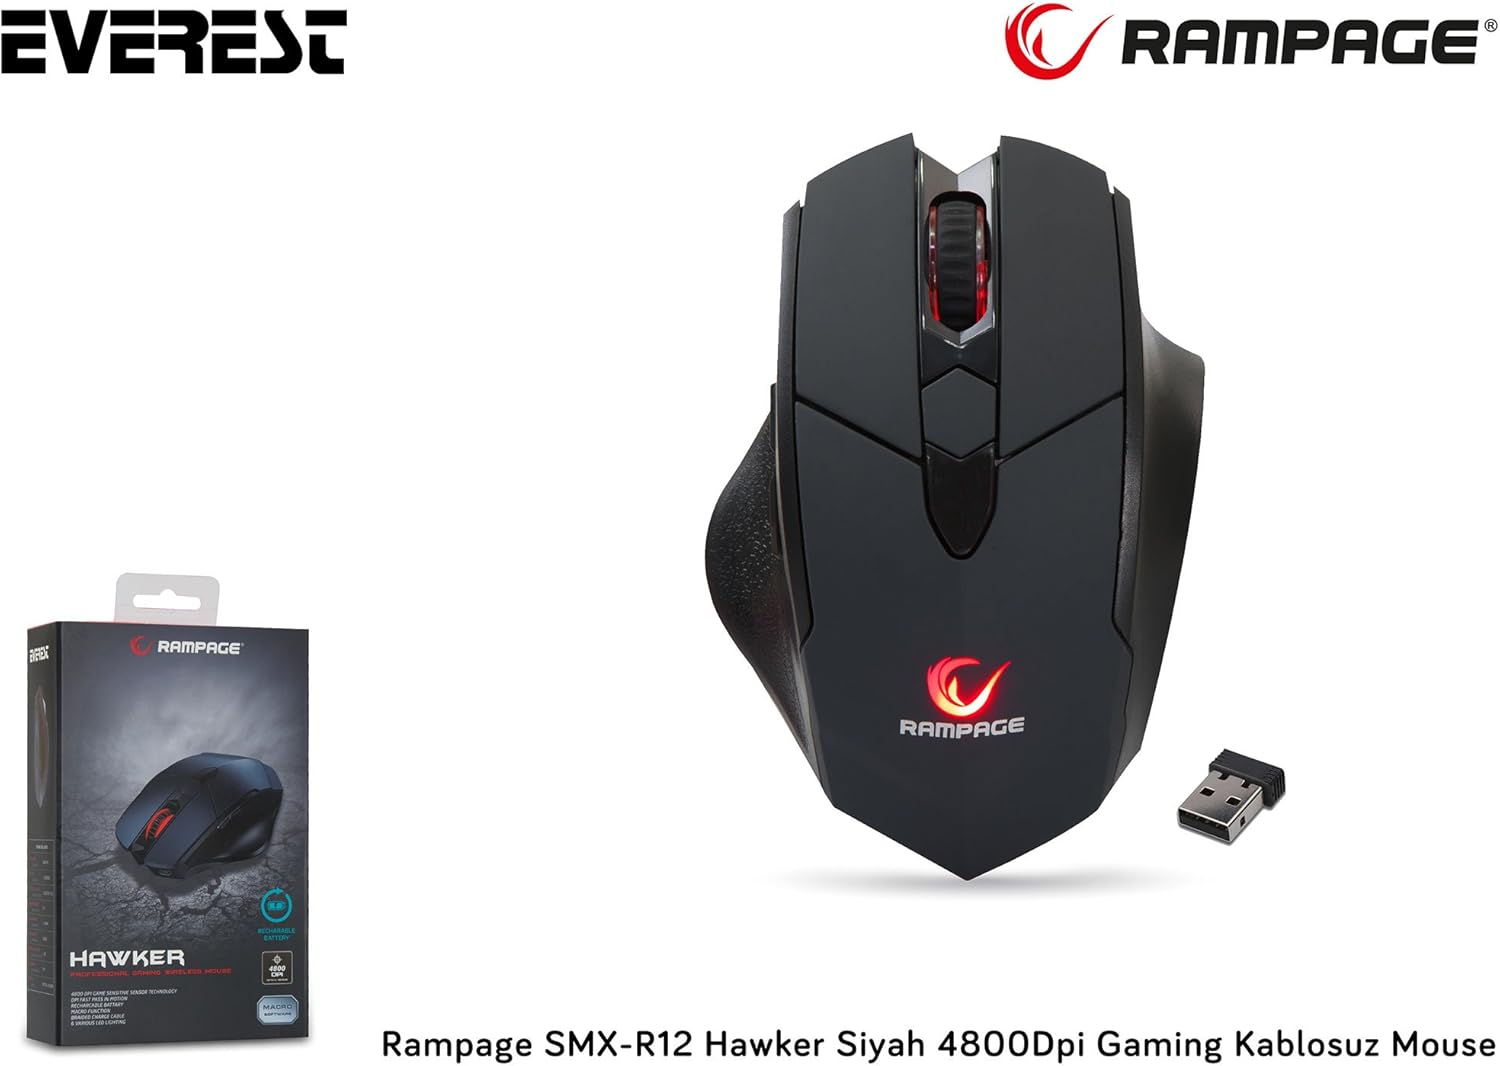
Figure 3.1: The Rampage SMX-R12 Hawker Gaming Mouse with its USB receiver and charging cable.
4. Instrucións de funcionamento
Once connected, your Rampage SMX-R12 Hawker mouse is ready for use. Here are its primary functions:
- Navegación básica: Move the mouse across a flat surface to control the cursor on your screen.
- Premendo: Use the left and right click buttons for primary and secondary actions.
- Desprazamento: Rotate the scroll wheel up or down to navigate through documents and web pages. Press the scroll wheel for a middle-click function.
- Botóns laterais: The side buttons typically function as 'Forward' and 'Backward' in web navegadores e file explorers. These buttons may be programmable through specific software (if available from the manufacturer) for custom in-game actions.
5. Configuración de DPI
O Rampage SMX-R12 Hawker features an optical sensor with adjustable DPI (Dots Per Inch) settings, allowing you to change the mouse's sensitivity on the fly. Higher DPI means the cursor moves further with less physical mouse movement, ideal for fast-paced gaming. Lower DPI provides more precise control, suitable for tasks requiring accuracy.
Use the dedicated DPI adjustment buttons (usually located behind the scroll wheel) to cycle through the available DPI levels. The mouse typically has visual indicators (e.g., LED color changes) to show the current DPI setting, though specific details may vary.
The mouse supports a maximum DPI of 4800, offering a wide range of sensitivity options.
6. Cargar o rato
O Rampage SMX-R12 Hawker Gaming Mouse is equipped with a rechargeable internal battery, eliminating the need for disposable batteries. When the battery level is low, the mouse's indicator light may flash or change color.
- Conecte o cable: Insert the micro USB end of the charging cable into the charging port located at the front of the mouse.
- Conectar á enerxía: Plug the standard USB-A end of the charging cable into a powered USB port on your computer or a USB wall adapter.
- Indicador de carga: The mouse will typically display an LED indicator to show that it is charging. This light may turn solid when fully charged.
- Tempo de carga: A full charge usually takes a few hours. You can continue to use the mouse while it is charging.

Figure 6.1: The micro USB charging port located at the front of the Rampage SMX-R12 Hawker Gaming Mouse.
7. Mantemento
Para garantir a lonxevidade e o rendemento óptimo do rato, siga estas pautas de mantemento:
- Limpeza: Usa un pano suave e seco para limpar a superficie do rato. Para a sucidade persistente, limpa lixeiramenteampEnxágüe o pano con auga. Evite o uso de produtos químicos agresivos ou materiais abrasivos.
- Limpeza de sensores: Occasionally, dust or debris may accumulate around the optical sensor. Use a cotton swab or compressed air to gently clean the sensor area.
- Coidado da batería: To prolong battery life, avoid fully discharging the mouse frequently. Charge it when the low battery indicator appears.
- Almacenamento: When not in use, especially during travel, store the USB receiver in its designated compartment on the mouse's bottom to prevent loss.
8 Solución de problemas
If you encounter issues with your Rampage SMX-R12 Hawker mouse, refer to the following common solutions:
| Problema | Posible Solución |
|---|---|
| O rato non responde |
|
| Cursor errático ou saltativo |
|
| O rato non carga |
|
| Os botóns laterais non funcionan |
|
9. Especificacións
| Característica | Detalle |
|---|---|
| Marca | Rampidade |
| Modelo | SMX-R12 Hawker |
| Tipo de sensor | Óptica |
| DPI (puntos por polgada) | Ata 4800 DPI |
| Número de botóns | 7 (Left, Right, Scroll Click, 2 DPI, 2 Side) |
| Conectividade | Sen fíos de 2.4 GHz (a través dun receptor USB) |
| Tipo de batería | Rechargeable (500mAh capacity) |
| Porto de carga | Micro USB |
| Lonxitude do cable de carga | 1.7 metros |
| Dimensións (L x W x H) | 12.5 x 4.2 x 8.3 cm |
| Peso | 270 gramos |
| Compatibilidade do sistema operativo | Windows, macOS, ChromeOS (general compatibility) |
10. Garantía e soporte
Rampage products are designed for quality and reliability. For information regarding warranty coverage, technical support, or service, please refer to the warranty card included with your product or visit the official Rampidade websitio. Garda o comprobante de compra para calquera reclamación de garantía.
For further assistance, please contact Rampage customer support through their official channels.