1. Introdución
Thank you for choosing the Pureline Pure Pro XL PL1502 Above Ground Pool Pump. This manual provides essential information for the safe installation, operation, and maintenance of your new pool pump. Please read all instructions carefully before installation and use to ensure proper function and longevity of the product.

Image: The Pureline Pure Pro XL PL1502 pump, showing its compact design and key components.
2. Información de seguridade
AVISO: O incumprimento destas instrucións pode provocar lesións graves ou a morte.
- Seguridade eléctrica: All electrical work must be performed by a qualified electrician and comply with local and national electrical codes.
- Risco de descarga eléctrica: Do not run the pump dry. Do not use an extension cord.
- Colocación: Install the pump at least 10 feet from the inside walls of a pool.
- Tipo de piscina: This pump is designed for use with permanently-installed pools only. Do not use with storable pools.
- Tipo de carcasa: Enclosure Type 3.
- Desconecte sempre a alimentación antes de realizar o mantemento da bomba.
- Manteña os nenos lonxe da bomba e das conexións eléctricas.
- Asegurar a posta a terra adecuada para evitar riscos eléctricos.
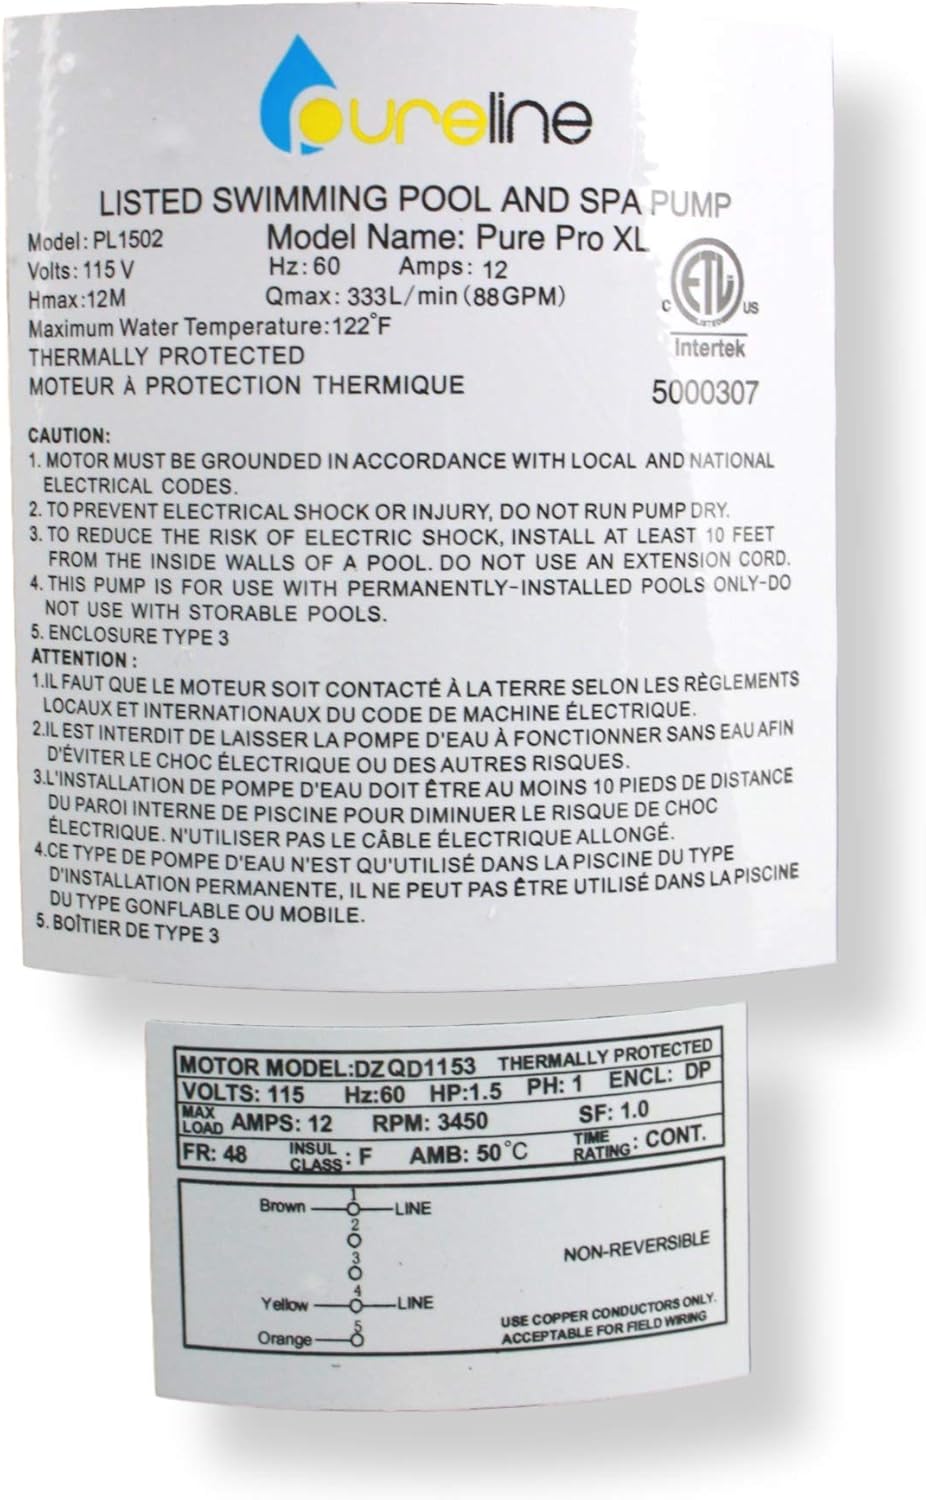
Image: Product label displaying electrical specifications and critical safety warnings in English and French.
3. Características do produto
- Corrosion-Proof Construction: All components are molded from reinforced thermoplastic for durability and long life.
- Fácil mantemento: Features a transparent strainer basket cover for easy monitoring and a drain plug for simple winterization.
- Integrated Cord: Includes a 115V, 6-foot cord with a 3-prong plug.
- Funcionamento silencioso: Designed for quiet and efficient performance.
- Aplicación versátil: Suitable for above-ground pools of all types, including those with in-floor cleaning systems, solar heating systems, and water features.

Imaxe: Detallada view of the pump highlighting the extra-large clear lid, 1.5" ports, and 6' cord.
4. Especificacións
| Característica | Especificación |
|---|---|
| Número de modelo | PL1502 |
| Potencia (HP) | 1.5 HP |
| Velocidade | Velocidade única |
| Voltage | 115 voltios |
| Ampera | 12 Amps |
| Tamaño do porto | 1-1/2 polgadas |
| Tipo de cordón | Enchufe de 3 puntas |
| Lonxitude do cordón | 6 pés |
| Caudal máximo | 65 galóns por minuto (GPM) |
| Altura máxima de elevación | 6 pés |
| Dimensións do produto (L x W x H) | 9.5" x 6.5" x 6.7" |
| Peso do elemento | 26 libras |
| Material | Reinforced Thermoplastic |

Image: Diagram showing the dimensions of the Pureline Pure Pro XL PL1502 pump.
5. Configuración e instalación
Proper installation is crucial for the pump's performance and safety. Refer to local and national electrical and plumbing codes.
- Localización: Place the pump on a firm, level surface, at least 10 feet from the pool's edge. Ensure adequate ventilation and protection from direct sunlight and harsh weather.
- Montaxe: Secure the pump to the mounting surface to prevent movement and vibration.
- Conexións de fontanería: Connect the pump to your pool's filtration system using 1-1/2 inch plumbing. Ensure all connections are tight to prevent leaks. The top discharge design is compatible with most filters.
- Conexión eléctrica: Connect the 3-prong plug to a properly grounded 115V electrical outlet. Non use cables de extensión. Ensure the circuit is protected by a Ground Fault Circuit Interrupter (GFCI).
- Cebado da bomba: Before starting, ensure the pump is filled with water. Remove the transparent strainer basket cover, fill the basket with water, and replace the cover securely.
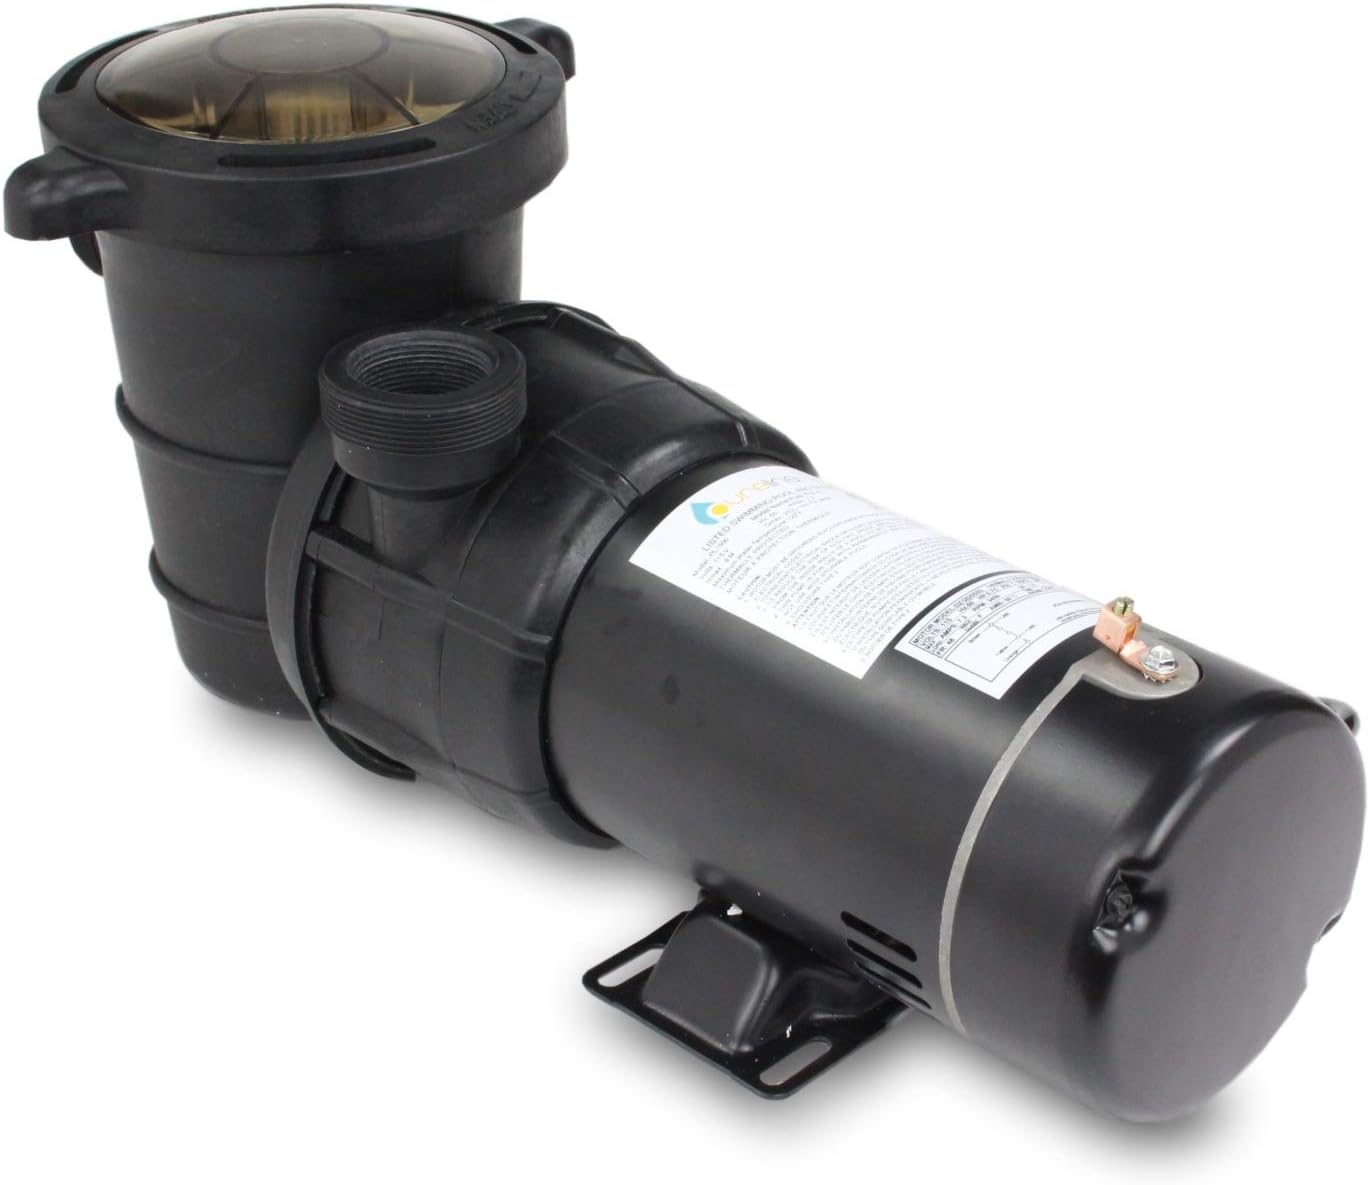
Imaxe: Lateral view of the Pureline Pure Pro XL PL1502 pump, showing the motor and wet end assembly.
6. Instrucións de funcionamento
Unha vez instalada e preparada, o funcionamento da bomba é sinxelo.
- Posta en marcha inicial: After priming, turn on the power to the pump. The pump should start drawing water and circulating it through the filter system.
- Seguimento: Observe the transparent strainer basket cover to ensure water flow and check for air bubbles, which may indicate a leak in the suction line.
- Tempo de execución: The optimal run time for your pool pump depends on pool size, usage, and environmental factors. Consult your pool professional or local guidelines for recommended daily run times to ensure proper filtration.
- Apagado: To turn off the pump, simply disconnect power at the switch or circuit breaker.
7. Mantemento
Regular maintenance ensures efficient operation and extends the life of your pump.
- Limpeza da cesta do coador: The transparent strainer basket cover allows you to see when the basket needs cleaning. Turn off the pump, remove the cover, empty debris from the basket, and rinse it. Replace the basket and cover securely, ensuring the O-ring is properly seated.
- Invernización: Before freezing temperatures arrive, drain the pump completely. Use the drain plug for easy water removal. Store the pump in a dry, protected area if possible, or ensure it is fully drained and protected from freezing.
- Inspección do selo: Periodically inspect the pump seals for any signs of wear or leaks. Replace worn seals promptly to prevent damage to the motor.
- Limpeza xeral: Keep the exterior of the pump clean and free of debris to ensure proper ventilation.
8 Solución de problemas
Se tes problemas coa bomba, consulta os seguintes pasos habituais para a resolución de problemas:
| Problema | Causa posible | Solución |
|---|---|---|
| A bomba non arranca | No power, tripped breaker/GFCI, motor issue | Check power supply, reset breaker/GFCI. If motor hums but doesn't start, consult a technician. |
| A bomba funciona pero non hai fluxo de auga | Pump not primed, clogged strainer basket, air leak in suction line | Re-prime the pump. Clean strainer basket. Check all suction line connections for leaks. |
| Baixo caudal de auga | Clogged basket, dirty filter, partially closed valve | Clean strainer basket. Backwash or clean filter. Ensure all valves are fully open. |
| A bomba é ruidosa | Air leak, cavitation, worn bearings | Check for air leaks in suction line. Ensure pump is adequately primed. If noise persists, motor bearings may be worn; consult a professional. |
| Fuga de auga da bomba | Loose connections, worn shaft seal, cracked housing | Tighten plumbing connections. Inspect and replace shaft seal if worn. If housing is cracked, pump replacement may be necessary. |
9. Garantía e soporte
For warranty information or technical support, please contact Pureline customer service. Keep your purchase receipt and model number (PL1502) handy when contacting support.
Fabricante: Pureline
For further assistance, visit the official Pureline websitio web ou póñase en contacto cos seus canais de atención ao cliente.