
Introdución
Thank you for choosing the Activa Mastercook CALIFORNIA Gas Grill. This manual provides essential information for the safe assembly, operation, maintenance, and troubleshooting of your new gas grill. Please read these instructions carefully before using the appliance and retain them for future reference.
The Activa Mastercook CALIFORNIA Gas Grill is designed for outdoor use, offering a convenient and efficient way to prepare grilled dishes. It features a robust design with three main burners and a side burner for versatile cooking, along with an integrated thermometer for optimal temperature control and wheels for easy mobility.

Imaxe: Fronte view of the Activa Mastercook CALIFORNIA Gas Grill with the lid and cabinet doors open, showcasing the cooking grates, side burner, and internal storage.
Información de seguridade
AVISO: O incumprimento destas instrucións de seguridade podería provocar lesións graves ou a morte.
- This grill is for outdoor use only. Do not operate indoors or in enclosed spaces.
- Lea todas as instrucións antes da montaxe e uso.
- Manteña os nenos e as mascotas lonxe da grella en todo momento.
- Non almacene nin use gasolina ou outros líquidos ou vapores inflamables nas proximidades deste ou de calquera outro aparello.
- Always ensure proper ventilation.
- Check for gas leaks before each use. Use a soapy water solution; never use an open flame.
- Non deixe a grella sen vixilancia mentres estea en uso.
- Ensure the gas cylinder is stored upright and secured.
- Use luvas de protección ao manipular compoñentes quentes.
- Keep the area around the grill clear and free from combustible materials.
Contido do paquete
Before beginning assembly, ensure all parts are present and undamaged. The main components included with your Activa Mastercook CALIFORNIA Gas Grill are:
- Gas Grill Unit (main body with burners and side burner)
- Cast Iron Grate (50x37 cm)
- Thermometer (integrated into the lid)
- Burner Covers / Heat Diffusers
- Baldas Laterais
- Rodas para mobilidade
- Assembly Hardware and Tools (may vary)
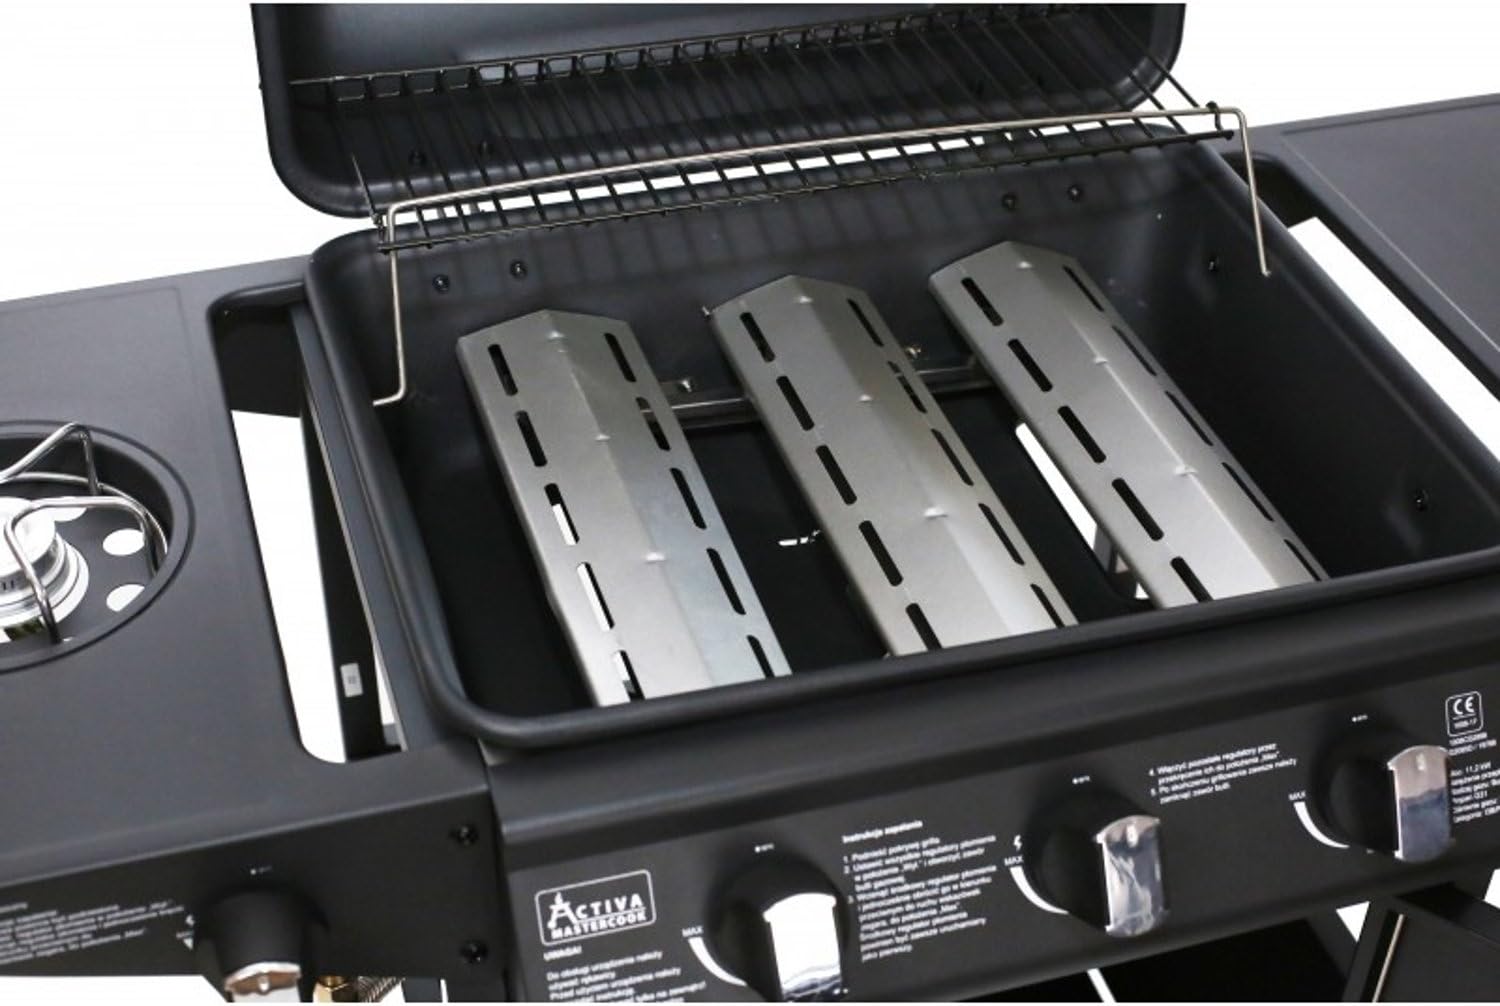
Imaxe: Interior view of the grill, highlighting the cast iron cooking grates and the stainless steel burner covers.
Configuración e montaxe
Assembly is required for this gas grill. Follow the detailed instructions provided in the separate assembly manual for step-by-step guidance. Ensure all connections are secure and leak-free before first use.
Pasos clave de montaxe:
- Desembalaxe: Retire coidadosamente todos os compoñentes da embalaxe.
- Montaxe base: Assemble the main frame and attach the wheels.
- Instalación do armario: Mount the cabinet panels and doors.
- Colocación do corpo da grella: Secure the main grill body onto the assembled base.
- Side Shelves and Side Burner: Attach the side shelves and connect the side burner gas line.
- Compoñentes internos: Place burner covers and cooking grates inside the grill.
- Conexión de gas: Connect the gas regulator and hose to the grill's inlet and to a suitable gas cylinder (not included). Ensure the connection is tight.
- Proba de fugas: Perform a leak test on all gas connections using a soapy water solution. Bubbles indicate a leak. Tighten connections or replace parts as necessary.

Imaxe: Detallada view of the control panel with burner knobs and the integrated side burner, illustrating the components involved in gas connection and operation.
Instrucións de funcionamento
Antes do primeiro uso:
Burn off any manufacturing residues by operating the grill on high for 15-20 minutes with the lid closed. Allow to cool completely before cleaning.
Acendendo os queimadores principais:
- Asegúrese de que a válvula da botella de gas estea completamente aberta.
- Abra a tapa da grella.
- Push and turn one main burner control knob to the ALTO posición.
- Press the electronic igniter button (if available) or use a long match/lighter through the lighting hole.
- Once lit, release the control knob.
- If the burner does not light within 5 seconds, turn the knob to DESACTIVADO, wait 5 minutes for gas to dissipate, and repeat the process.
- Repita para outros queimadores principais segundo sexa necesario.
- Adjust heat by turning the control knobs between BAIXO e ALTO.
Lighting the Side Burner:
- Abra a tapa do queimador lateral.
- Push and turn the side burner control knob to the ALTO posición.
- Press the electronic igniter button or use a long match/lighter.
- Once lit, release the control knob.
- Adjust heat as required.

Imaxe: Detallada view of the side burner, ready for use with a pot or pan.
Shutting Down the Grill:
- Turn all burner control knobs to the DESACTIVADO posición.
- Peche completamente a válvula da botella de gas.
- Allow the grill to cool down completely before cleaning or covering.
Mantemento
Unha limpeza e un mantemento regulares prolongarán a vida útil da súa grella e garantirán un funcionamento seguro.
Cleaning the Cooking Grates:
- After each use, while the grates are still warm, brush off food residue with a grill brush.
- For deeper cleaning, remove the grates once cooled and wash with warm soapy water. Rinse thoroughly and dry.
Cleaning Burner Covers and Burners:
- Periodically remove burner covers and clean off any accumulated grease or food particles.
- Inspect burner ports for blockages. Use a wire brush or paper clip to clear any debris.

Image: Close-up of the grill interior, showing the burner covers and the igniter mechanism, which require regular cleaning.
Xestión de graxas:
- Regularly check and empty the grease tray/cup located beneath the grill.
- Clean the grease tray with warm soapy water.

Image: The grease collection cup, designed to catch drippings, shown hanging below the grill body.
Limpeza exterior:
- Limpe as superficies exteriores cun damp pano e deterxente suave.
- Evita os produtos de limpeza abrasivos que poidan danar o acabado.
Almacenamento:
- When not in use, store the grill in a dry, protected area.
- Disconnect the gas cylinder and store it outdoors in a well-ventilated area, away from direct sunlight and heat sources.
- Use a grill cover to protect the appliance from weather elements.

Image: The Activa Mastercook CALIFORNIA Gas Grill with its lid and cabinet doors closed, demonstrating its compact form for storage.
Resolución de problemas
If you encounter issues with your grill, refer to the following common problems and solutions:
| Problema | Causa posible | Solución |
|---|---|---|
| O queimador non se acende |
|
|
| Low flame, uneven heat |
|
|
| Cheiro a gas |
|
|
Se os problemas persisten despois de intentar estas solucións, póñase en contacto co servizo de atención ao cliente.
Especificacións
| Marca | ACTIVA |
| Nome do modelo | CALIFORNIA |
| Número de modelo (ASIN) | B07CC42VMQ |
| Tipo de combustible | Gas |
| Queimadores principais | 3 x Stainless Steel Cone Burners (2.9 kW each) |
| Queimador lateral | 1 x Side Burner (2.5 kW) |
| Cooking Grate Material | Ferro fundido |
| Cooking Grate Dimensions | 50 x 37 cm |
| Material de construción | Durable steel sheet (painted with high-temperature varnish), Stainless Steel |
| Cor | Negro |
| Características especiais | Integrated Thermometer, Wheels for mobility |
| Requírese montaxe | Si |
Garantía e Soporte
Information regarding specific warranty terms and conditions for the Activa Mastercook CALIFORNIA Gas Grill was not provided in the product data. Please refer to the documentation included with your purchase or contact Activa customer service directly for warranty details and support inquiries.
For spare parts availability, the provided information states "Information indisponible sur les pièces détachées". Please contact the manufacturer or your retailer for assistance with spare parts.