
1. Introdución
This instruction manual provides essential information for the installation, operation, and maintenance of the Hikvision DS-7604NI-K1/4P 4-Channel 4K PoE Network Video Recorder (NVR). Please read this manual thoroughly before using the product to ensure correct and safe operation. Keep this manual for future reference.
2. Información de seguridade
Observe as seguintes precaucións de seguridade para evitar lesións ou danos no dispositivo:
- Fonte de alimentación: Use só o adaptador de corrente especificado para este dispositivo. Asegúrese de que o voltaxe da correntetage is stable and meets the device's requirements.
- Ventilación: Do not block ventilation openings. Ensure proper airflow to prevent overheating.
- Ambiente: Avoid exposing the device to extreme temperatures, humidity, dust, or corrosive environments. Do not place heavy objects on the device.
- Instalación: Install the device on a stable surface. Avoid strong vibrations or impacts.
- Servizo: Non intente desmontar nin modificar o dispositivo. Encargue calquera mantemento a persoal cualificado.
3. Produto rematadoview
The Hikvision DS-7604NI-K1/4P is a 4-channel Network Video Recorder designed for surveillance systems. It supports up to 4K resolution for live view, recording, and playback, and features Power-over-Ethernet (PoE) interfaces for direct connection and power supply to compatible IP cameras.
3.1 Contido do paquete
- Unidade NVR Hikvision DS-7604NI-K1/4P
- Adaptador de alimentación
- Rato USB
- Tornillos para a instalación do disco duro
- Guía de inicio rápido
3.2 Panel frontal
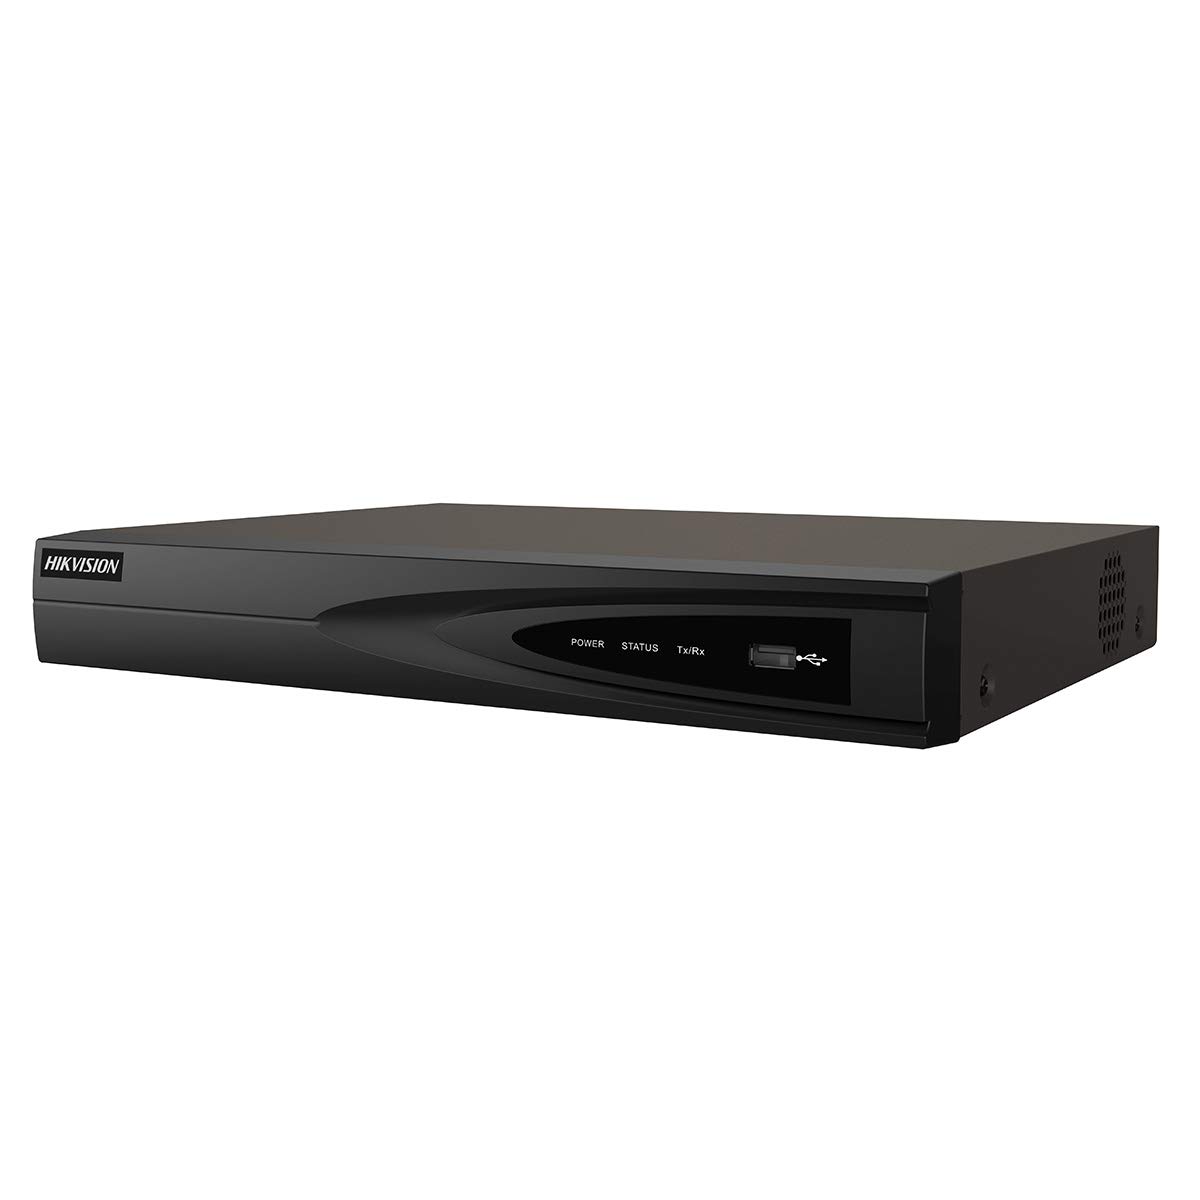
Imaxe 1: Fronte view of the Hikvision DS-7604NI-K1/4P NVR. This image displays the front panel of the NVR, typically featuring status indicator lights and a USB port for peripheral connections.
3.3 Panel posterior
O panel traseiro inclúe varios portos para a conectividade:
- PoE Ports (x4): For connecting IP cameras and providing power.
- Porto LAN: For network connection to a router or switch.
- Saída HDMI: For connecting to a monitor or TV for high-definition video output.
- Saída VGA: For connecting to a monitor for video output.
- USB Ports (x2 total, typically one front, one rear): For mouse, USB drive, or other peripherals.
- Entrada de son (RCA): For connecting an external audio source.
- Entrada de enerxía: Para conectar o adaptador de alimentación.
4. Configuración
4.1 Instalación do disco duro (opcional)
The NVR supports one internal SATA hard drive for video storage (up to 6 TB). If a hard drive is not pre-installed, follow these steps:
- Desenrosque e retire a tapa superior do NVR.
- Conecte o cable de datos SATA e o cable de alimentación ao disco duro.
- Align the hard drive with the mounting holes and secure it with the provided screws.
- Replace the NVR's top cover and secure it with screws.
4.2 Conexión de periféricos
- Monitor: Conecte un monitor ao porto de saída HDMI ou VGA do NVR.
- Rato: Conecte o rato USB a un porto USB do NVR.
- Rede: Conecta o porto LAN do NVR ao teu enrutador ou conmutador de rede mediante un cable Ethernet.
- Cámaras: Connect IP cameras to the NVR's PoE ports. The NVR will automatically power and detect compatible Hikvision PoE cameras.
4.3 Acendido e configuración inicial
- Connect the power adapter to the NVR's power input and then to a power outlet.
- The NVR will power on automatically.
- Upon first boot, the NVR will guide you through an initialization wizard. Follow the on-screen prompts to set up a strong password, network settings, and hard drive formatting (if applicable).
- Ensure the hard drive is formatted before recording can begin.
5. Funcionamento
5.1 En directo View
After initial setup, the NVR will display the live video feed from connected cameras on the monitor. You can switch between single-camera view e grella multicámara view usando os controis en pantalla ou o rato.
5.2 Gravación
O NVR admite varios modos de gravación:
- Gravación continua: Grava vídeo constantemente.
- Gravación de detección de movemento: Records only when motion is detected in the camera's view.
- Gravación programada: Rexistros baseados nunha programación predefinida.
Configure recording settings via the NVR's menu interface (typically accessible by right-clicking on the live view screen and selecting 'Menu').
5.3 Reprodución
Para review gravado footage:
- Access the 'Playback' menu from the NVR's main interface.
- Seleccione a(s) cámara(s) desexada(s) e o intervalo de data/hora.
- Usa os controis de reprodución (reproducir, pausar, avanzar, rebobinar) para navegar polas imaxes.tage.
5.4 Acceso remoto
Para control remoto viewing and management, download the Hik-Connect app on your mobile device or use the Hik-Connect web portal. The NVR must be connected to the internet, and you will need to register the device with your Hik-Connect account. Refer to the Hik-Connect documentation for detailed instructions.
6. Mantemento
6.1 Actualizacións de firmware
Consulta periodicamente a páxina oficial de Hikvision website for firmware updates. Updating the firmware can improve performance, add new features, and enhance security. Follow the instructions provided with the firmware update package carefully.
6.2 Xestión do disco duro
Regularly check the health status of your hard drive through the NVR's menu. If the hard drive shows errors or is nearing its end of life, consider replacing it to prevent data loss. You may also need to format the hard drive periodically, which will erase all recorded data.
6.3 Limpeza
Clean the exterior of the NVR with a soft, dry cloth. Do not use liquid cleaners or aerosols. Ensure ventilation openings are free from dust and debris.
7 Solución de problemas
| Problema | Causa posible | Solución |
|---|---|---|
| Non se mostra vídeo no monitor | Conexión do cable solta, fonte de entrada incorrecta no monitor, NVR non acendido. | Check HDMI/VGA cable connections. Ensure monitor is set to correct input. Verify NVR power. |
| Sen imaxe da cámara | Camera not powered, network issue, camera not added/activated. | Check PoE cable connection. Ensure camera is powered. Verify camera IP address and add it to the NVR. |
| Cannot record video | No hard drive, hard drive not formatted, hard drive full, recording schedule not set. | Install and format a hard drive. Check hard drive status. Configure recording schedule. |
| O acceso remoto non funciona | NVR not connected to internet, incorrect network settings, Hik-Connect account issue. | Verify NVR network connection. Check network settings (IP, DNS). Ensure NVR is added to Hik-Connect. |
8. Especificacións
| Característica | Especificación |
|---|---|
| Número de modelo | DS-7604NI-K1/4P |
| Marca | Hikvision |
| Tecnoloxía de conectividade | Ethernet |
| Dispositivos compatibles | Cámara |
| Dimensións do produto (L x W x H) | 8.5 x 29.8 x 42.1 cm |
| Capacidade de almacenamento da memoria | 6 TB |
| Tamaño do disco duro | 6 TB |
| Número de canles | 4 |
| Peso do elemento | 2.2 libras |
| Digital Video Media Format | Disco duro |
| Entrada de audio | RCA |
| Total de portos USB | 2 |
| Entrada de vídeo | VGA, HDMI |
| Número de unidades | 1.0 Conta |
| Fabricante | Hikvision |
| Número de identificación comercial global | 06954273652883 |
| Número de peza | KNVRDS7604NI-K1/4P |
9. Garantía e soporte
Para obter información sobre a garantía, asistencia técnica e consultas sobre o servizo, consulte a páxina oficial de Hikvision websitio web ou póñase en contacto co seu distribuidor autorizado de Hikvision. Garde o recibo de compra como proba de compra para reclamacións de garantía.
Recursos en liña: Visit the official Hikvision support page for FAQs, downloads, and contact information.