1. Instrucións de seguridade importantes
Please read all instructions carefully before using the Mestic MO-80 Mini Oven. Keep this manual for future reference.
- Always ensure the oven is placed on a stable, heat-resistant surface, away from flammable materials.
- Do not touch hot surfaces. Use oven mitts or gloves when handling hot items or surfaces.
- To protect against electrical shock, do not immerse the cord, plug, or oven in water or other liquids.
- É necesaria unha estreita supervisión cando calquera aparello é usado por nenos ou preto de eles.
- Desenchufe da toma cando non estea en uso e antes de limpalo. Deixar arrefriar antes de poñer ou quitar pezas.
- Non faga funcionar ningún aparello cun cable ou enchufe danados, ou despois de que o aparello funcione mal ou teña dano dalgún xeito.
- Non use anexos non recomendados polo fabricante do aparello.
- Non o coloque sobre ou preto dun queimador eléctrico ou de gas quente, nin nun forno quente.
- Débese ter moito coidado ao mover un aparello que conteña aceite quente ou outros líquidos quentes.
- Non cubra a bandexa de migas nin ningunha parte do forno con folla metálica. Isto provocará o superenriquecido do forno.
- Non limpar con estropajos metálicos. As pezas poden romper a almofada e tocar pezas eléctricas, creando risco de descarga eléctrica.
2. Produto rematadoview
The Mestic MO-80 Mini Oven is a compact and versatile appliance designed for various cooking tasks. It features an 800 W heating element and a 10-liter capacity, suitable for small meals, snacks, or reheating.

Figura 2.1: En ángulo view of the Mestic MO-80 Mini Oven, showcasing its compact design and front door handle.

Figura 2.2: Fronte view of the oven, highlighting the temperature and timer control knobs on the right side, and the glass door with the Mestic logo.

Figura 2.3: The oven with its door open, revealing the internal rack and baking tray. This view demonstrates the accessible interior for placing food.
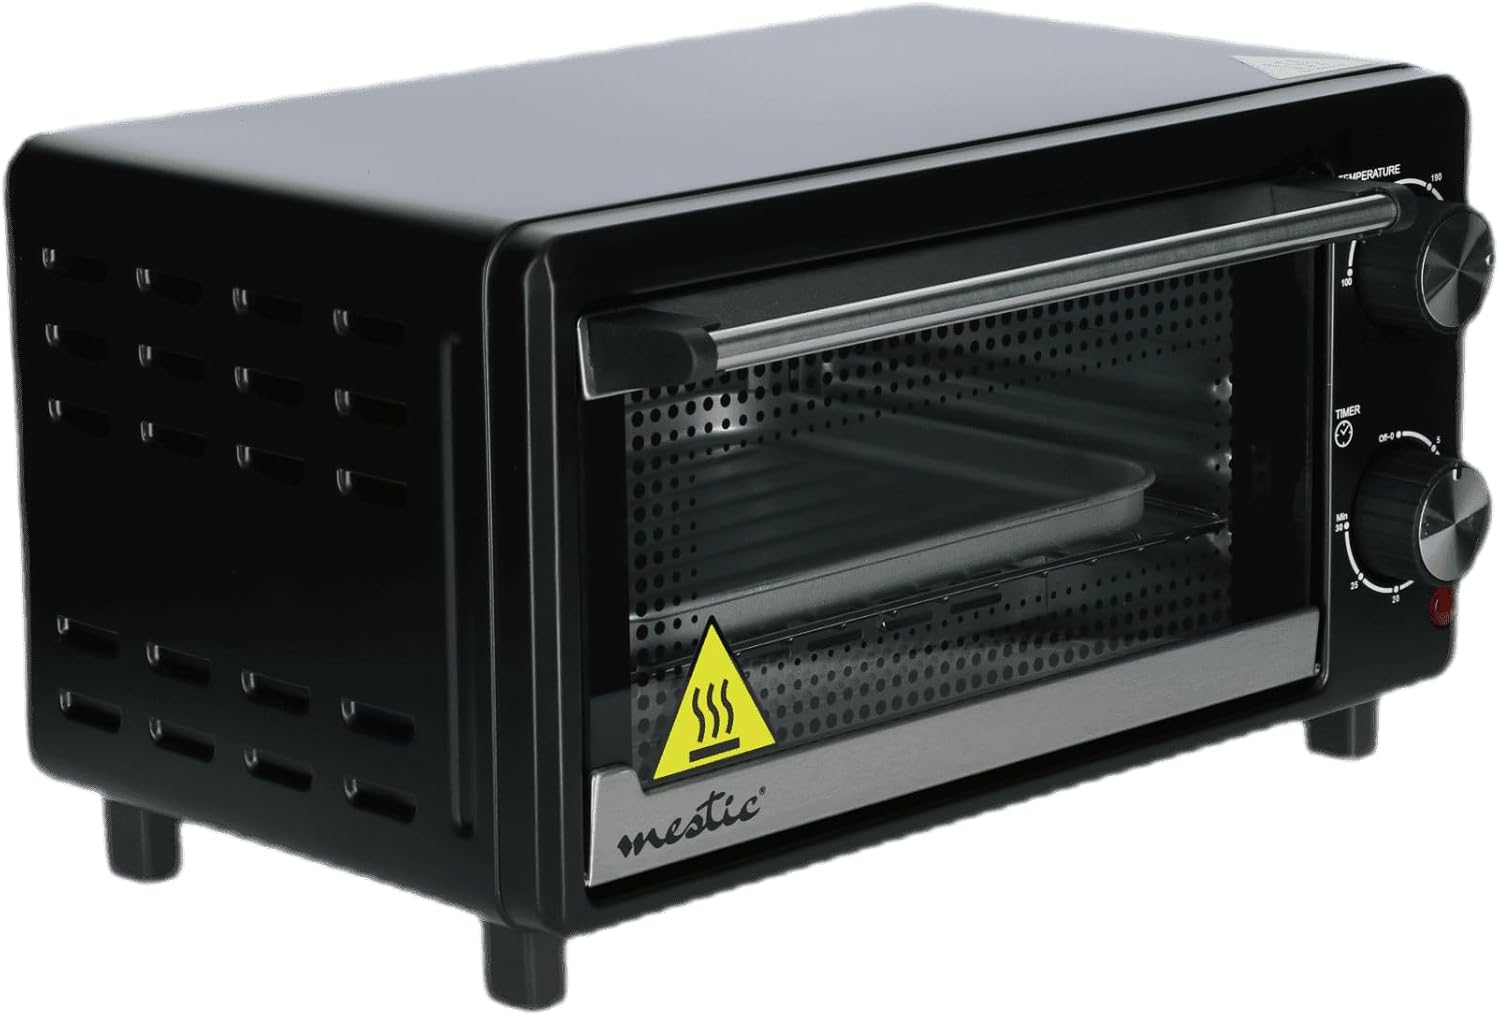
Figura 2.4: The Mestic MO-80 Mini Oven in operation, with croissants baking inside, illustrating its cooking capability.

Figura 2.5: A close-up of the oven's interior, showing the removable baking tray positioned on the wire rack.
3. Configuración
- Desembalaxe: Carefully remove the oven and all accessories from the packaging. Retain packaging for storage or disposal.
- Limpeza inicial: Antes do primeiro uso, limpe o interior e o exterior do forno cun pano publicitarioamp cloth. Wash the baking tray and wire rack in warm, soapy water. Dry all parts thoroughly.
- Colocación: Place the oven on a flat, stable, heat-resistant surface. Ensure there is adequate ventilation around the oven (at least 10 cm clearance on all sides and top) to prevent overheating. Do not place it directly against a wall or under cabinets.
- Conexión de alimentación: Conecte o cable de alimentación a unha toma de corrente con conexión a terra. Asegúrese de que o voltaxe da toma de correntetage matches the oven's requirements (220-240V, 50/60Hz).
- Primeiro uso Queimado: It is recommended to run the oven empty for about 15 minutes at the highest temperature setting (230°C) during its first use. This helps to burn off any manufacturing residues. A slight odor or smoke may be present; ensure the area is well-ventilated.
4. Instrucións de funcionamento
Controis:
- Botón de temperatura: Located on the top right, this knob allows you to select the desired cooking temperature, typically ranging from 100°C to 230°C.
- Botón do temporizador: Located on the bottom right, this knob sets the cooking time, usually up to 30 minutes. It also includes an 'OFF-0' position to turn the oven off.
Operación básica:
- Preparar comida: Place your food on the baking tray or wire rack.
- Inserir comida: Carefully slide the tray or rack into the desired position inside the oven. Close the oven door.
- Temperatura establecida: Turn the Temperature Knob to your desired cooking temperature.
- Establecer temporizador: Turn the Timer Knob to the desired cooking time. The oven will begin heating. A red indicator light may illuminate to show the oven is operating.
- Cociña: The oven will cook for the set duration. When the timer reaches '0', the oven will automatically turn off, and a bell may sound.
- Eliminar comida: Using oven mitts, carefully open the door and remove the cooked food.
Funcións especiais:
- Roasting Function: For roasting meats or vegetables, set the temperature according to your recipe. The oven's convection capability ensures even cooking.
- Grill Option: To use the grill function, place food on the wire rack closer to the top heating element. Set the temperature to a high setting (e.g., 230°C) and monitor closely to prevent burning.
- Función de vapor: While this mini oven does not have a dedicated steam generator, you can create a moist environment by placing a small, oven-safe dish filled with water on the bottom rack during cooking. This can help keep food from drying out.
- Automatic Cooking Menu: The oven may feature an automatic cooking menu. For specific instructions on using pre-programmed settings, please refer to the detailed recipe guide that may accompany your product.
5. Mantemento e Limpeza
Unha limpeza regular garante un rendemento óptimo e prolonga a vida útil do teu forno.
- Antes da limpeza: Desconecte sempre o forno da toma de corrente e déixeo arrefriar completamente antes de limpalo.
- Limpeza de interiores: Limpe as paredes interiores con anuncioamp cloth and mild detergent. For stubborn stains, a non-abrasive cleaner can be used. Avoid harsh chemicals or abrasive sponges that could damage the surface.
- Limpeza exterior: Limpe o exterior cun anuncioamp cloth. Do not use abrasive cleaners or immerse the oven in water.
- Accesorios: The baking tray and wire rack can be washed in warm, soapy water or placed in a dishwasher if they are dishwasher-safe. Ensure they are completely dry before reinserting them into the oven.
- Bandexa de migas: Regularly remove and clean the crumb tray located at the bottom of the oven to prevent grease buildup and fire hazards.
6 Solución de problemas
- O forno non quenta:
- Ensure the oven is properly plugged into a working electrical outlet.
- Check if the timer knob is set to a cooking duration and not 'OFF-0'.
- Verify that the temperature knob is set to a desired temperature.
- Food cooks unevenly:
- Ensure food is placed centrally on the rack or tray.
- Preheat the oven for 5-10 minutes before placing food inside.
- Xira os alimentos a metade da cocción para obter resultados máis uniformes.
- Smoke or odor during operation:
- A slight odor or smoke during first use is normal (see Setup).
- Excessive smoke may indicate food spills or grease buildup. Clean the interior thoroughly.
- Ensure no packaging materials or foreign objects are inside the oven.
7. Especificacións
| Nome do modelo | Mestic MO-80 Mini Oven |
| Capacidade | 10 litros |
| Poder | 800 vatios |
| Tipo de control | Rotary Knobs (Manual Control) |
| Características especiais | Roasting function, Steam function (via water dish), Automatic cooking menu, Grill option |
| Estilo de porta | Abertura lateral |
| Material da porta | Cast Iron (frame), Glass (window) |
| Fonte de enerxía | AC adapter (Mains powered) |
8. Garantía e soporte
Este produto está cuberto por unha garantía do fabricante. Consulta a tarxeta de garantía incluída coa túa compra para coñecer os termos e condicións específicos, incluído o período de garantía e os detalles da cobertura.
For technical support, spare parts, or service inquiries, please contact the Mestic customer service department. Contact information can typically be found on the manufacturer's official websitio web ou na embalaxe do produto.
Please have your model number (MO-80) and proof of purchase ready when contacting support.