
1. Introdución
The Hioki CM3286 Clamp On Power Tester is a versatile instrument designed for precise measurement of electrical parameters. It is capable of measuring voltage, current, power, power factor, phase angle, reactive power, and frequency. Additionally, it can detect phase sequence on live lines within single-phase or three-phase circuits at any desired point. This manual provides essential information for the safe and effective operation, maintenance, and troubleshooting of your CM3286 device.
2. Información de seguridade
ADVERTENCIA: Lea todos os avisos e instrucións de seguridade antes de usar este produto. O incumprimento dos avisos e as instrucións pode provocar descargas eléctricas, incendios ou lesións graves.
- Always observe local and national safety codes.
- Non empregue o dispositivo se parece estar danado ou funciona de forma anormal.
- Asegúrate de que o dispositivo estea clasificado para o volumetage and current levels you intend to measure.
- Wear appropriate personal protective equipment (PPE), such as insulated gloves and eye protection.
- Avoid touching live conductors with bare hands or non-insulated tools.
- Non opere o dispositivo en ambientes húmidos ou atmosferas explosivas.
- Keep fingers behind the tactile barrier on the instrument during measurements.
- Disconnect the device from the circuit before opening the battery compartment.
3. Contido do paquete
Verify that all items listed below are present and undamaged upon opening the package:
- Hioki CM3286 Clamp On Power Tester Unit
- Cables de proba (vermello e negro)
- Maletín de transporte
- Pilas AAA (x2)
- Manual de instrucións (este documento)
4. Características e compoñentes do produto

Figure 4.1: Hioki CM3286 Clamp On Power Tester (Overall View)
This image displays the complete Hioki CM3286 Clamp On Power Tester, showcasing its ergonomic design, the large clamp jaw for current measurement, and the clear digital display. The function dial and various control buttons are visible on the front panel.
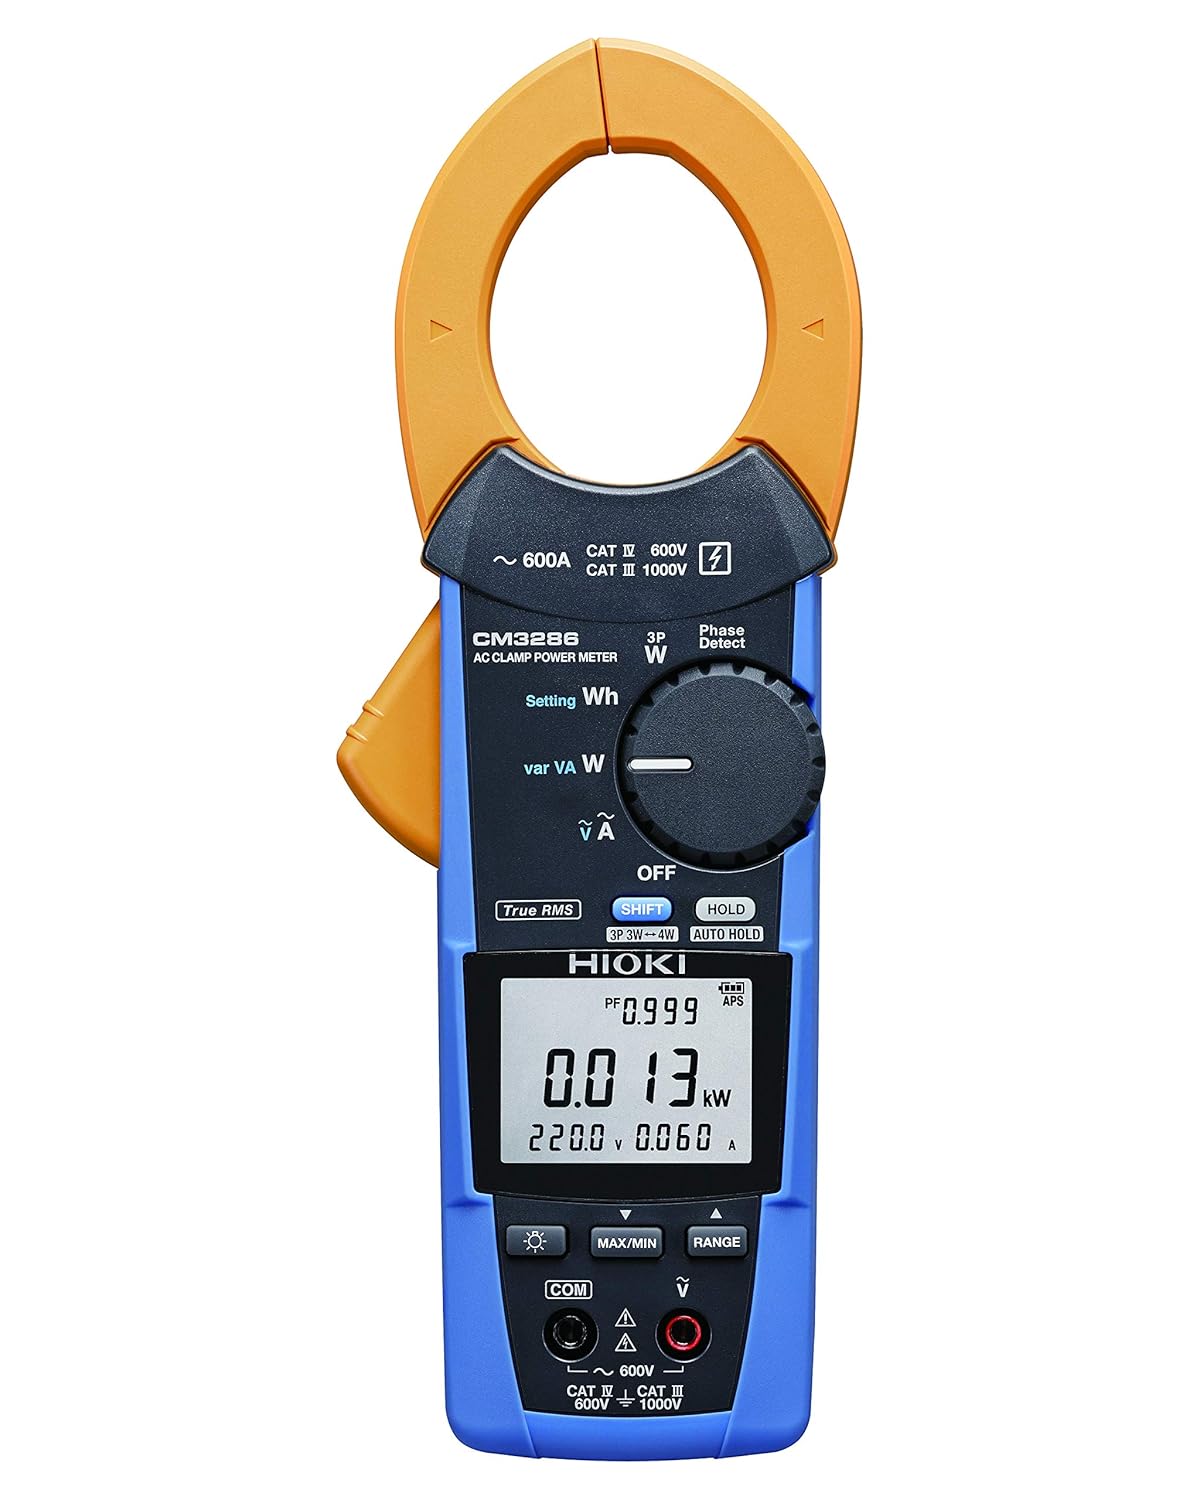
Figure 4.2: Hioki CM3286 Clamp On Power Tester (Front Panel Detail)
This image provides a closer look at the front panel of the Hioki CM3286, highlighting the digital display, the rotary function dial with various measurement settings (e.g., W, Wh, V, A), and the control buttons such as SHIFT, HOLD, MAX/MIN, and RANGE. The input terminals for voltage measurement are also visible at the bottom.
Compoñentes clave:
- Clamp Mandíbula: Usado para medir corrente alterna sen contacto.
- Dial de función: Selects the desired measurement mode (e.g., Voltage, Current, Power, Frequency).
- Pantalla LCD: Mostra lecturas de medición, unidades e indicadores.
- Terminais de entrada: Para conectar cables de proba para vol.tage and other measurements.
- Botón HOLD: Conxela a lectura actual da pantalla.
- Botón MAX/MIN: Rexistra lecturas máximas e mínimas.
- Botón RANGE: Selecciona manualmente o rango de medición.
- Botón MAIÚS: Accesses secondary functions marked in blue on the dial.
5. Configuración
5.1. Instalación da batería
- Asegúrese de que o dispositivo estea apagado.
- Localice a tapa do compartimento das baterías na parte traseira da unidade.
- Use un desaparafusador (se é necesario) para abrir a tapa.
- Insert two (2) AAA batteries, observing the correct polarity (+/-) as indicated inside the compartment.
- Coloque a tapa do compartimento da batería e fíxaa.
5.2. Acendido inicial
After battery installation, turn the function dial from "OFF" to any measurement setting to power on the device. The display should illuminate, indicating readiness for use.
6. Instrucións de funcionamento
6.1. Acendido/apagado
- To power on, rotate the function dial from the "OFF" position to the desired measurement function.
- To power off, rotate the function dial back to the "OFF" position.
6.2. AC Current Measurement (Clamp)
- Rotate the function dial to the "A" (Current) setting.
- Abre o clamp jaw by pressing the lever.
- Enclose only one conductor (live or neutral) within the clamp mandíbula. Asegúrate de que a mandíbula estea completamente pechada.
- Le o valor actual na pantalla LCD.
6.3. Vootage Medición (V)
- Rotate the function dial to the "V" (Voltage) configuración.
- Connect the red test lead to the "V" input terminal and the black test lead to the "COM" input terminal.
- Conecte os cables de proba en paralelo a través do circuíto ou compoñente que se vai medir.
- Le o voltago valor da pantalla LCD.
6.4. Power Measurement (W, Wh, var, VA)
The CM3286 can measure various power parameters. Select the appropriate setting on the function dial (W for active power, Wh for energy, var for reactive power, VA for apparent power). Connect test leads for voltage e clamp the jaw around the current conductor as per the specific measurement method outlined in the full manual (not provided here, but implied by the device's capabilities).
6.5. Medición de frecuencia (Hz)
Select the "Hz" setting on the function dial. Connect test leads across the circuit where frequency is to be measured, similar to voltage medición.
6.6. Phase Sequence Detection
The device features a "Phase Detect" function. Refer to the detailed instructions in the complete manual for proper connection and interpretation of phase sequence on single-phase or three-phase circuits.
6.7. Using Buttons (HOLD, MAX/MIN, RANGE, SHIFT)
- MANTENER: Prema para conxelar a lectura actual na pantalla. Prema de novo para desactivala.
- MAX / MIN: Press to enter Max/Min recording mode. The display will show the maximum or minimum value recorded since activation. Press again to cycle through Max, Min, and current readings.
- GAMA: Press to switch between auto-ranging and manual ranging. In manual ranging, press repeatedly to cycle through available ranges.
- CAMBIAR: Press to access secondary functions indicated in blue text next to the primary function on the dial.
7. Mantemento
7.1. Limpeza
Limpe o dispositivo cun suave, damp pano. Non empregue produtos de limpeza abrasivos nin disolventes. Asegúrese de que o dispositivo estea completamente seco antes de gardalo ou de usalo de novo.
7.2. Substitución da batería
When the low battery indicator appears on the display, replace the batteries promptly to ensure accurate measurements. Follow the battery installation steps outlined in Section 5.1.
7.3. Almacenamento
Store the device in its carrying case in a cool, dry place, away from direct sunlight and extreme temperatures. If storing for extended periods, remove the batteries to prevent leakage.
8 Solución de problemas
| Problema | Causa posible | Solución |
|---|---|---|
| O dispositivo non se acende. | Baterías gastadas ou instaladas incorrectamente. | Comprobe a polaridade das baterías; substitúa as baterías. |
| Sen lectura na pantalla. | Incorrect function selected; open circuit; test leads not connected properly. | Select correct function; ensure circuit is complete; check test lead connections. |
| "OL" or "OVER" displayed. | Measurement exceeds selected range or device maximum. | Select a higher range (if manual ranging) or ensure measurement is within device limits. |
| Lecturas inexactas. | Low battery; environmental interference; damaged test leads. | Replace batteries; move away from strong electromagnetic fields; inspect and replace test leads if damaged. |
9. Especificacións
| Parámetro | Valor |
|---|---|
| Número de modelo | CM3286 |
| Marca | Hioki |
| Dimensións do paquete | 9.92 x 2.76 x 2.05 polgadas |
| Peso do elemento | 0.45 quilogramos (15.87 onzas) |
| Baterías | 2 pilas AAA (incluídas) |
| Fonte de enerxía | Eléctrico con cable (Note: This refers to the type of power it measures, not its own power source. The device is battery-powered.) |
| Fabricante | Hioki |
| Data de primeira dispoñibilidade | 20 de agosto de 2020 |
10. Garantía e soporte
For detailed warranty information, please refer to the warranty card included with your product or visit the official Hioki website. Hioki provides comprehensive customer support for its products.
If you encounter any issues not covered in this manual or require technical assistance, please contact Hioki customer support through their official channels. Ensure you have your product model number (CM3286) and purchase details ready when contacting support.
Nota: Os termos e condicións da garantía poden variar segundo a rexión.