
1. Introdución
Thank you for choosing the HECHT 530 Electric Grass Trimmer. This powerful and lightweight tool is designed to help you maintain your lawn and garden with ease. To ensure safe and effective operation, please read this manual thoroughly before using the trimmer. Keep this manual for future reference.

This image shows the complete HECHT 530 Electric Grass Trimmer from a side angle, highlighting its red and black body, long shaft, and electric cord.
2. Instrucións de seguridade importantes
Siga sempre as precaucións de seguridade básicas ao usar electrodomésticos para reducir o risco de incendio, descarga eléctrica e lesións persoais.
- Le o Manual: Lea e comprenda todas as instrucións antes de operar a desbrozadora.
- Usar equipo de protección individual (EPI): Always wear safety glasses or goggles, long pants, sturdy footwear, and hearing protection when operating the trimmer.
- Manter a zona despexada: Ensure the work area is clear of other people, children, and pets. Remove any debris or objects that could be thrown by the cutting line.
- Inspeccionar antes de usar: Before each use, inspect the trimmer for any damage, loose parts, or worn cutting line. Do not use if damaged.
- Desenchufe cando non estea en uso: Always unplug the trimmer from the power source before cleaning, performing maintenance, or when not in use.
- Evitar condicións húmidas: Non opere a desbrozadora en herba mollada ou enamp condicións.
- Agarre adecuado: Sujete sempre a desbrozadora firmemente con ambas as mans durante o funcionamento.
- Protección contra sobrecalentamento: The motor is protected by a robust plastic housing with ventilation slots. Ensure these slots are not blocked during operation to prevent overheating.
3. Características do produto
The HECHT 530 Electric Grass Trimmer offers several features designed for user comfort and efficient performance:
- Cabezal de corte axustable: The angle of the cutting head can be easily adjusted to 2 positions, allowing flexible use for various trimming needs.
- Eixo telescópico: The telescopic shaft extends by 180 mm, enabling adjustment to the user's height for comfortable operation.
- Motor potente: Equipped with a 550 W electric motor, providing 10,000 rpm for efficient cutting of grass and thicker weeds.
- Wide Cutting Circle: Features a 30 cm (300 mm) cutting circle for broader coverage.
- Deseño lixeiro: Weighing only 2.6 kg, the trimmer is easy to handle and allows for extended periods of work without fatigue.
- Automatic Line Extension: The cutting line, up to 1.4 mm thick, extends automatically with a simple tap, eliminating the need for manual pulling.
4. Compoñentes Overview
Familiarize yourself with the main components of your HECHT 530 Electric Grass Trimmer:

Esta imaxe ofrece información detallada view of the HECHT 530 trimmer with numbered labels pointing to its key parts, along with a German legend. The following list translates and describes each component.
- Manexo con controis: The main grip area where the power switch is located.
- Cable de alimentación: The electrical cord for connecting to a power outlet.
- Axuste do ángulo de inclinación: Mechanism to change the angle of the cutting head.
- Cutting Head with Line Spool: The rotating part that holds the cutting line.
- Roda: A small wheel for guiding the trimmer along edges.
- Polo telescópico: The adjustable shaft that connects the handle to the cutting head.
- Auxiliary Handle, Adjustable: The secondary handle for improved grip and control.
5. Configuración
Before first use, some assembly and adjustments may be required.
5.1 Colocación da asa auxiliar
Attach the auxiliary handle (7) to the telescopic pole (6). Ensure it is securely fastened and can be adjusted to a comfortable position for your height and working posture.
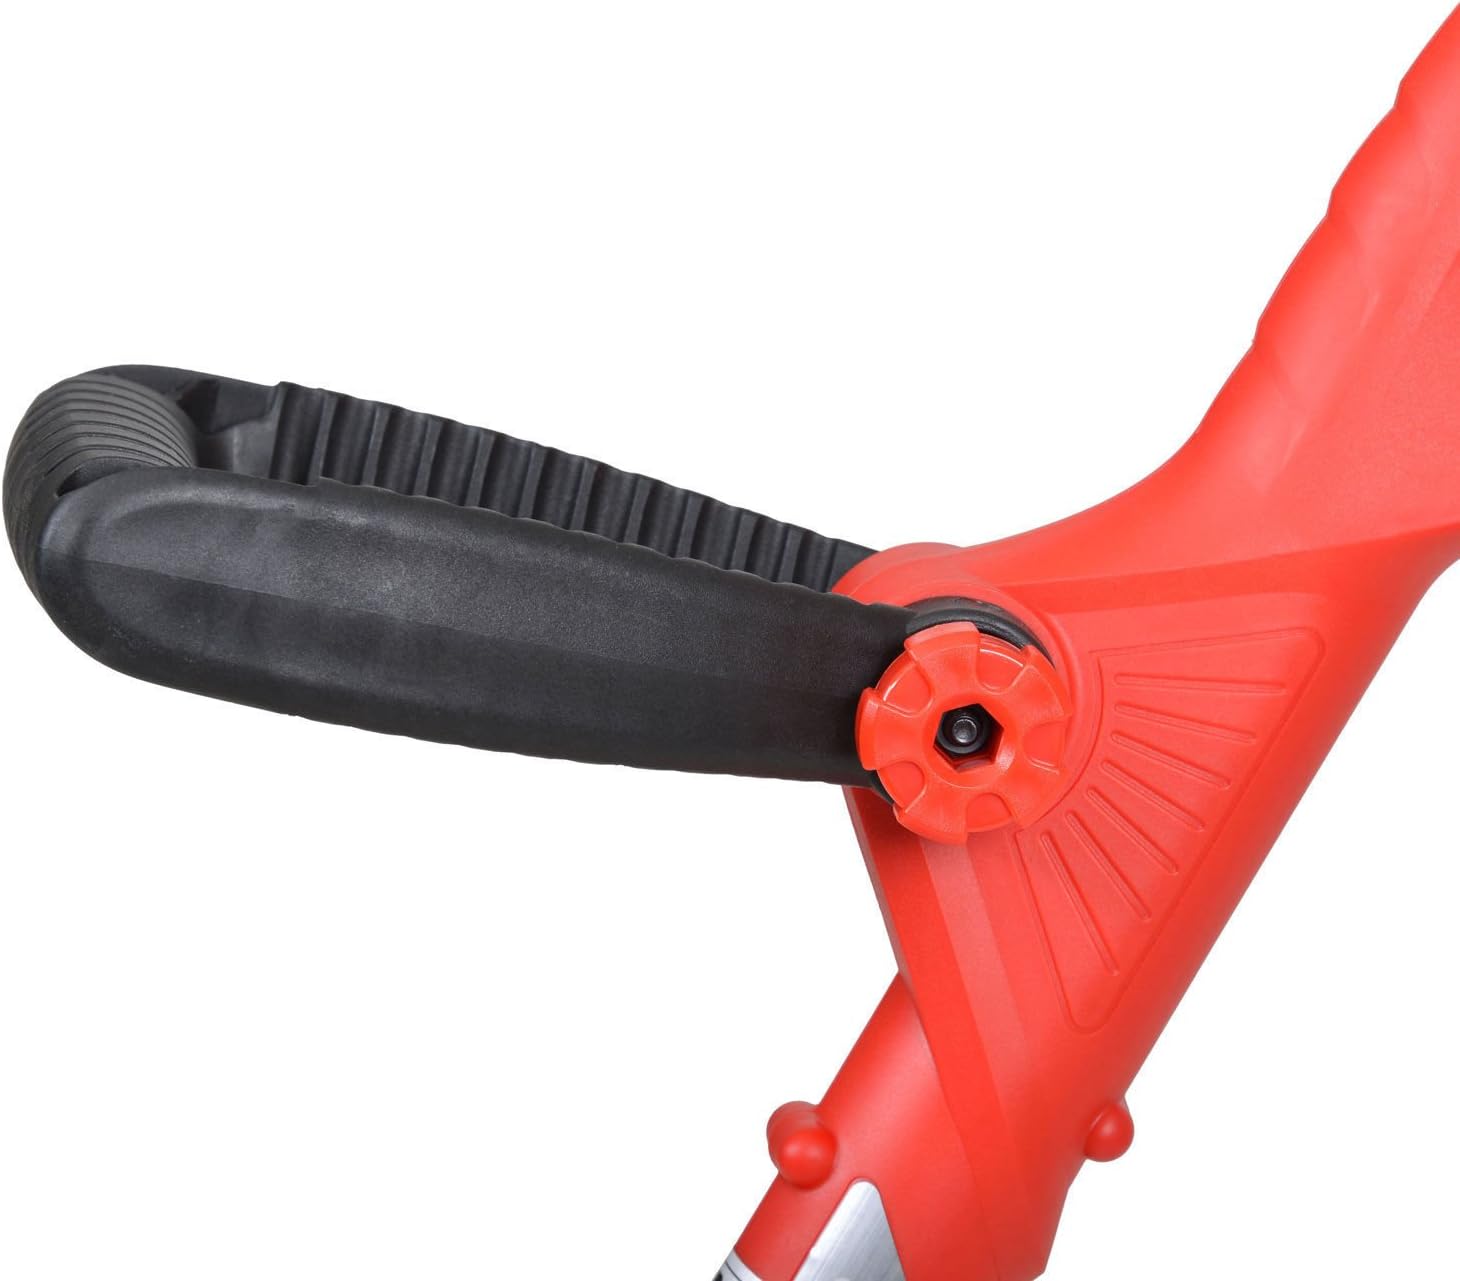
This image shows a close-up of the auxiliary handle and its adjustment mechanism on the trimmer's shaft.
5.2 Adjusting the Telescopic Pole
Extend or retract the telescopic pole (6) to match your height. This adjustment ensures comfortable operation and reduces strain. Secure the pole firmly once adjusted.
5.3 Adjusting the Cutting Head Angle
The cutting head's tilt angle (3) can be set to 2 positions. Adjust it according to the terrain and the type of trimming you are performing (e.g., edging vs. general trimming).
6. Instrucións de funcionamento
Follow these steps for safe and effective operation of your grass trimmer.
6.1 Antes do uso
- Ensure the power cable (2) is in good condition and free from cuts or damage.
- Check the cutting line (4) for wear and ensure it is properly installed.
- Clear the area to be trimmed of any stones, sticks, or other debris that could be thrown by the trimmer.
6.2 Arranque da desbrozadora
- Connect the power cable (2) to a suitable electrical outlet.
- Hold the trimmer firmly with both hands, one on the main handle (1) and the other on the auxiliary handle (7).
- Press the power switch on the main handle to start the motor. The cutting line will begin to rotate.
6.3 Técnicas de recorte
- Use a gentle sweeping motion to cut grass. Avoid forcing the trimmer into thick vegetation.
- Keep the cutting head slightly above the ground for an even cut.
- For edging, use the integrated wheel (5) to guide the trimmer along paths or flowerbeds.
6.4 Automatic Line Extension
If the cutting line becomes too short during operation, simply tap the cutting head (4) gently on the ground while the trimmer is running. This action will automatically extend the line. Do not manually pull the line.

Esta imaxe ofrece un primeiro plano view of the trimmer's cutting head, showing the line spool and the protective guard.
7. Mantemento
Un mantemento regular garante a lonxevidade e o rendemento óptimo da súa desbrozadora.
7.1 Limpeza
- Desconecte sempre a desbrozadora antes de limpala.
- Limpa o exterior da desbrozadora con anunciosamp pano. Non use produtos químicos agresivos ou produtos de limpeza abrasivos.
- Remove any grass clippings or debris from the cutting head and ventilation slots to prevent blockages and overheating.
7.2 Substitución de liña
When the cutting line is depleted, it needs to be replaced. Refer to the cutting head (4) section for instructions on opening the spool housing and winding new line. Use only line with a maximum thickness of 1.4 mm.
7.3 Almacenamento
Store the trimmer in a dry, well-ventilated area, away from direct sunlight and extreme temperatures. Keep it out of reach of children.
8 Solución de problemas
If you encounter issues with your trimmer, refer to the table below for common problems and their solutions.
| Problema | Causa posible | Solución |
|---|---|---|
| O recortador non comeza | Sen fonte de alimentación Cable de alimentación danado Protección contra sobrecalentamento activada | Check power outlet and connection Inspect cable for damage; replace if necessary Deixar que a desbrozadora arrefríe |
| Cutting line does not extend automatically | Line tangled or stuck Bobina baleira Incorrect line thickness | Unplug and untangle line Substitúe o carrete de liña Use correct 1.4 mm line |
| Baixo rendemento de corte | Worn or short line Too much resistance (thick weeds) Ranuras de ventilación bloqueadas | Extend or replace line Cut in smaller passes Limpar as ranuras de ventilación |
9. Especificacións técnicas
| Especificación | Valor |
|---|---|
| Número de modelo | 530 |
| Marca | Hecht |
| Fonte de enerxía | Eléctrico |
| Potencia do motor | 550 W |
| Velocidade sen carga | 10,000 rpm |
| Diámetro do círculo de corte | 30 centímetros (300 milímetros) |
| Max. Line Thickness | 1.4 mm |
| Peso | 2.6 kg |
| Dimensións do paquete | 44 x 31 x 26 cm |
10. Garantía e soporte
Warranty information for your HECHT 530 Electric Grass Trimmer is typically provided with your purchase documentation. Please refer to these documents for details regarding warranty coverage and terms.
For technical support, spare parts, or any other inquiries, please contact your retailer or the manufacturer directly. Ensure you have your model number (530) and purchase date available when seeking support.


