Introdución
This manual provides comprehensive instructions for the setup, operation, and maintenance of your PreSonus Studio 24c USB Audio Interface. The Studio 24c is designed to deliver high-quality audio recording and playback for musicians, podcasters, and content creators.
It features pristine XMAX-L mic preamps, high-headroom instrument preamps, professional input metering, and comes bundled with Studio One 6 Artist Edition software, offering a complete solution for your home recording studio needs.
O que hai na caixa
- (1) Studio 24c Interface
- (1) 1M USB-C to USB-C Cable
- (1) 1M USB-C to USB-A Cable
- (1) Guía de inicio rápido
- (1) PreSonus Health Safety and Compliance Guide
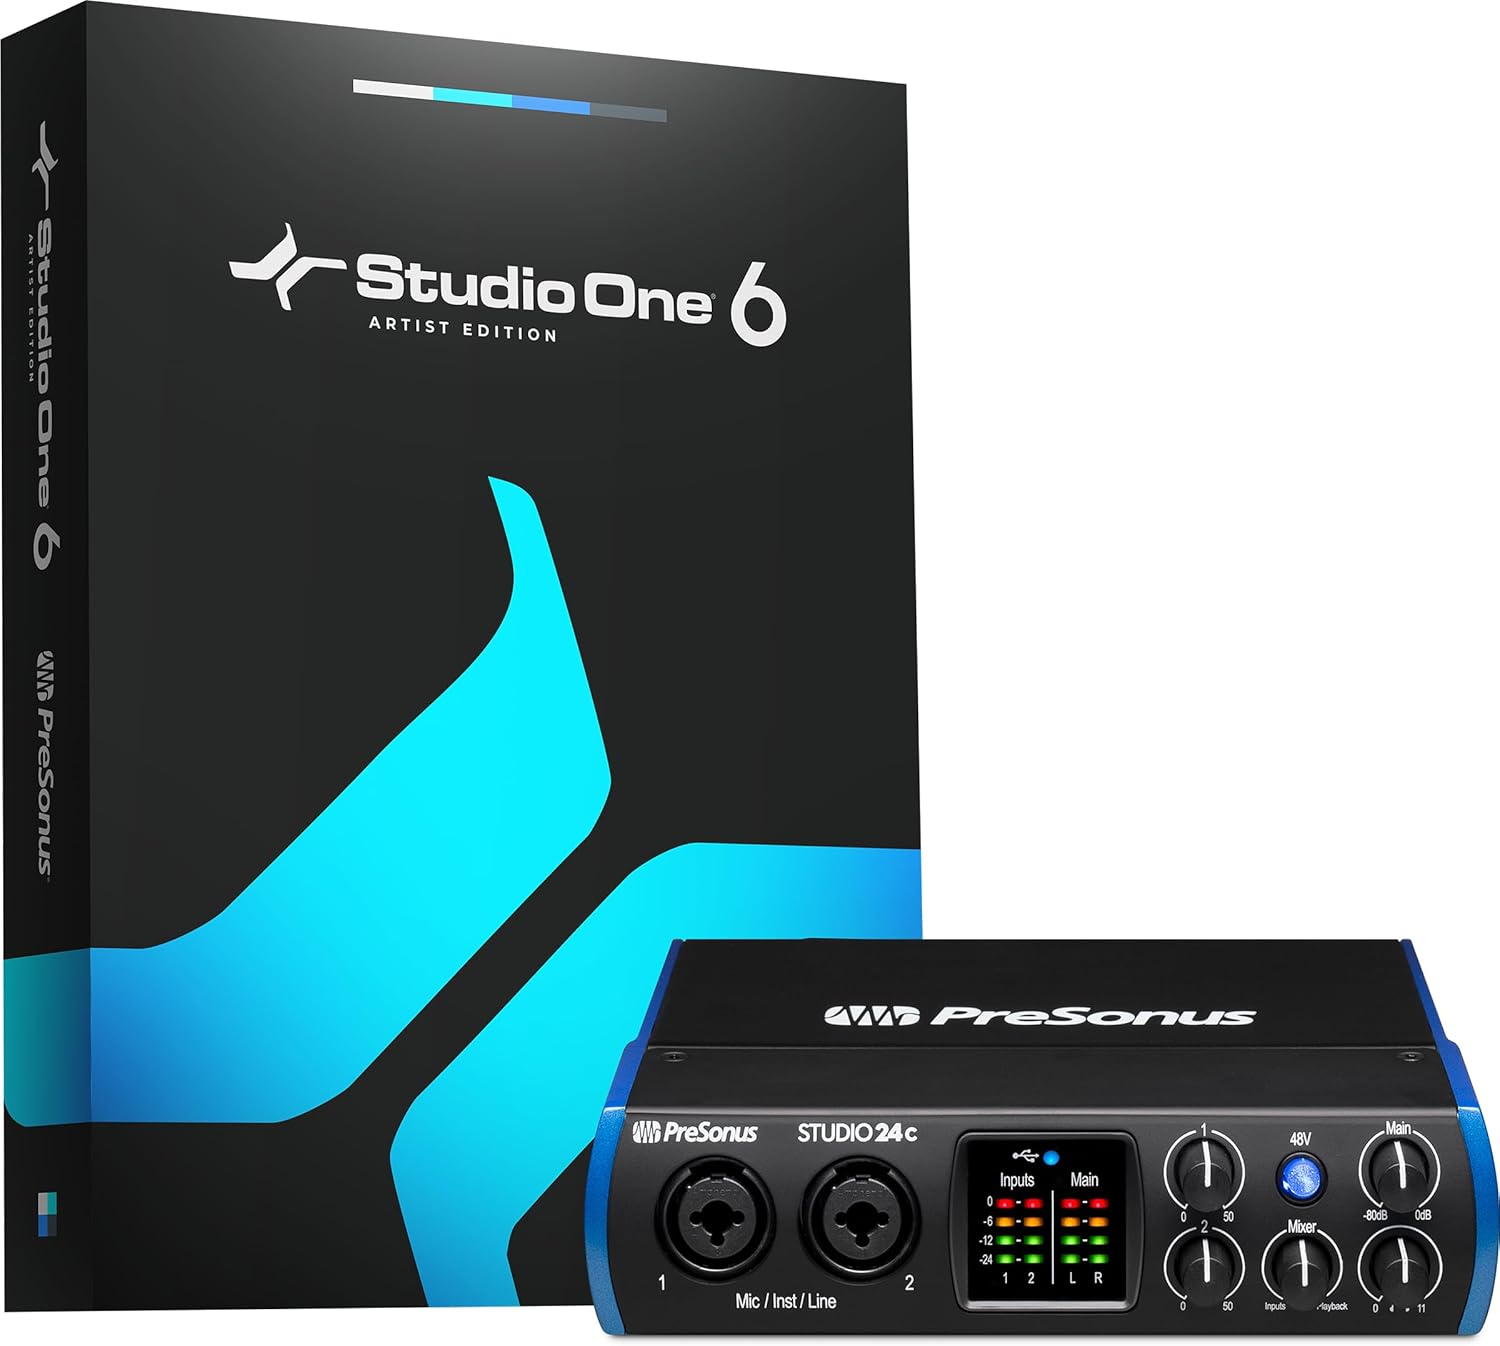
Figure 1: PreSonus Studio 24c interface and included Studio One 6 Artist Edition software packaging.
Configuración
1. Conexión ao teu ordenador
The Studio 24c is bus-powered, meaning it draws power directly from your computer via the USB connection. Use the provided USB-C to USB-C cable for modern computers or the USB-C to USB-A cable for older systems.

Figura 2: Traseira view of the Studio 24c, highlighting the USB-C port for computer connection.
Connect the USB-C end of the cable to the Studio 24c's USB-C port on the rear panel. Connect the other end of the cable (USB-C or USB-A) to an available USB port on your computer. The unit will power on automatically.
2. Software Installation and Registration
To fully utilize your Studio 24c, you must register your product and download the necessary drivers and software.
- Vai en liña a my.presonus.com.
- Register your serial number. The serial number can be found on the Quick Start Guide included in the box.
- Once registered, you will be able to download your complimentary copy of Studio One Artist, as well as additional plugins e contido.
- Download and install the appropriate drivers for your operating system (Windows or macOS).
Figure 3: The Studio 24c comes bundled with Studio One Artist software.
Operating the Studio 24c
Front Panel Controls and Inputs

Figura 4: Fronte view of the Studio 24c with labeled controls.
- Mic/Inst/Line Inputs (1 & 2): These combo jacks accept XLR connectors for microphones or 1/4-inch (TRS/TS) cables for instruments (guitars, basses) and line-level devices.
- Botón de alimentación fantasma de 48 V: Activates +48V phantom power for condenser microphones. Ensure this is off when connecting or disconnecting microphones.
- Input Gain Knobs (1 & 2): Adjust the input level for connected microphones or instruments.
- Medidores de entrada/principais: LED ladder-style meters provide visual feedback on input and main output levels.
- Mixer Knob: Blends the direct input signal with the playback signal from your computer for low-latency monitoring. Turn towards "Inputs" to hear more of your live input, and towards "Playback" to hear more of your computer's audio.
- Main Output Knob: Controls the overall volume of the main outputs.
- Botón de saída de auriculares: Controla o volume da saída dos auriculares.
Conexións do panel traseiro
Figura 5: Traseira view of the Studio 24c with labeled connections.
- Porto USB-C: Conéctase ao teu ordenador para obter datos e enerxía.
- Entrada/Saída MIDI: Standard 5-pin DIN connectors for connecting MIDI devices like keyboards or controllers.
- Main Out (1/L & 2/R): Balanced 1/4-inch TRS outputs for connecting to studio monitors or other audio playback systems.
- Saída de teléfonos: 1/4-inch TRS stereo output for headphones.
Características
- Simultaneous I/O up to 2 inputs/2 outputs.
- 2 mic/instrument/line inputs with XMAX-L mic preamps.
- 2 balanced 1/4-inch TRS main outputs to connect professional studio monitors.
- High-power headphone output.
- MIDI In/Out.
- Mixer knob for low-latency direct input monitoring.
- Front-panel level controls for main outputs.
- 4 ladder-style LED level meters (2 input, 2 main output).
- 24-bit resolution, 44.1, 48, 88.2, 96, 176.4 and 192 kHz samptaxas de ling.
- USB-C to USB-C and USB-C to USB-A cables included for compatibility with most computers.
- Recording software included: Studio One 6 Artist Edition.

Figure 6: Key features and compact dimensions of the Studio 24c.
Especificacións
| Atributo | Valor |
|---|---|
| Peso do elemento | 1 libras |
| Dimensións do produto | 6.3 x 7.09 x 1.77 polgadas |
| Número de modelo do artigo | Estudo 24c |
| Nome da cor | Negro |
| Dispositivos compatibles | Auriculares, Instrumento, Hardware MIDI, Micrófono, Ordenador persoal, Teléfono intelixente, Monitores de estudio, Tableta |
| Interface de hardware | Headphone, USB |
| Software compatible | Compatible con Studio One Pro, Ableton Live, FL Studio, Cubase, Pro Tools, Logic Pro, Reaper e moitos máis. |
| Potencia de saídatage | 800 vatios |
| Tamaño | 2 Mic Pres - 2 Line Outs |
| Sistema Operativo | Windows, macOS |
| Tecnoloxía de conectividade | USB 2.0 (compatible 3.0) |
| Número de canles | 2 |
Mantemento
Para garantir a lonxevidade e o rendemento óptimo do seu PreSonus Studio 24c, siga estas pautas de mantemento:
- Limpeza: Usa un pano suave e seco para limpar o exterior da unidade. Evita produtos de limpeza abrasivos, solventes ou ceras.
- Ambiente: Operate the device in a clean, dry environment away from direct sunlight, heat sources, and excessive dust.
- Ventilación: Asegúrese de que haxa unha ventilación axeitada arredor da unidade para evitar o sobrequecemento. Non bloquee ningunha abertura de ventilación.
- Coidado do cable: Handle USB and audio cables carefully. Avoid sharp bends or kinks that could damage the internal wiring.
- Almacenamento: When not in use for extended periods, store the Studio 24c in its original packaging or a protective case to prevent dust accumulation and physical damage.
Resolución de problemas
No Power/No Connection
- Comprobar a conexión USB: Ensure the USB cable is securely connected to both the Studio 24c and your computer. Try a different USB port on your computer.
- Proba cun cable diferente: If available, test with another USB-C to USB-C or USB-C to USB-A cable to rule out a faulty cable.
- Potencia do ordenador: Asegúrate de que o teu ordenador estea acendido e non en modo de suspensión.
No Audio Input/Output
- Instalación de controladores: Verify that the correct and latest drivers for the Studio 24c are installed on your computer. Reinstall if necessary from my.presonus.com.
- Configuración de software: In your DAW (e.g., Studio One Artist) or audio settings, ensure the "PreSonus Studio 24c" is selected as both the input and output device.
- Niveis de ganancia: Check the Input Gain knobs on the front panel and the Main Output/Headphone Output knobs. Ensure they are turned up sufficiently.
- Alimentación phantom de 48 V: If using a condenser microphone, ensure the 48V button is engaged.
- Integridade do cable: Test audio cables (XLR, 1/4-inch TRS) with other equipment to ensure they are not faulty.
- Mixer Knob: Adjust the Mixer knob on the front panel. If you only hear your input or only playback, adjust the knob to blend the signals as desired.
Problemas de latencia
- Tamaño do buffer: In your DAW's audio setup preferences, try reducing the buffer size. A smaller buffer size reduces latency but requires more CPU power.
- Seguimento directo: Utilize the Mixer knob on the Studio 24c for direct, hardware-based monitoring of your inputs, which provides zero-latency monitoring independent of your computer's buffer settings.
- Pechar outras aplicacións: Close any unnecessary applications running on your computer to free up CPU resources.
Garantía e Soporte
For detailed warranty information and technical support, please visit the official PreSonus websitio:
You can also find additional resources, FAQs, and user manuals on their support page.