
1. Información importante de seguridade
Read and understand all safety warnings and instructions before operating this garden tiller. Failure to follow these instructions may result in serious injury or death.
- Equipos de protección individual: Always wear appropriate safety gear, including eye protection, hearing protection, sturdy footwear, and gloves.
- Seguridade de combustible: Gasoline is highly flammable. Handle fuel in a well-ventilated area, away from sparks, open flames, or other ignition sources. Do not smoke while fueling.
- Operating Area: Clear the work area of stones, debris, and other objects that could be thrown by the tines. Keep bystanders, children, and pets at a safe distance (at least 15 meters/50 feet).
- Escape do motor: Operate the tiller in a well-ventilated outdoor area. Engine exhaust contains carbon monoxide, which is a colorless, odorless, and deadly gas.
- Control da máquina: Always maintain a firm grip on the handlebars. Be aware of the tines and their rotation direction. Never operate the tiller on excessively steep slopes.
- Mantemento: Disconnect the spark plug wire before performing any maintenance or adjustments to prevent accidental starting.
2. Produto rematadoview e Compoñentes
Familiarize yourself with the main parts of your Hecht HEC-796 garden tiller.

Figura 2.1: The handlebar assembly featuring the Hecht brand logo. This is where the operator controls the tiller.

Figura 2.2: Close-up of a handlebar grip, designed for comfortable and secure handling during operation.

Figura 2.3: The throttle control and engine kill switch located on the handlebar for easy access. The red switch is for turning the engine ON/OFF.

Figura 2.4: View of the engine area, showing the fuel tank cap (silver) and the air filter housing (black cage). Regular checks of these components are crucial for performance.

Figura 2.5: The tilling tines (black blades) and the transport wheel. The transport wheel assists in moving the tiller to and from the work area.
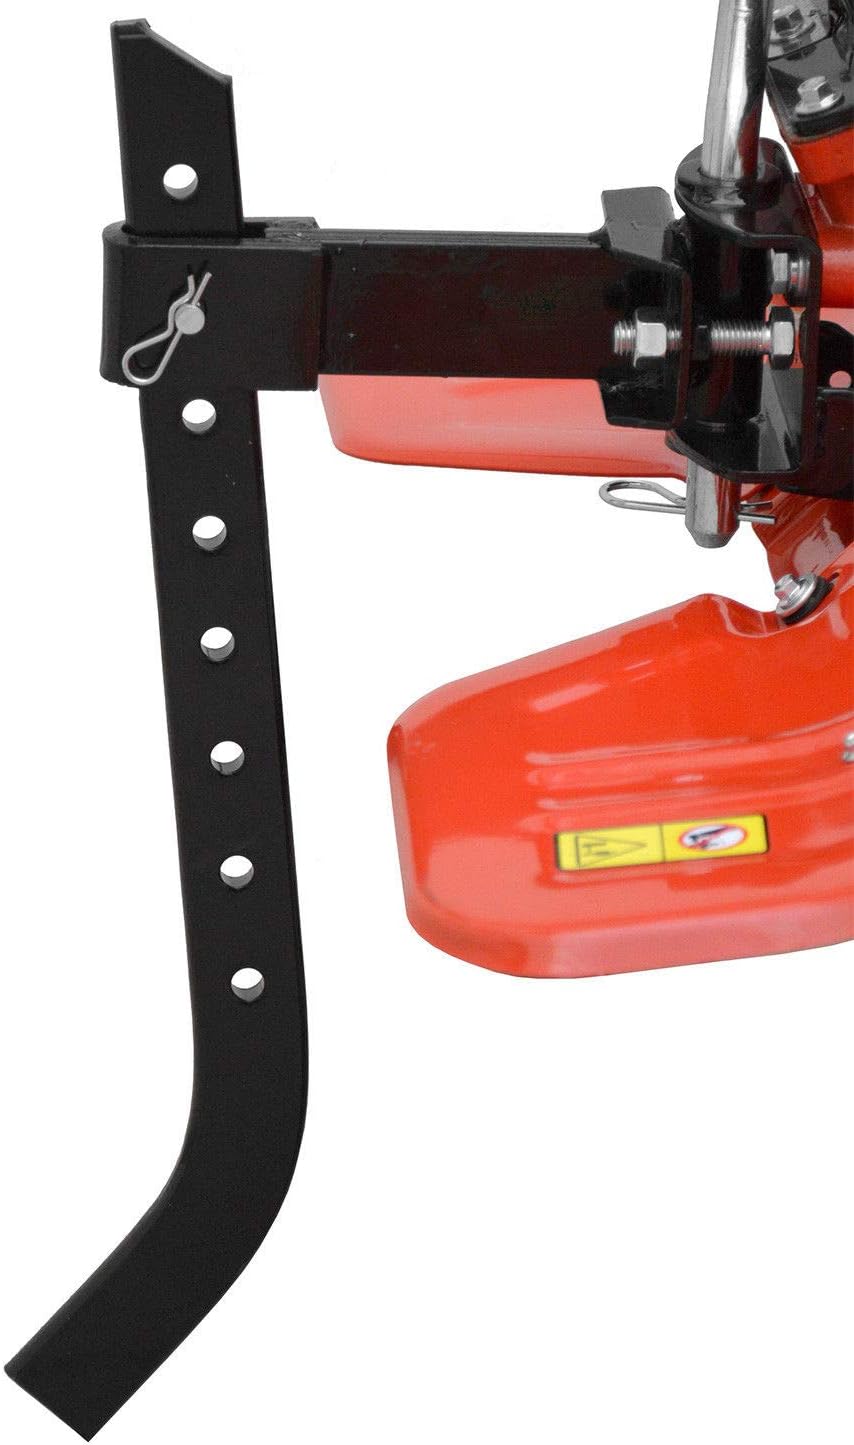
Figura 2.6: The adjustable depth stake (also known as a drag bar) at the rear of the tiller. This component helps control the tilling depth and forward speed.
3. Configuración e montaxe
Your Hecht HEC-796 tiller may require some assembly before first use. Follow these steps carefully:
- Desembalaxe: Retire con coidado todos os compoñentes da embalaxe. Comprobe se hai algún dano ou pezas que falten.
- Montaxe do manillar: Attach the handlebar assembly to the main unit. Secure it firmly using the provided bolts and nuts. Ensure all cables (throttle, kill switch) are routed correctly and not pinched.
- Transport Wheel Installation: Install the transport wheel(s) as per the diagrams in the separate assembly guide. Ensure they can be easily raised and lowered.
- Depth Stake/Drag Bar: Attach the depth stake to the rear of the tiller. Adjust its height to the desired tilling depth. A lower setting results in deeper tilling and slower forward movement.
- Comprobacións de fluídos:
- Aceite de motor: Fill the engine with appropriate 4-stroke engine oil (e.g., SAE 10W-30) to the recommended level on the dipstick. Do not overfill.
- Combustible: Fill the fuel tank with fresh, unleaded gasoline. Do not use E85 or mixed fuels. Ensure the fuel cap is securely tightened.
4. Instrucións de funcionamento
Before starting, ensure you have read the safety section and the tiller is properly assembled and fueled.
4.1. Arranque do motor
- Válvula de combustible: Open the fuel valve (if equipped).
- Chokes: Mova a panca do estrangulador á posición "CHOKE" (para arranques en frío).
- Acelerador: Set the throttle lever to the 'FAST' or 'START' position.
- Interruptor de apagado: Ensure the engine kill switch is in the 'ON' position.
- Arrancador de retroceso: Pull the recoil starter handle slowly until resistance is felt, then pull firmly and quickly. Repeat until the engine starts.
- Quecemento: Unha vez que o motor arranque, mova gradualmente a panca do estrangulador á posición "RUN" mentres o motor se quenta.
4.2. Tilling
- Lower Transport Wheel: Raise the transport wheel(s) to engage the tines with the ground.
- Engage Tines: Engage the tines using the appropriate lever or clutch control on the handlebar.
- Control Depth: Use the depth stake to control how deep the tines penetrate the soil. For initial passes, a shallower depth is often recommended.
- Manter o control: Walk behind the tiller, maintaining a firm grip on the handlebars. Allow the tiller to pull itself forward. Do not force it.
- Pases múltiples: For deeply compacted soil, make several passes, gradually increasing the tilling depth with each pass.
4.3. Parar o motor
- Disengage Tines: Disengage the tines.
- Acelerador: Move the throttle lever to the 'SLOW' or 'IDLE' position and allow the engine to cool for a minute.
- Interruptor de apagado: Move the engine kill switch to the 'OFF' position.
- Válvula de combustible: Close the fuel valve (if equipped) for storage.
5. Mantemento
Regular maintenance ensures optimal performance and extends the life of your tiller. Always disconnect the spark plug wire before performing any maintenance.
- Despois de cada uso:
- Clean soil and debris from the tines and housing.
- Inspect tines for damage or wear.
- Comproba se hai fixadores soltos.
- Every 10-20 Hours of Operation (or Annually):
- Aceite de motor: Check engine oil level and change if necessary. Refer to the engine manual for specific oil change intervals.
- Filtro de ar: Limpa ou substitúe o filtro de aire. Un filtro de aire sucio pode reducir o rendemento do motor.
- Buxía: Inspect and clean the spark plug. Replace if electrodes are worn or fouled.
- Filtro de combustible: Inspect and replace the fuel filter if necessary.
- Almacenamento:
- Drain the fuel tank or add a fuel stabilizer if storing for more than 30 days.
- Clean the entire machine thoroughly.
- Gardar nun lugar seco e ben ventilado, lonxe da luz solar directa e de temperaturas extremas.
6 Solución de problemas
Consulta esta sección para coñecer os problemas comúns e as súas posibles solucións.
| Problema | Causa posible | Solución |
|---|---|---|
| O motor non arranca |
|
|
| O motor funciona mal/falta potencia |
|
|
| Tiller does not cultivate effectively |
|
|
If problems persist after attempting these solutions, contact a qualified service technician or Hecht customer support.
7. Especificacións técnicas
| Especificación | Valor |
|---|---|
| Marca | Hecht |
| Modelo | HEC-796 |
| Número de peza | H796 |
| Fonte de enerxía | Funciona con gasolina |
| Potencia do motor | 4.5 kW / 6.12 HP |
| Ancho de traballo | 80 cm |
| Profundidade de traballo | 30 cm |
| Peso do elemento | 68 quilogramos |
| GTIN | 08595614920148 |
8. Garantía e atención ao cliente
This Hecht HEC-796 garden tiller is covered by a manufacturer's warranty. Please refer to the separate warranty document included with your purchase for specific terms and conditions, including warranty period and coverage details.
For technical assistance, spare parts, or warranty claims, please contact your authorized Hecht dealer or visit the official Hecht websitio web para obter información de atención ao cliente.
Hecht Customer Service:
- Refer to your purchase documentation for local contact details.
- Visita www.hecht.cz/en/ for general information and support.