
1. Introdución
The REDARC Tow-Pro Elite V3 Electric Brake Controller with Active Calibration is designed to provide smooth and safe braking for trailers. This unit offers proportional braking, ensuring the trailer brakes are applied in proportion to the towing vehicle's brake force. Its compact design and remote head allow for flexible installation in various vehicle types.
This manual provides essential information for the proper installation, operation, and maintenance of your Tow-Pro Elite V3 brake controller. Please read it thoroughly before installation and use to ensure optimal performance and safety.
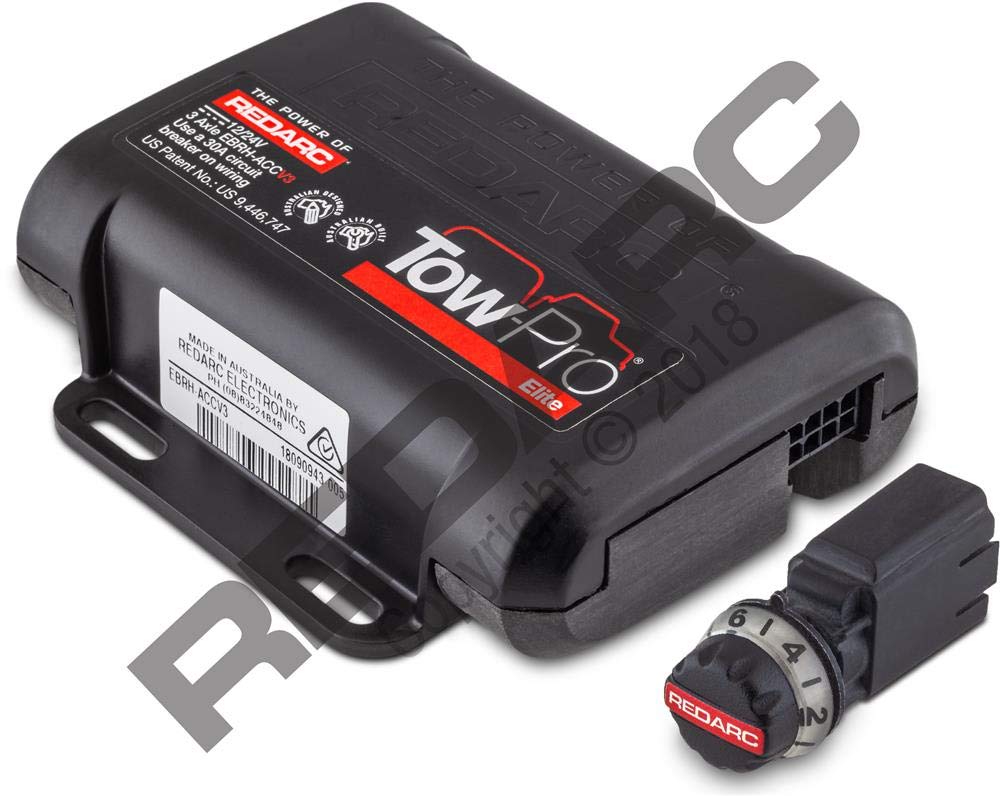
Figura 1.1: The REDARC Tow-Pro Elite V3 Brake Controller, showing the main control unit and the remote head with its display.
2. Contido do paquete
Verifica que todos os elementos estean presentes no paquete:
- Tow-Pro Elite V3 Main Unit
- Remote Head (User Interface)
- Remote Head Cable
- Wiring Harness (with color-coded wires)
- Hardware de montaxe
- Manual de instrucións (este documento)
3. Instalación
Proper installation is crucial for the safe and effective operation of your brake controller. If you are unsure about any step, consult a qualified automotive electrician.
3.1 Instalación da unidade principal
The main unit should be securely mounted in a location that is protected from moisture and physical damage, typically under the dashboard or in a kick panel. Ensure the unit is mounted in the correct orientation as indicated by the product labels for optimal accelerometer performance.
Figura 3.1: Example of the main unit being mounted securely within the vehicle interior.
3.2 Conexións de cableado
Connect the wiring harness to the main unit. The harness typically includes four color-coded wires:
- Fío negro: Connect to the positive terminal of the vehicle's battery via a 20A or 30A auto-resetting circuit breaker or fuse.
- Fío branco: Connect to a suitable chassis ground location. Ensure a clean, secure connection for reliable operation.
- Fío vermello: Connect to the cold side of the vehicle's brake light switch (stoplight signal). This wire detects when the vehicle's brakes are applied.
- Fío azul: Connect to the trailer's electric brake output wire. This carries the braking signal to the trailer.
Aviso: A posta a terra inadecuada pode provocar freadas intermitentes ou falta de voltage to trailer brakes. The white wire must be connected to a suitable ground location. The negative terminal of the battery is a suitable ground in the absence of a dedicated Trailer Tow Package connection.

Figura 3.2: Generic Wiring Diagram illustrating connections for the brake controller. (Note: This image is a placeholder for a wiring diagram, as no specific diagram image was provided in the JSON. The URL points to a video preview, which is not an image.)
3.3 Remote Head Installation
The remote head should be mounted within easy reach of the driver and in a location that does not obstruct the driver's view or interfere with vehicle controls. Use the provided adhesive pad or mounting bracket to secure the remote head. Route the remote head cable discreetly to the main unit.
Figura 3.3: The remote head being attached to the vehicle's dashboard, ensuring clear visibility and accessibility.
4. Funcionamento
4.1 Configuración e calibración iniciais
After installation, the unit will perform an initial calibration. Drive the vehicle with the trailer attached on a level surface. The unit will automatically detect the trailer and calibrate its internal sensors. The display will indicate when calibration is complete.
4.2 Manual Brake Control
The remote head features a manual brake button (often labeled 'S' or 'M' for 'Manual' or 'Set'). Pressing this button applies the trailer brakes independently of the vehicle's brakes. This can be used for testing or to reduce trailer sway. The display will show the applied brake force.
Figura 4.1: The remote head displaying the manual brake output level, typically a numerical value indicating brake force.
4.3 Brake Force Adjustment
Use the 'Up' and 'Down' buttons on the remote head to adjust the overall brake force applied to the trailer. This allows you to fine-tune the braking response to match your trailer's weight and road conditions. The display will show the current brake setting (e.g., B1 to B9).
4.4 Modo inverso
When reversing, the brake controller automatically reduces or disables trailer braking to prevent locking up the trailer wheels. The display may show a 'Caution Reverse' message or similar indicator.
5. Axustes e configuración
The remote head allows access to various settings to customize the controller's behavior.
5.1 Accessing the Setup Menu
Typically, holding down a specific button (refer to the remote head's markings) will enter the setup menu. Navigate through options using the 'Up' and 'Down' buttons.
5.2 Configuracións dispoñibles
- Idioma: Seleccione o seu idioma de visualización preferido.
- Brillo: Adjust the display brightness for optimal visibility day or night.
- Tempo de espera: Configure how long the display remains active before entering a power-saving standby mode.
- Nivelación: Re-calibrate the internal leveling sensor if the unit's mounting orientation has changed or if you experience inconsistent braking.
Figura 5.1: The remote head display showing the setup menu, allowing adjustment of various operational parameters.
6 Solución de problemas
If you encounter issues with your Tow-Pro Elite V3, refer to the following common troubleshooting steps:
6.1 Diagnostic Display
The remote head can display diagnostic information. Access the 'Troubleshoot' or 'Diagnostics' menu (refer to your remote head's specific button functions) to view:
- POTENCIA: Batería do vehículo voltage.
- ENTRADA: Voltage from the brake light switch.
- SAÍDA: Current being sent to the trailer brakes.
Ensure POWER and INPUT voltages are within expected ranges (e.g., ~12V). If OUTPUT is 0.0A when brakes are applied, check wiring to the trailer.
Figura 6.1: The remote head displaying diagnostic values for power, input, and output, useful for identifying electrical issues.
6.2 Problemas comúns
- Sen alimentación á unidade: Check the fuse/circuit breaker on the black wire to the battery. Verify battery connections.
- No Trailer Detected: Ensure the trailer is properly connected to the vehicle's trailer connector. Check the blue wire connection.
- Intermittent Braking: Inspect all wiring connections for looseness or corrosion, especially the ground (white wire).
- Incorrect Braking Force: Adjust the brake force setting on the remote head. Re-perform leveling calibration if necessary.
7. Especificacións
| Característica | Especificación |
|---|---|
| Fabricante | REDARC |
| Modelo | EBRH-ACCV3-NA |
| Dimensións do produto | 17.27 x 16 x 6.1 cm |
| Peso do elemento | 312 g |
| Tipo de freado | Proporcional |
| Calibración | Active Calibration |
8. Garantía e soporte
For detailed warranty information and technical support, please refer to the official REDARC website or contact REDARC customer service directly. Keep your proof of purchase for warranty claims.
REDARC Contact Information: Por favor visite www.redarc.com.au para obter os recursos de asistencia e os datos de contacto máis recentes.