1. Introdución
This manual provides detailed instructions for the installation, operation, and maintenance of your ASHATA 120dB Touch Sensor Security Alarm Door Knob. This device is designed to provide an audible alert upon detecting unauthorized contact with a door or window, enhancing security for your home, office, or shop. Please read this manual thoroughly before using the product to ensure proper function and safety.
2. Información de seguridade
- Ensure the device is used with the specified 9V battery. Incorrect battery types may cause damage or malfunction.
- Non expoñas o dispositivo a temperaturas extremas, á luz solar directa nin á humidade.
- Keep the device out of reach of children to prevent accidental activation or misuse.
- The alarm produces a loud sound (120dB). Avoid prolonged exposure to the sound at close range to prevent hearing discomfort.
- Non intente desmontar nin reparar o dispositivo vostede mesmo. Consulte persoal cualificado para o seu mantemento.
3. Contido do paquete
Verifica que todos os elementos estean presentes no teu paquete:
- 1 x ASHATA Touch Sensor Security Alarm
- 1 x Manual de usuario (este documento)
Nota: Para o funcionamento require unha batería de 9 V e non está incluída no paquete.
4. Produto rematadoview
The ASHATA Touch Sensor Security Alarm is a compact and portable device designed for easy deployment. It features a sensitive touch sensor and a loud siren to deter intruders.
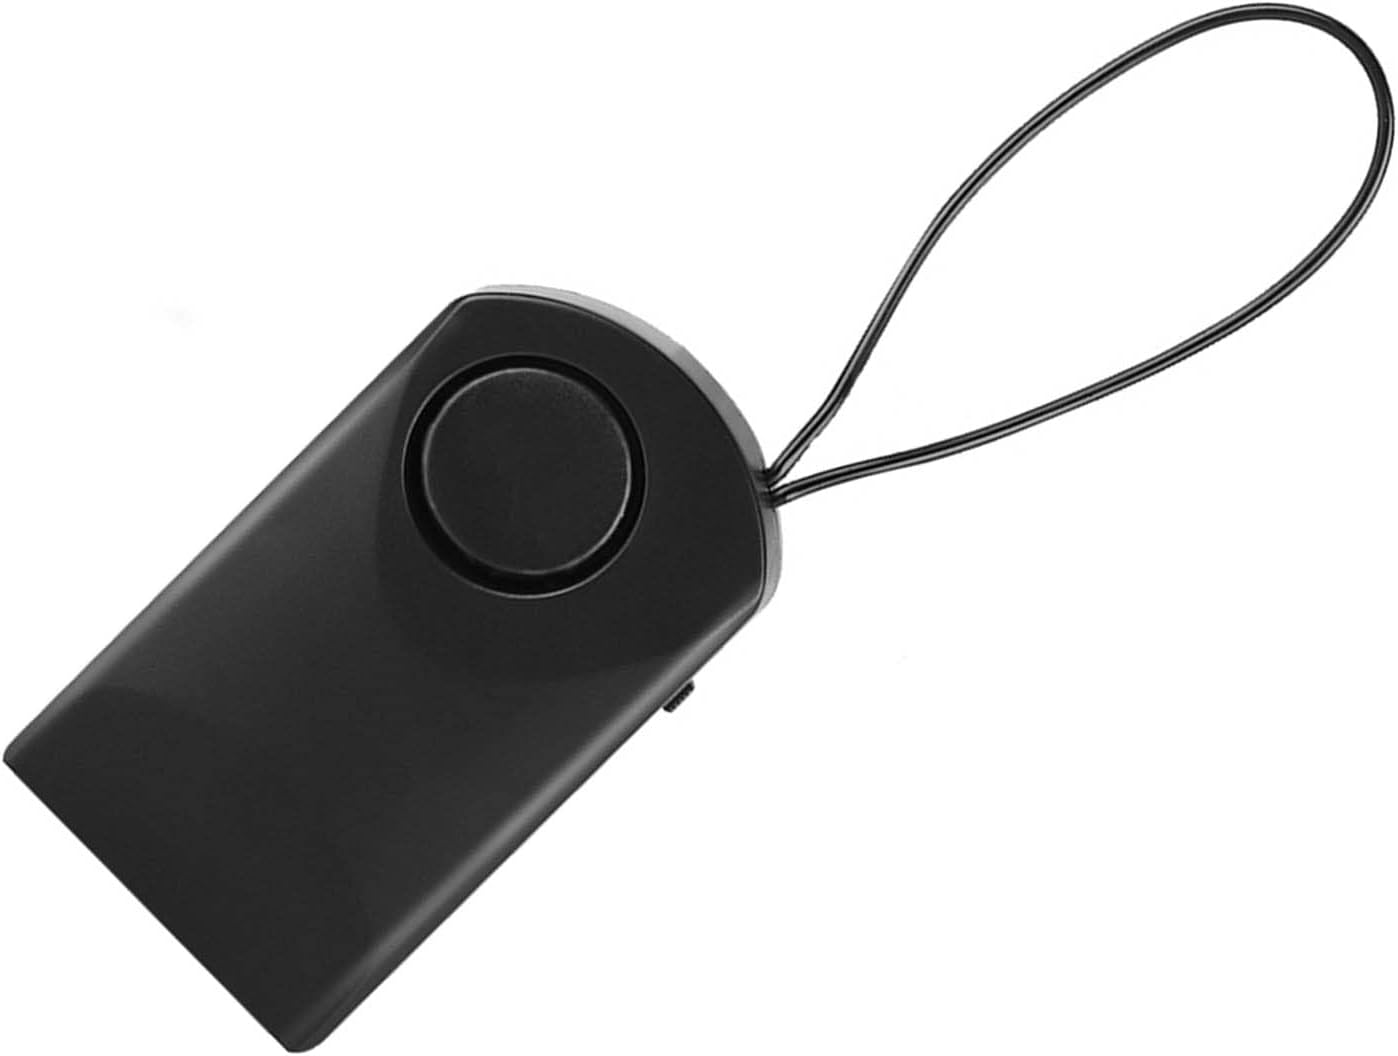
Figura 4.1: Fronte view of the ASHATA Touch Sensor Security Alarm. This image shows the main body of the alarm with the siren speaker visible on the front surface.

Figura 4.2: Lado view of the ASHATA Touch Sensor Security Alarm, highlighting the ON/OFF switch. The switch allows for easy activation and deactivation of the alarm function.
Compoñentes clave:
- Siren Speaker: Emits a 120dB alarm sound.
- Sensor táctil: Detects contact or vibration.
- Interruptor ON / OFF: Activa ou desactiva a alarma.
- Compartimento de batería: Located on the back (requires 9V battery).
- Bucle colgante: For easy attachment to door handles or knobs.
5. Configuración
5.1 Instalación da batería
- Locate the battery compartment cover on the back of the alarm unit.
- Abra a tapa deslizándoa ou facendo palanca con coidado.
- Insert a new 9V alkaline battery, ensuring correct polarity (+/-).
- Coloque a tapa do compartimento da batería de forma segura.
5.2 Montaxe da alarma
The alarm is designed for easy, temporary mounting on door handles or knobs.
- Identify the door or window you wish to secure.
- Use the integrated hanging loop to place the alarm over the inside door handle or knob. Ensure the alarm hangs freely and can detect movement.

Figura 5.1: The alarm unit attached to a door handle. The hanging loop allows for quick and easy placement on various door types.

Figura 5.2: The alarm positioned on a door knob, illustrating its use in a bedroom setting for personal security. The alarm is designed to activate if the door knob is touched.
6. Instrucións de funcionamento
6.1 Activating the Alarm
- Once the alarm is securely mounted and the battery is installed, locate the ON/OFF switch on the side of the unit.
- Deslice o interruptor cara a ON posición.
- The alarm is now armed. Any significant touch or vibration detected on the door handle/knob will trigger the 120dB siren.
6.2 Deactivating the Alarm
- To deactivate the alarm, slide the ON/OFF switch to the DESACTIVADO posición.
- The alarm will cease to function until reactivated.
Note: The alarm is highly sensitive. Test its sensitivity by gently touching the door handle after activation to ensure it functions as expected.
7. Mantemento
- Limpeza: Limpe o dispositivo cun pano suave e seco. Non empregue produtos de limpeza abrasivos nin disolventes.
- Substitución da batería: Replace the 9V battery when the alarm sound becomes weak or the unit fails to activate. Always use a fresh alkaline battery.
- Almacenamento: Se garda o dispositivo durante un período prolongado, retire a batería para evitar fugas e danos. Gárdeo nun lugar fresco e seco.
8 Solución de problemas
| Problema | Causa posible | Solución |
|---|---|---|
| Non soa a alarma. |
|
|
| Alarm sounds too easily (false alarms). |
|
|
| Alarm sound is weak. | Batería baixa. | Replace the 9V battery with a new one. |
9. Especificacións
| Característica | Detalle |
|---|---|
| Modelo | ASHATAurz2poca7s |
| Volume de alarma | 120 dB |
| Fonte de enerxía | 1 batería de 9 V (non incluída) |
| Material | Plástico ABS |
| Método de control | Touch Sensor, ON/OFF Switch |
| Tipo de montaxe | Door Handle/Knob Mount |
| Dimensións (aprox.) | 9.9 x 5.4 x 2.5 cm (3.9 x 2.1 x 1.0 polgadas) |
| Peso (aprox.) | 69 g (2.4 oz) sen batería |
10. Garantía e soporte
ASHATA products are designed for reliability and performance. For specific warranty details, please refer to the warranty card included with your purchase or visit the official ASHATA websitio.
If you encounter any issues or have questions regarding your ASHATA Touch Sensor Security Alarm, please contact ASHATA customer support through the retailer where the product was purchased or via the contact information provided on the official ASHATA websitio.
Please have your model number (ASHATAurz2poca7s) and purchase information ready when contacting support.