
ZZIPP TXZZ580
ZZIPP TXZZ580 UHF 48-Channel Wireless Microphone System User Manual
Model: TXZZ580
Introdución
This manual provides detailed instructions for the proper setup, operation, and maintenance of your ZZIPP TXZZ580 UHF 48-Channel Wireless Microphone System. Please read this manual thoroughly before using the product to ensure optimal performance and longevity.
Produto rematadoview
O que hai na caixa
- Two Handheld Microphones (Transmitters)
- Unidade receptora
- Adaptador de corrente para o receptor
- Cable de conexión de audio
- Manual de usuario
Características clave
- Tecnoloxía sen fíos UHF
- 48 canles seleccionables
- Manual and IR Configuration
- Designed for Karaoke and other vocal applications
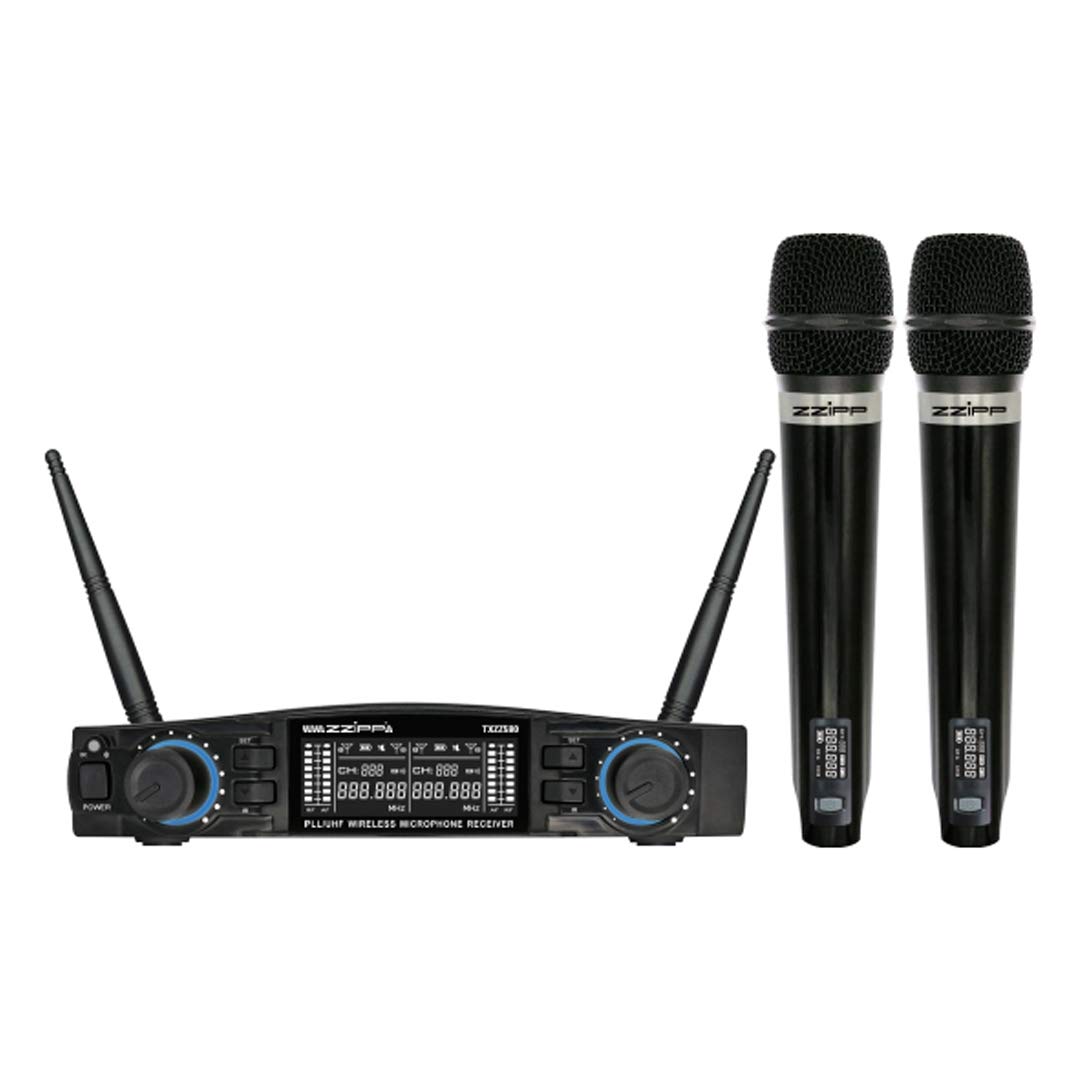
Figura 1: Acabadoview of the ZZIPP TXZZ580 Wireless Microphone System, showing the receiver unit and two handheld microphones.
Configuración
- Desempaquetar compoñentes: Retire con coidado todos os elementos da embalaxe.
- Colocación do receptor: Place the receiver unit on a stable surface, away from potential sources of interference such as computers, Wi-Fi routers, or other wireless devices. Ensure good line-of-sight to the area where the microphones will be used.
- Conectar enerxía: Connect the provided power adapter to the receiver's DC input and then plug it into a suitable power outlet.
- Conectar a saída de audio: Connect the receiver's audio output (e.g., 3.5mm Jack) to the input of your mixer, amplifier, or sound system using the supplied audio cable.
- Instalar as baterías nos transmisores: Open the battery compartment of each handheld microphone and insert the required batteries (typically AA, not always included). Observe correct polarity.
- Encendido: Turn on the receiver unit and then each handheld microphone.
- Channel Synchronization (Manual/IR):
- Configuración manual: Refer to the receiver's display and controls to manually select a desired channel for each microphone. Ensure each microphone is set to a unique channel to avoid interference.
- IR Synchronization: For automatic synchronization, align the IR sensor on the microphone with the IR sensor on the receiver. Activate the IR sync function on the receiver, and the microphone will automatically pair to the selected channel.
- Son de proba: Speak into each microphone to test the audio output through your sound system. Adjust volume levels as needed.
Instrucións de funcionamento
Encendido/apagado
- Receptor: Prema o botón de acendido no panel frontal para acender ou apagar a unidade.
- Micrófonos: Press and hold the power button on the microphone handle until the display illuminates (on) or turns off (off).
Selección de canles
The system offers 48 UHF channels. If you experience interference, change the operating channel. This can be done manually on the receiver and then synchronized with the microphone via IR, or directly on the microphone if it supports manual channel adjustment.
Control de volume
Adjust the output volume for each microphone using the dedicated volume knobs on the receiver's front panel. Further volume adjustments can be made on your connected mixer or ampmáis vivo.
Consellos de uso
- Maintain a clear line of sight between the microphones and the receiver for optimal signal quality.
- Evite colocar o receptor preto de obxectos metálicos grandes ou outros dispositivos electrónicos que poidan causar interferencias.
- Regularly check microphone battery levels to prevent unexpected power loss during use.
- For best sound quality, hold the microphone approximately 2-6 inches from your mouth.
Mantemento
Substitución da batería
When the microphone's battery indicator shows low power, replace the batteries immediately. Always use fresh batteries of the correct type (e.g., AA). Remove batteries if the microphones will not be used for an extended period to prevent leakage.
Limpeza
Clean the receiver and microphones with a soft, dry cloth. Do not use liquid cleaners or solvents, as these can damage the finish or internal components. For microphone grilles, a soft brush can be used to remove debris.
Almacenamento
Store the system in a cool, dry place, away from direct sunlight and extreme temperatures. If possible, use the original packaging or a protective case for transport and storage.
Resolución de problemas
| Problema | Causa posible | Solución |
|---|---|---|
| Non hai son do micrófono |
|
|
| Interferencia ou estática |
|
|
| Rango de funcionamento curto |
|
|
Especificacións
- Marca: ZIPP
- Modelo: TXZZ580
- Cor: Negro
- Tipo sen fíos: UHF
- Número de canles: 48
- Conectividade: Jack de 3.5 mm
- Fonte de enerxía: Corded Electric (for receiver)
- Característica especial: Manual and IR Configuration
- Uso recomendado: Karaoke
- Compoñentes incluídos: Two Handheld Microphones, Receiver
Garantía e Soporte
For warranty information, technical support, or service inquiries, please refer to the documentation provided with your purchase or contact your retailer. Keep your proof of purchase for warranty claims.
Ask a question about this manual
Ask about setup, troubleshooting, compatibility, parts, safety, or missing instructions. Manuals+ will review the question and use this page’s manual context to help answer it.