
1. Introdución
Thank you for choosing the Reebok RDVNEG9P2S2B2N Digital Watch. This manual provides essential information for the proper setup, operation, and maintenance of your new timepiece. Please read this manual thoroughly before using the watch to ensure optimal performance and longevity.
2. Información de seguridade
- Resistencia á auga: This watch is water resistant up to 100 meters. It is suitable for swimming and snorkeling but not for diving. Do not operate buttons underwater.
- Temperatura: Avoid exposing the watch to extreme temperatures (hot or cold) for extended periods, as this may affect its accuracy and battery life.
- Químicos: Keep the watch away from solvents, detergents, perfumes, and cosmetics, as these can damage the strap, case, or seals.
- Impacto: Protect the watch from strong impacts or drops, which can damage internal components or the crystal.
- Batería: Do not attempt to open the watch case or replace the battery yourself, as this may void the warranty and damage the watch. Refer to qualified service personnel.
3. Contido do paquete
Verifica que todos os elementos estean presentes no teu paquete:
- Reebok RDVNEG9P2S2B2N Digital Watch (with Stainless Steel Strap)
- Extra Silicone Strap
- Spring Bar Tool for strap replacement
- Manual de usuario (este documento)
4. Produto rematadoview
Familiarize yourself with the main components of your Reebok digital watch.
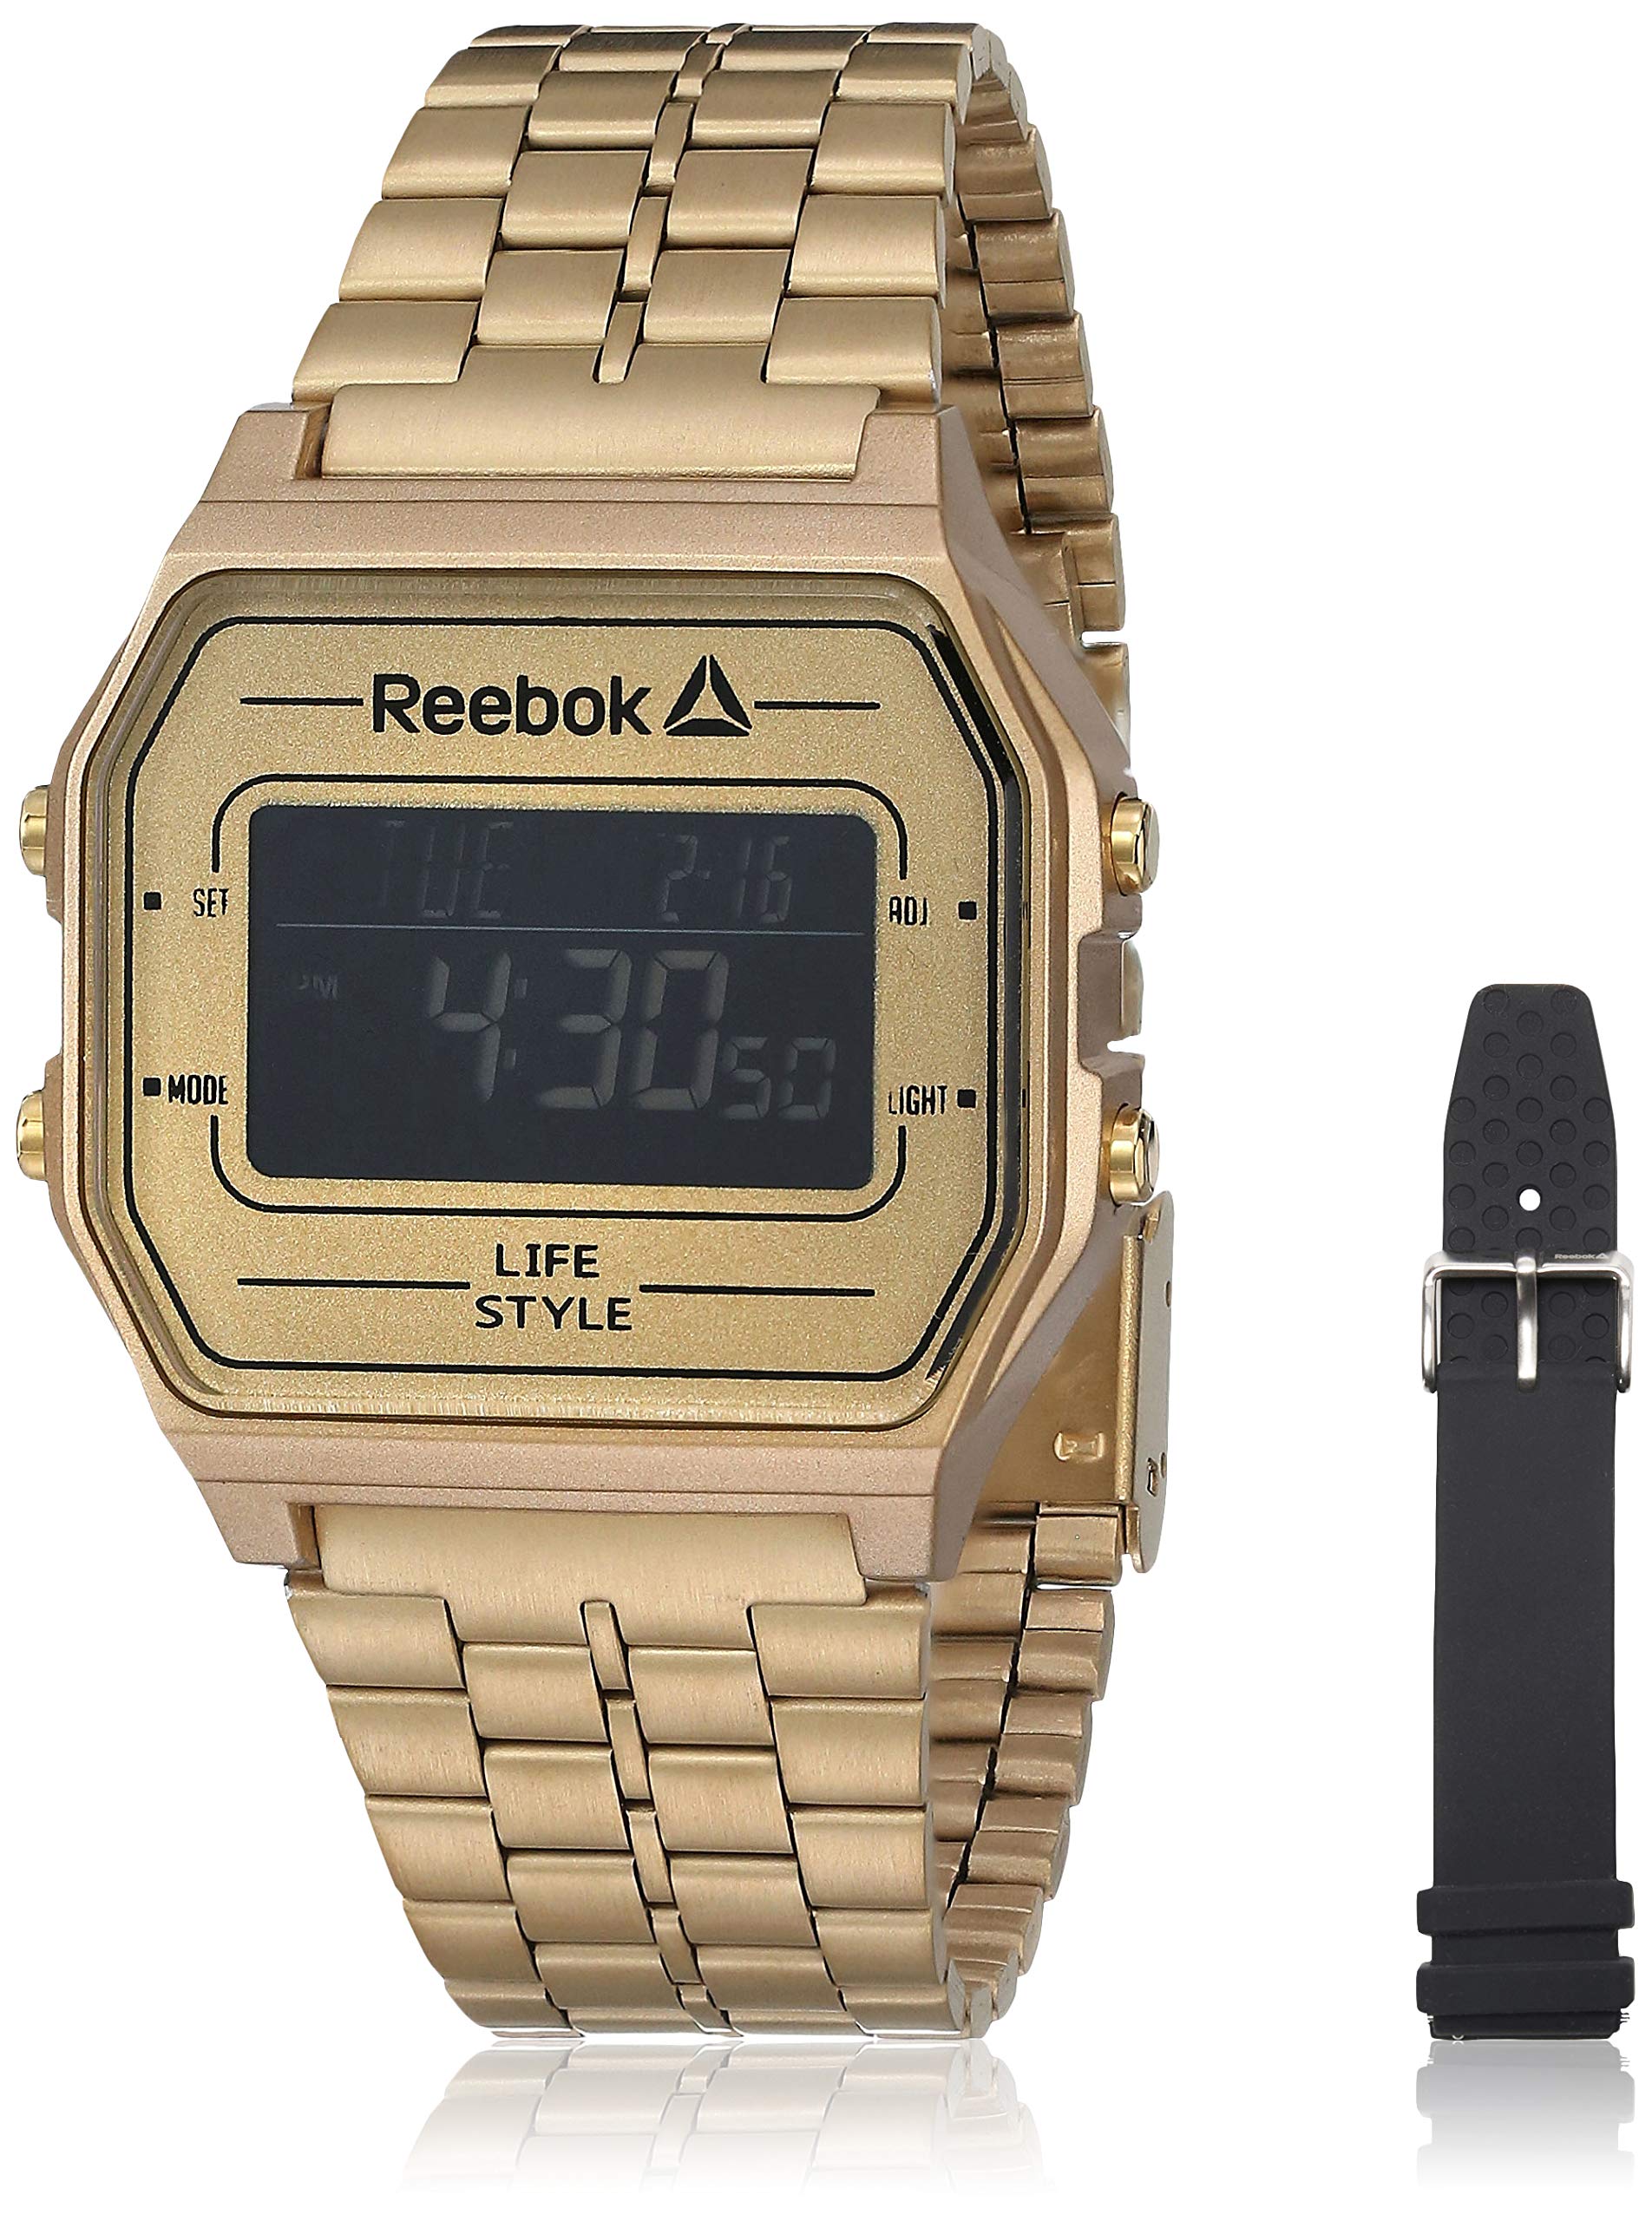
Imaxe 1: Fronte view of the Reebok RDVNEG9P2S2B2N Digital Watch with its gold stainless steel strap. The digital display shows time and date, and control buttons are visible on the sides.
- Visualización: Pantalla dixital que mostra a hora, a data e outras funcións.
- Botón SET: Úsase para introducir e confirmar a configuración.
- Botón MODE: Cycles through different watch modes (Time, Alarm, Stopwatch, etc.).
- Botón ADJ: Adjusts values during setting.
- Botón LUZ: Activa a retroiluminación para maior visibilidade en condicións de pouca luz.
- Caso: Gold-colored stainless steel case.
- Correa: Interchangeable straps (Stainless Steel and Silicone).
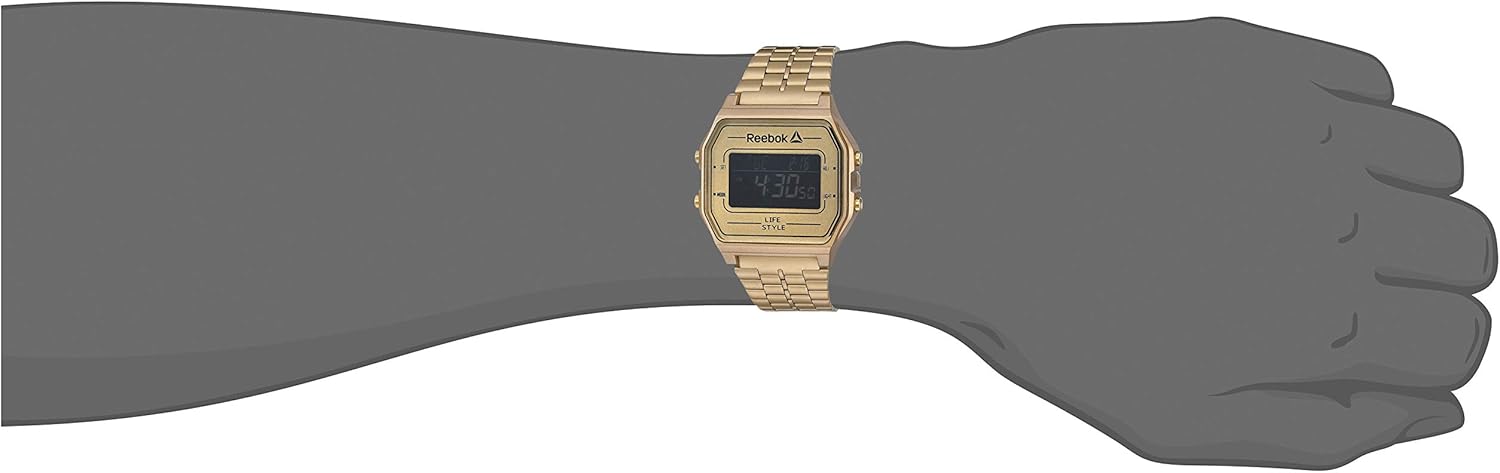
Imaxe 2: The Reebok RDVNEG9P2S2B2N Digital Watch worn on a wrist, showcasing its size and fit with the gold stainless steel strap.
5. Configuración
5.1 Configuración inicial da data e da hora
- In normal timekeeping mode, press and hold the SET botón ata que os segundos comecen a parpadear. Isto indica que estás no modo de configuración.
- Preme o MODO para percorrer os axustes: Segundos → Hora → Minuto → Ano → Mes → Día.
- Usa o ADJ button to increase the flashing value. Hold the ADJ button to rapidly advance the value.
- Unha vez axustados todos os axustes, prema o botón SET button again to exit the setting mode and save your changes.
5.2 12/24-Hour Format
Mentres estea no modo de axuste da hora (os segundos parpadean), prema o botón ADJ botón cando a hora parpadea para alternar entre os formatos de 12 horas (co indicador AM/PM) e 24 horas.
6. Funcionamento do reloxo
6.1 Selección de modo
Preme o MODO button repeatedly to cycle through the available functions:
- Modo de hora normal (mostra a hora e a data actuais)
- Modo de alarma
- Modo cronómetro
6.2 Usando a luz de fondo
Preme o LUZ button to illuminate the display for a few seconds. This is useful in dark environments.
6.3 Función de alarma
- From Timekeeping Mode, press MODO until "AL" or "Alarm" appears on the display.
- Manteña premido o SET botón ata que a hora da alarma parpadee.
- Usa o ADJ botón para configurar a hora desexada. Preme MODO para pasar a minutos.
- Usa o ADJ botón para axustar os minutos desexados.
- Preme SET para confirmar e saír da configuración da alarma.
- Para activar/desactivar a alarma, prema o botón ADJ button while in Alarm Mode (without holding SET). An alarm icon will appear/disappear.
6.4 Función de cronómetro
- From Timekeeping Mode, press MODO until "ST" or "Stopwatch" appears on the display.
- Preme o ADJ botón para iniciar o cronómetro.
- Preme o ADJ botón de novo para pausar o cronómetro.
- Preme o SET botón para poñer o cronómetro a cero.
- To exit Stopwatch Mode, press the MODO botón.
7. Substitución da correa
Your Reebok watch comes with an extra silicone strap and a spring bar tool for easy strap changes. Follow these steps carefully to avoid scratching your watch or damaging the spring bars.
7.1 Removing the Current Strap
- Place the watch face down on a soft, clean cloth to prevent scratches.
- Locate the spring bar tool. It typically has a forked end.
- Insert the forked end of the tool between the strap and the watch lug (the part of the watch case where the strap attaches).
- Gently push the spring bar inwards (towards the center of the strap) to compress it.
- Once one end of the spring bar is disengaged from the lug hole, carefully pull the strap away from the watch.
- Repeat for the other side of the strap and for the second strap piece.
- Keep the spring bars in a safe place if you intend to reuse the strap.
7.2 Attaching a New Strap
- Insert one end of a spring bar into one of the lug holes on the watch case.
- With the spring bar tool, compress the other end of the spring bar.
- Guide the compressed end into the opposite lug hole.
- Release the spring bar tool, ensuring both ends of the spring bar are securely seated in the lug holes. Gently tug on the strap to confirm it is firmly attached.
- Repeat for the second strap piece.
8. Mantemento
8.1 Limpeza
- Watch Case and Stainless Steel Strap: Wipe regularly with a soft, dry cloth. For stubborn dirt, use a slightly damp pano e xabón suave, despois seca ben.
- Correa de silicona: Wash with mild soap and water, then rinse and dry completely.
- Avoid using abrasive cleaners or chemical solvents.
8.2 Coidado da resistencia á auga
- Ensure the watch crown (if applicable, though this is a digital watch with buttons) and buttons are fully pressed in before any contact with water.
- Non opere os botóns mentres o reloxo estea mergullado na auga.
- Despois da exposición á auga salgada, enxágüe o reloxo con auga limpa e séqueo ben.
- Water resistance is not a permanent condition and may decrease over time. Have the seals checked periodically by a qualified technician.
8.3 Substitución da batería
When the display becomes dim or the watch stops functioning, the battery may need replacement. It is recommended to have the battery replaced by a professional watch technician to ensure proper sealing and water resistance integrity.
9 Solución de problemas
| Problema | Causa posible | Solución |
|---|---|---|
| A pantalla do reloxo está en branco ou escura. | Batería baixa ou esgotada. | Substitúa a batería (recomendado por un profesional). |
| O tempo é impreciso. | Incorrect time setting; exposure to strong magnetic fields; low battery. | Reset the time and date (refer to Section 5.1). Keep away from strong magnets. Replace battery if issue persists. |
| Os botóns non responden. | O reloxo está mollado; avaría interna. | Ensure watch is dry. If issue persists, contact customer support. |
| Auga dentro do reloxo. | Water resistance compromised; buttons operated underwater. | Leve o reloxo inmediatamente a un profesional para que o inspeccione e o repare e evite máis danos. |
10. Especificacións
- Número de modelo: RDVNEG9P2S2B2N
- Tipo de visualización: Dixital
- Movemento: Cuarzo
- Material da caixa: Aceiro inoxidable
- Diámetro da caixa: 42 mm
- Espesor da caixa: 5 mm
- Material da correa: Stainless Steel (Gold), Silicone (Extra)
- Ancho da correa: 4 cm
- Cristal: Mineral
- Resistencia á auga: 100 metros (330 pés)
- Fonte de enerxía: Batería
- Tipo de peche: Buckle (for silicone), Elegant Clasp (for stainless steel)
11. Garantía e soporte
11.1 Garantía do fabricante
This Reebok watch is covered by a manufacturer's warranty. Please refer to the warranty card included in your original packaging for specific terms, conditions, and duration. The warranty typically covers manufacturing defects but does not cover damage resulting from misuse, accidents, unauthorized repairs, or normal wear and tear.
11.2 Atención ao cliente
For technical assistance, warranty claims, or service inquiries, please contact Reebok customer support through their official website or the contact information provided with your purchase documentation. When contacting support, please have your watch model number (RDVNEG9P2S2B2N) and proof of purchase readily available.