1. Introdución
This manual provides detailed instructions for the setup, operation, and maintenance of your BMW Multi-Function Clock, Alarm, and Weather Station. This device combines a digital clock, an alarm with a snooze function, and a weather station that displays temperature. Please read this manual carefully before use to ensure proper functionality and to maximize your experience with the product.
2. Contido do paquete
Comprobe o contido do paquete ao desembalar. Se falta algún artigo ou está danado, póñase en contacto co seu vendedor.
- BMW Multi-Function Clock, Alarm, and Weather Station Unit
- Manual de usuario (este documento)
3. Configuración
3.1. Instalación da batería
O dispositivo require 2 pilas AAA (not included) for operation. Follow these steps to install the batteries:
- Localice a tapa do compartimento da batería na parte traseira da unidade.
- Deslice ou levante a tapa con suavidade para abrir o compartimento.
- Insira dúas pilas AAA, asegurándose de manter a polaridade correcta (+ e -) como se indica no interior do compartimento.
- Coloque a tapa do compartimento da batería de forma segura.
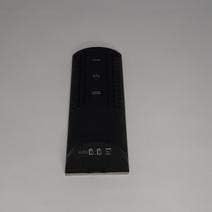
Figura 3.1: De volta view of the device, illustrating the battery compartment and control buttons for setup.
3.2. Acendido inicial
After battery installation, the device display will illuminate, and it will typically show a default time or begin searching for a signal (if applicable for weather functions). Proceed to the operating instructions to set the time and other functions.
4. Instrucións de funcionamento
4.1. Axuste da hora e da data
To set the current time and date:
- Manteña premido o MODO button (usually located on the back or side) for a few seconds until the time display starts flashing.
- Usa o UP or ABAIXO buttons (often labeled '+' or '-') to adjust the hour.
- Preme MODO again to confirm the hour and move to the minutes.
- Axuste os minutos usando o botón UP or ABAIXO botóns.
- Continúa presionando MODO and adjusting with ARRIBA/ABAIXO for year, month, and day settings.
- Preme MODO unha última vez para saír do modo de configuración.
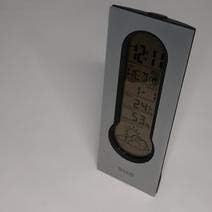
Figura 4.1: Front display of the device, showing the digital clock, temperature, and weather forecast icons.
4.2. Axustar a alarma
Para configurar a hora da alarma:
- No modo de visualización da hora normal, prema ALARMA botón (o MODO repetidamente ata que apareza 'AL' ou unha icona de alarma).
- Manteña premido o ALARMA botón ata que a hora da alarma comece a parpadear.
- Usa o UP or ABAIXO botóns para axustar a hora de alarma desexada.
- Preme ALARMA again to confirm the hour and move to the minutes.
- Axuste os minutos usando o botón UP or ABAIXO botóns.
- Preme ALARMA one last time to save the alarm setting. An alarm icon will typically appear on the display to indicate the alarm is active.
4.3. Using Snooze Function
Cando soe a alarma, prema o botón AMORTAR button (usually a large button on the top of the unit) to temporarily silence the alarm. The alarm will sound again after a few minutes (typically 5-10 minutes, depending on the model). To turn off the alarm completely, press any other button or let it ring until it automatically stops.

Figura 4.2: Arriba view of the device, highlighting the prominent SNOOZE button.
4.4. Visualización da temperatura
The device continuously displays the ambient temperature. The temperature unit (Celsius or Fahrenheit) can usually be switched by pressing a dedicated button (e.g., 'C/F' or 'TEMP') or by holding down one of the adjustment buttons during time setting.
4.5. Weather Station Function
The integrated weather station provides a basic weather forecast using graphical icons (e.g., sun, clouds, rain). This forecast is based on internal barometric pressure changes and is an estimation for the local area. It is not connected to external weather services.
5. Mantemento
5.1. Limpeza
To clean the device, use a soft, dry cloth. Do not use abrasive cleaners, solvents, or chemical sprays, as these can damage the surface and electronic components. Avoid getting moisture into the device.
5.2. Substitución da batería
When the display dims or functions become erratic, it is time to replace the batteries. Follow the battery installation steps in Section 3.1. Always replace both batteries at the same time with new AAA batteries.
6 Solución de problemas
If you encounter issues with your device, please refer to the following common problems and solutions:
- A pantalla está en branco ou escura:
Check if batteries are installed correctly. Replace with fresh AAA batteries. - A hora ou a data son incorrectas:
Refer to Section 4.1 to reset the time and date. Ensure you confirm each setting step. - Alarm is not sounding:
Verify that the alarm is set and activated (look for an alarm icon on the display). Ensure the volume is not set to zero if adjustable. - Temperature reading seems inaccurate:
Ensure the device is not placed in direct sunlight, near heat sources, or in drafts, which can affect readings. Allow some time for the sensor to stabilize after placement. - Weather forecast icons are not changing:
The weather forecast is based on local barometric pressure changes and may take time to update. It provides a general trend, not a precise forecast.
7. Especificacións
| Característica | Detalle |
|---|---|
| Marca | BMW |
| Número de modelo | 06017443015007 |
| Características especiais | Alarm, Snooze, Temperature Display |
| Fonte de enerxía | Batería |
| Tipo de batería | 2 pilas AAA (non incluídas) |
| ASIN | B089QGJ9VR |
8. Garantía e soporte
This product is covered by a standard manufacturer's warranty. For specific warranty terms and conditions, please refer to the documentation provided at the time of purchase or contact your retailer. For technical support or service inquiries, please reach out to the point of purchase or the manufacturer's customer service department.