
1. Introdución
The Gravity 4000.1D is a high-performance Class D monoblock amplifier designed for automotive audio systems. This amplifier delivers 4000 Watts maximum power and is stable at 1 Ohm, 2 Ohm, and 4 Ohm loads, making it suitable for driving subwoofers. It features a digital design with a MOSFET power supply for efficient operation. This manual provides essential information for proper installation, operation, and maintenance of your ampmáis vivo.
2. Precaucións de seguridade
- Desconecte sempre o terminal negativo da batería do vehículo antes de comezar calquera instalación.
- Asegúrate de que todo o cableado estea correctamente instalado e fixado para evitar danos ou curtocircuítos.
- Empregue cables de alimentación e terra do calibre axeitado, tal e como se especifica na sección de instalación.
- Instala o amplifier nunha zona ben ventilada para evitar o sobrequecemento.
- Evite montar o amplifier in locations exposed to direct sunlight or excessive moisture.
- Consulta cun instalador profesional de audio para automóbiles se tes algunha dúbida sobre algún paso da instalación.
3. Contido do paquete
Verifica que todos os elementos estean presentes no paquete:
- Gravity 4000.1D Class D Car Ampmáis vivo
- Mando remoto para baixo con cable
- Ferramentas de montaxe (parafusos)
- Manual de usuario (este documento)
- SoundXtreme AP6 Bass Machine (Bundle Component)
4. Produto rematadoview
Familiarizarse co amplifier's layout and connections.

Figura 1: Arriba view of the Gravity 4000.1D Class D Car Amplifier, showing the 'GRAVITY' logo and 'WARZONE' branding, along with the model number 'WZ 4000-1D'.
4.1 Panel de entrada e control

Imaxe 2: Primeiro plano view da amplifier's input and control panel. This side features RCA input jacks, a remote bass knob port, and various adjustment controls.
- LED DE PROTECCIÓN: Ilumina cando o ampo lifier está en modo de protección.
- REMOTO: Port for connecting the wired remote bass knob.
- ENTRADA (RCA): Audio signal input from your head unit or source.
- BRIDGE IN: Usado para conectar múltiples amplifiers (refer to advanced setup).
- GAÑA: Axusta a sensibilidade de entrada do ampmáis vivo.
- LPF (filtro paso baixo): Adjusts the low-pass crossover frequency (40 Hz ~ 180 Hz).
- SUBSONICO: Adjusts the subsonic filter frequency (0 Hz ~ 50 Hz).
- BASS BOOST FREQ: Selects the center frequency for bass boost (30 Hz, 40 Hz, 60 Hz).
- BASS BOOST: Adjusts the level of bass boost (0 dB ~ 12 dB).
- LED POWER: Ilumina cando o ampo lifier está acendido.
4.2 Power and Speaker Terminal Panel

Imaxe 3: Primeiro plano view da amplifier's power and speaker terminal panel. This side includes connections for power, ground, remote turn-on, and speaker outputs.
- PONENTE: Output terminals for connecting your subwoofer(s).
- POTENCIA (+12 V): Connects to the positive terminal of the vehicle's battery.
- REM (Remoto): Connects to the remote turn-on output of your head unit.
- GND (terra): Connects to a solid chassis ground point in the vehicle.
5. Instalación
5.1 Montaxe do Ampmáis vivo
Choose a mounting location that is dry, well-ventilated, and secure. Ensure there is sufficient airflow around the amplifier to prevent overheating. The amplifier can be mounted horizontally or vertically. Use the provided mounting screws to secure the amplifter a unha superficie sólida no seu vehículo.
5.2 Conexións de cableado
Proper wiring is crucial for optimal performance and safety. Refer to Figure 3 for terminal locations.
- Conexión de alimentación (+12 V): Run a heavy-gauge power cable (e.g., 4-gauge or larger) directly from the vehicle's positive battery terminal to the amplifier's +12V terminal. Install an in-line fuse holder with an appropriate fuse (not included) within 18 inches (45 cm) of the battery.
- Conexión a terra (GND): Run a heavy-gauge ground cable (same gauge as power cable) from the amplifier's GND terminal to a clean, unpainted metal surface on the vehicle's chassis. Ensure a good electrical connection by scraping away any paint or rust. The ground cable should be as short as possible, ideally less than 3 feet (1 meter).
- Conexión de activación remota (REM): Connect a smaller gauge wire (e.g., 18-gauge) from the amplifier's REM terminal to the remote turn-on output of your head unit. This wire tells the ampactivar cando a unidade principal estea activa.
- Conexión de entrada RCA: Connect RCA cables from the pre-out outputs of your head unit to the INPUT RCA jacks on the ampmáis vivo.
- Conexión do altofalante: Connect your subwoofer(s) to the SPEAKER output terminals. Ensure correct polarity (+ to + and - to -). The amplifier is stable down to 1 Ohm. Consult your subwoofer's specifications for proper wiring configurations to achieve the desired impedance.
- Control remoto de graves: Plug the remote bass knob cable into the REMOTE port on the amplifier and mount the knob in a convenient location for adjustment.
6. Funcionamento
6.1 Encendido inicial
After all connections are made and verified, reconnect the vehicle's battery. Turn on your head unit. The POWER LED on the amplifier should illuminate. If the PROTECT LED illuminates, refer to the Troubleshooting section.
6.2 Axuste AmpConfiguración do lifier
Adjust these settings carefully to optimize sound quality and prevent damage to your speakers.
- GAÑA: Start with the GAIN control at minimum. Play a familiar piece of music at a moderate volume on your head unit. Slowly increase the GAIN until you hear distortion, then back off slightly. This sets the ampa sensibilidade de entrada do adaptador para que coincida coa saída da unidade principal.
- LPF (filtro paso baixo): Adjust the LPF to filter out frequencies above your desired subwoofer range. A common starting point is 80-100 Hz. This ensures only low frequencies are sent to your subwoofer.
- Filtro SUBSONICO: This filter removes extremely low frequencies that your subwoofer cannot reproduce efficiently, preventing damage and improving sound quality. Set it slightly below your subwoofer's port tuning frequency or around 25-30 Hz for sealed enclosures.
- BASS BOOST FREQ & BASS BOOST: Use these controls to enhance bass output at a specific frequency. Start with Bass Boost at 0 dB and adjust only if needed. Excessive bass boost can cause distortion and damage.
6.3 Botón de baixo remoto

Figure 4: The wired remote bass knob, used for convenient adjustment of bass level from the driver's seat.
The remote bass knob allows you to adjust the subwoofer output level conveniently from your listening position. This control typically acts as a master volume for the subwoofer channel, allowing you to fine-tune bass levels without accessing the amplifier directamente.
7. Especificacións
| Característica | Especificación |
|---|---|
| Modelo | 4000.1D |
| Potencia de saída | 4000 vatios máx |
| Clase | Clase D |
| Estabilidade | 1 Ohm, 2 Ohm, 4 Ohm Stable |
| Relación S/N | > 70 dB |
| Resposta en frecuencia | 8 Hz ~ 180 Hz |
| THD | < 0.2 % |
| Nivel de aumento de graves | 0 ~ 12 dB |
| LPF (filtro paso baixo) | 40 Hz ~ 180 Hz |
| Filtro subsónico | 0 ~ 50 Hz |
| Entradas | High and Low Level Inputs |
| Dimensións (L×W×H) | 286 mm (11.3 polgadas) × 211 mm (8.3 polgadas) × 64.5 mm (2.5 polgadas) |
| Número de canles | 1 (Monobloque) |
| Tipo de montaxe | Autónomo |
8 Solución de problemas
Se tes problemas co teu amplifier, consult the following table:
| Problema | Causa posible | Solución |
|---|---|---|
| AmpO amplificador non se acende (o LED de encendido está apagado) | No power, no ground, or no remote signal. Blown fuse. | Check +12V, GND, and REM connections. Verify in-line fuse. |
| PROTECT LED illuminates | Short circuit in speaker wiring, impedance too low, overheating, or DC offset. | Check speaker wiring for shorts. Verify speaker impedance. Ensure proper ventilation. Allow amplifier para arrefriar. |
| Sen saída de son | No input signal, incorrect gain setting, or speaker wiring issue. | Check RCA input connections. Adjust GAIN. Verify speaker connections and polarity. |
| Son distorsionado | GAIN set too high, improper crossover settings, or damaged speakers. | Reduce GAIN. Adjust LPF and Subsonic filters. Inspect speakers for damage. |
| Engine noise/whine | Poor grounding, RCA cable routing, or power cable interference. | Ensure solid ground connection. Route RCA cables away from power cables. Consider a ground loop isolator. |
9. Mantemento
To ensure the longevity and optimal performance of your Gravity 4000.1D ampmáis vivo:
- Manteña o ampManteña o refrigerador limpo e sen po. Use un pano suave e seco para a limpeza.
- Asegúrate de que as aletas de refrixeración non estean obstruídas para permitir unha disipación axeitada da calor.
- Comprobe periodicamente todas as conexións do cableado para comprobar se están ben apertadas e se presentan corrosión.
- Evite derramar líquidos sobre o ampmáis vivo.
10. SoundXtreme AP6 Bass Machine (Bundle Component)
The Gravity 4000.1D amplifier may be bundled with a SoundXtreme AP6 Bass Machine. This component is designed to enhance bass response and provide additional control over low frequencies in your audio system.
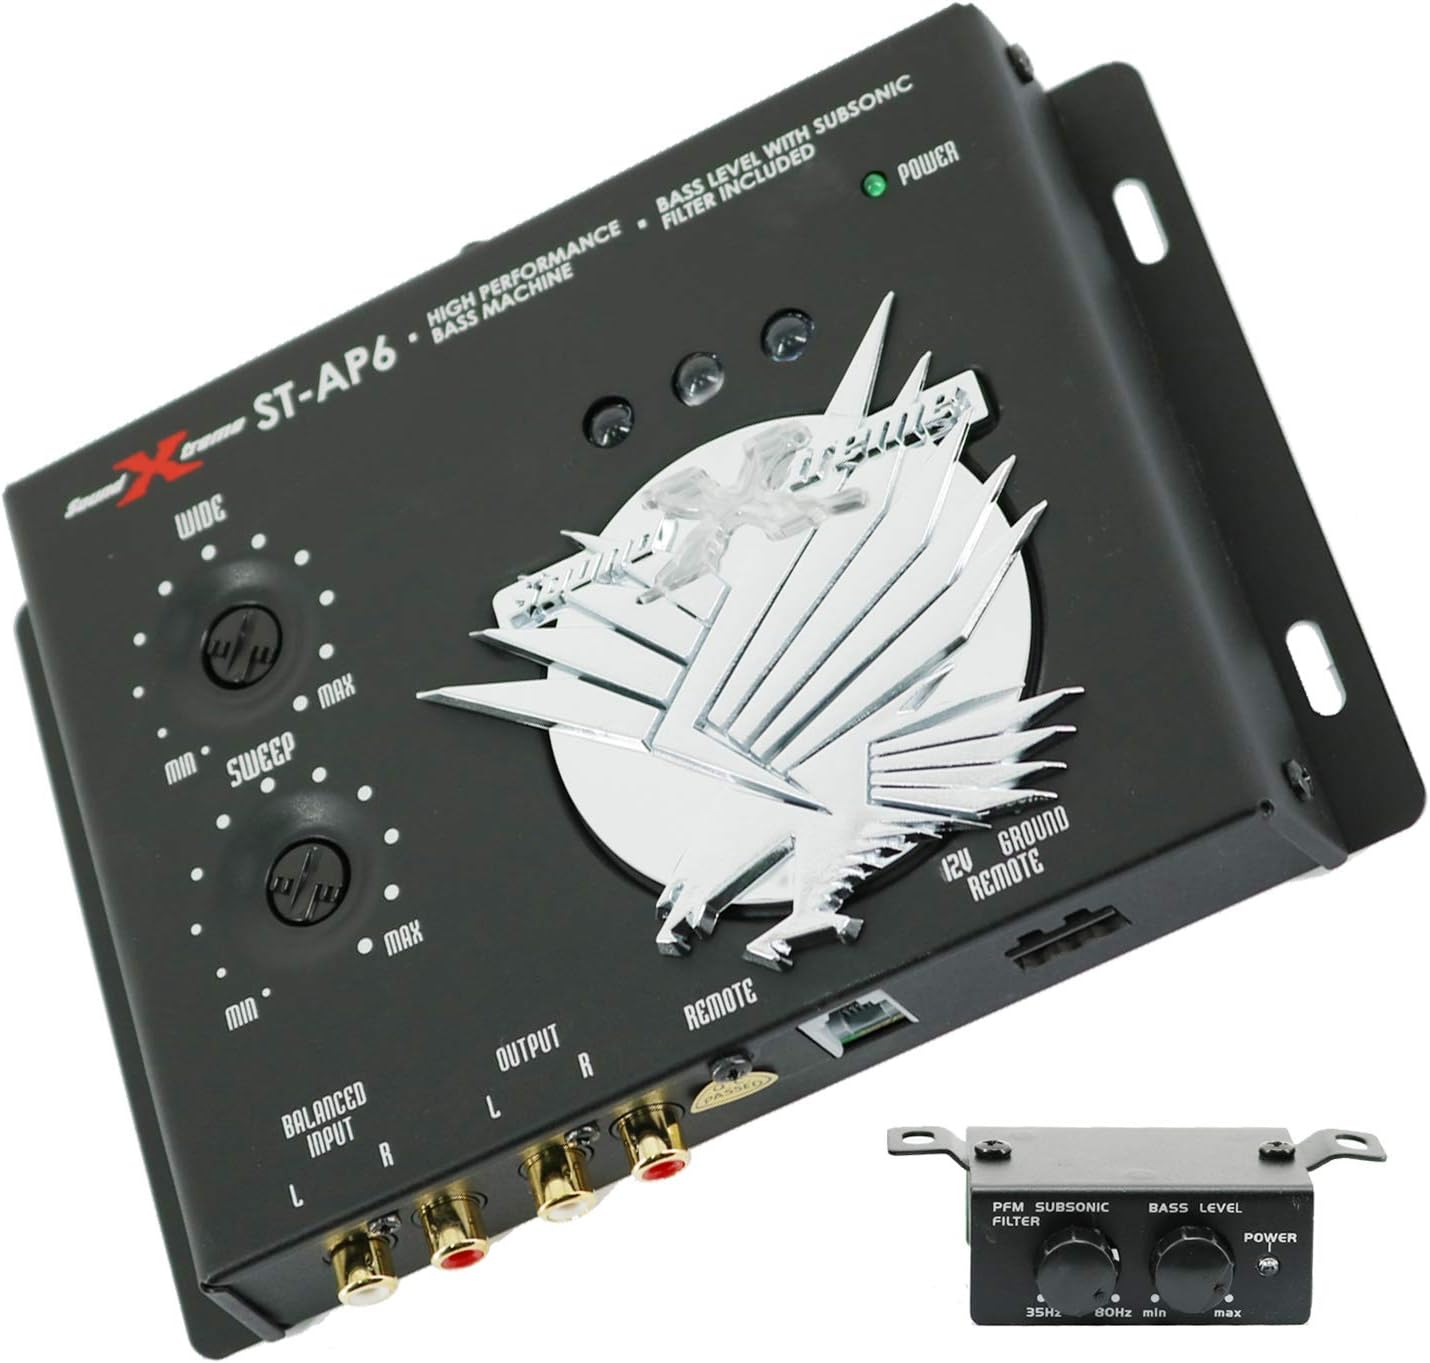
Figure 5: The SoundXtreme AP6 Bass Machine, a high-performance bass processor included in some bundles.
For detailed installation and operation instructions for the SoundXtreme AP6 Bass Machine, please refer to its dedicated user manual, as its functionality is separate from the Gravity 4000.1D ampmáis vivo.
11. Garantía e soporte
For warranty information and technical support, please refer to the documentation provided with your purchase or contact Gravity customer service. Keep your proof of purchase for warranty claims.