
1. Introdución
Thank you for choosing the Vantrue T3 Dash Cam. This manual provides essential information for setting up, operating, and maintaining your device. The Vantrue T3 is designed to capture high-quality video footage of your journeys and parking incidents, offering features such as 1520P resolution, radar motion detection parking mode, and enhanced night vision. Please read this manual thoroughly before use to ensure proper operation and to maximize the benefits of your dash cam.
2. Produto rematadoview
2.1 Contido do paquete
- Vantrue T3 Dash Cam
- OBD Hardwired Cable
- Cable de datos USB-C
- Cargador de coche
- Montaxe para ventosa
- Manual de usuario
2.2 Disposición do dispositivo
Familiarize yourself with the buttons and ports on your Vantrue T3 Dash Cam:

Imaxe: Vantrue T3 Dash Cam with labeled components. Key features include the 2.45" IPS Screen, Button Panel, Emergency Button, Mic, Type-C USB port, Micro SD Card slot (supports up to 256GB), Reset Button, Radar Microwave Detection Indicator, Sony Starvis CMOS Sensor, 6-Glass Lens, and F1.4 Large Aperture.
- Button Panel: Para a navegación e selección de menús.
- Botón de emerxencia: Manually locks current recording.
- Pantalla IPS de 2.45 polgadas: Mostra en directo view, menú e reprodución.
- Micrófono: Grava audio dentro do vehículo.
- USB tipo C: Power input and data transfer.
- Ranura para tarxeta Micro SD: Insert your memory card here (up to 256GB).
- Botón de reinicio: Restablece o dispositivo á configuración de fábrica.
- Radar Microwave Detection Indicator: Lights up when radar motion is detected.
- Lente: High-resolution 6-glass lens with F1.4 aperture and 160° wide angle.
3. Configuración
3.1 Inserción da tarxeta Micro SD
- Asegúrate de que a cámara do salpicadero estea apagada.
- Insert a Class 10 or higher Micro SD card (up to 256GB recommended) into the Micro SD card slot until it clicks into place.
- Para retirala, empurre a tarxeta con coidado ata que faga clic e logo solte.
Nota: Always format the Micro SD card within the dash cam before first use and periodically thereafter to ensure stable recording performance.
3.2 Montaxe da cámara para o salpicadero
- Limpa a zona do parabrisas onde pretendes montar a cámara do salpicadero.
- Fixe o soporte da ventosa á cámara do salpicadero.
- Prema a ventosa firmemente contra o parabrisas e xire a palanca para suxeitala.
- Adjust the lens angle to ensure it captures the road ahead clearly, avoiding obstruction from the rearview mirror or wipers.
3.3 Power Connection (OBD Hardwired Cable)
The Vantrue T3 includes an OBD hardwired cable for continuous power, enabling 24/7 parking monitoring and protecting your car battery from depletion.
- Locate your vehicle's OBD-II port (usually under the dashboard on the driver's side).
- Plug the OBD connector into the vehicle's OBD-II port.
- Connect the USB-C end of the OBD cable to the dash cam's Type-C USB port.
- Route the cable neatly along the windshield and dashboard edges to avoid obstructing your view ou interferir cos controis de condución.
The dash cam will automatically power on and begin recording when the vehicle's ignition is turned on, and switch to parking mode when the ignition is off.
3.4 Configuración inicial
Upon first power-on, you may need to set the date, time, and language. Navigate the menu using the button panel.
Optional GPS Functionality: For GPS tracking of location and speed, an external GPS mount (sold separately, ASIN: B083XBS88L) is required. Attach the GPS mount to the dash cam and connect it to power instead of the standard mount.
4. Instrucións de funcionamento
4.1 Gravación básica
Once powered on, the Vantrue T3 automatically starts continuous loop recording. The 1520P resolution and 160° wide-angle lens capture a broad view da estrada.

Imaxe: Comparison of 1520P and 1080P recording quality, highlighting the 160° wide angle and other features like Sony Starvis Sensor and F1.4 Aperture.
4.2 Night Vision and HDR
The dash cam features a Sony Starvis Sensor, 6-glass lens, and F1.4 large aperture, combined with High Dynamic Range (HDR) technology, to deliver clear and detailed video even in low-light conditions or at night.

Imaxe: Illustrates the Super Night Vision capability of the Vantrue T3, equipped with Sony Starvis Sensor, HDR technology, and F1.4 Large Aperture for clear low-light recording.
4.3 24/7 Radar Detection Parking Monitor
When the vehicle is parked and the ignition is off, the dash cam enters parking mode. The integrated microwave radar sensitively detects any movement in front of the car or vibrations, triggering recording to capture potential incidents.
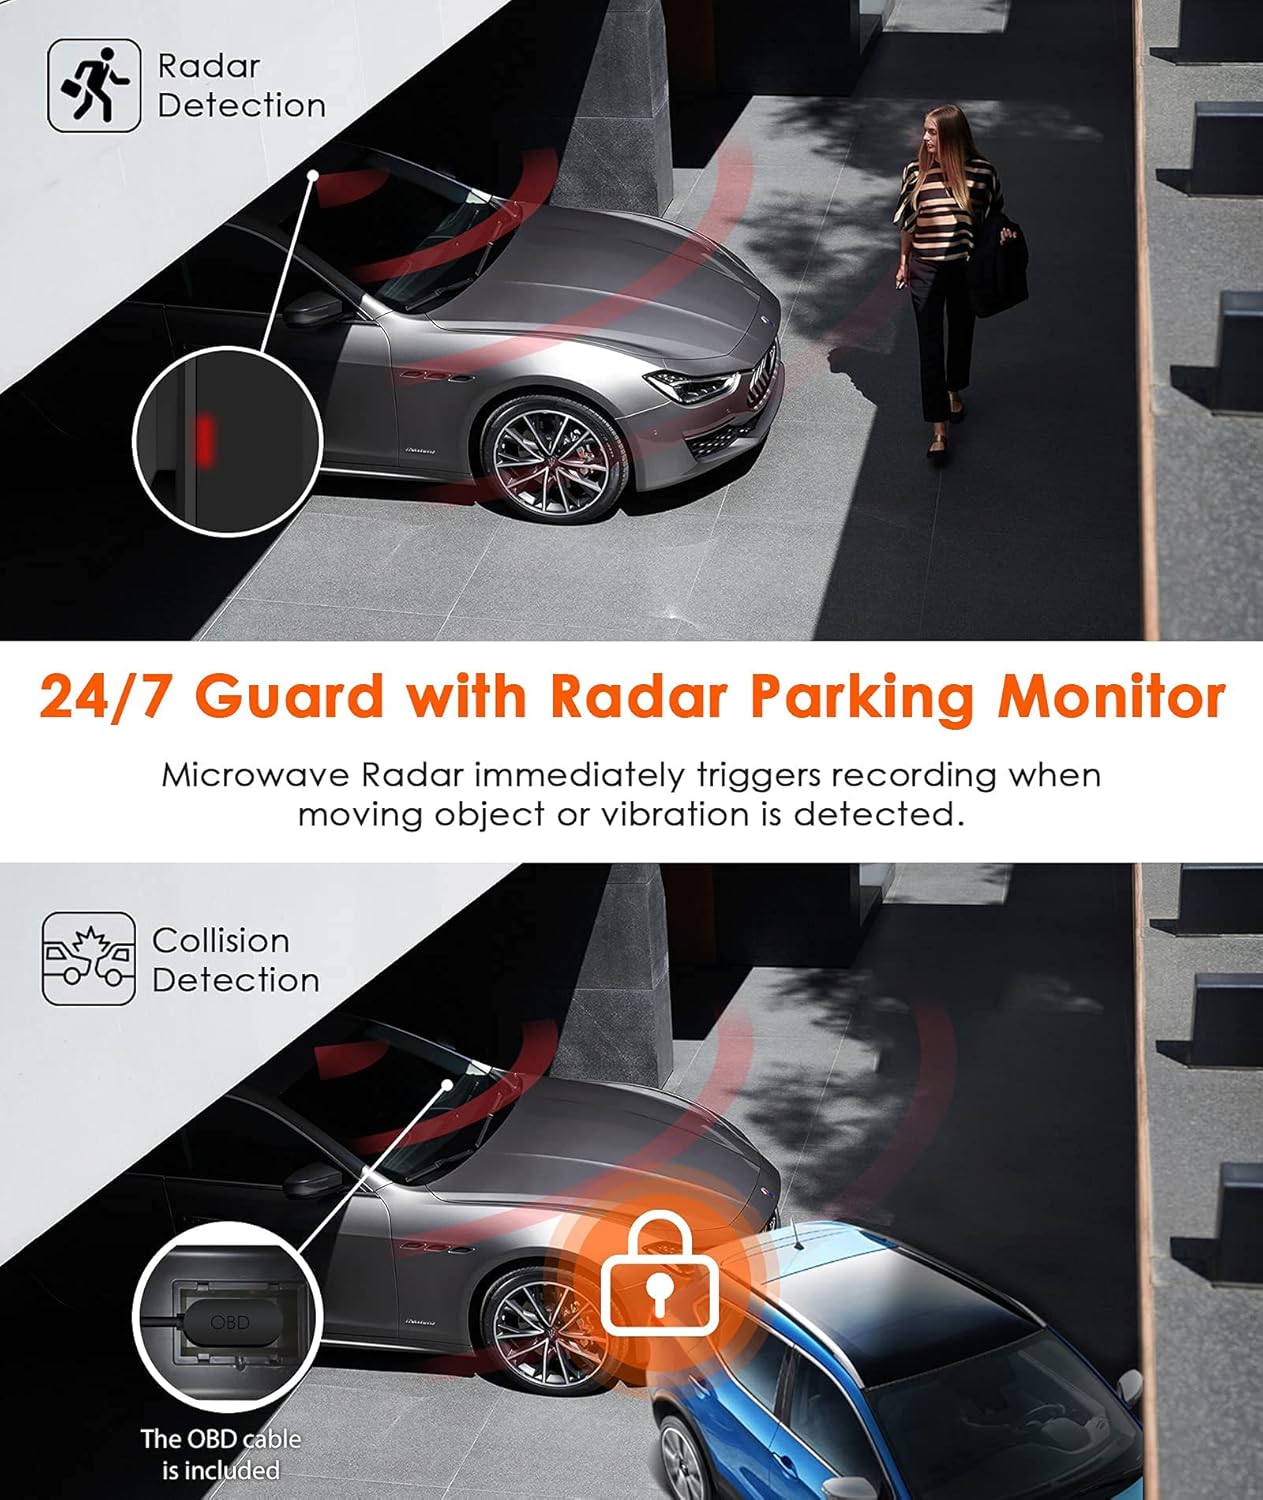
Imaxe: Depicts the 24/7 Guard with Radar Parking Monitor, showing how microwave radar triggers recording upon movement. Also illustrates Collision Detection, where the OBD cable ensures continuous power.
4.4 G-Sensor (Collision Detection)
The built-in G-sensor automatically detects sudden shakes or collisions. When activated, it locks and saves the current footage to a protected folder, preventing it from being overwritten by loop recording. This ensures critical incident evidence is preserved.

Imaxe: Shows the G-Sensor feature, acting as a reliable witness by automatically recording incidents and locking video footage for insurance claims, captured in 2592x1520 at 30FPS.
4.5 Seamless Loop Recording
The dash cam continuously records video in short segments (e.g., 1, 3, or 5 minutes). When the Micro SD card is full, the oldest unlocked footage is automatically overwritten by new recordings. This ensures uninterrupted recording without manual intervention.

Imaxe: Illustrates Seamless Loop Recording, where the dash cam continuously records and overwrites the oldest footage. Also shows the Time Lapse function, which records frames to create a condensed video, saving memory card space.
4.6 Gravación por intervalos de tempo
The Time Lapse function allows the dash cam to capture still images at set intervals (e.g., one photo per second) and then combine them into a video. This is useful for monitoring long periods, such as a multi-week road trip, while conserving memory card space.
4.7 Super Capacitor Technology
The Vantrue T3 utilizes a super capacitor instead of a traditional battery. This provides superior heat and cold resistance, allowing the dash cam to operate reliably in temperatures ranging from 14°F to 158°F (-10°C to 70°C). This design enhances durability, prevents overheating issues, and extends the device's service life.

Imaxe: Demonstrates the high performance of the Super Capacitor, providing heat resistance from 14°F to 158°F, ensuring explosion-proof operation and extended working life for stable recording.
5. Mantemento
5.1 Xestión de tarxetas Micro SD
- Formato: Regularly format your Micro SD card (at least once a month) through the dash cam's menu to prevent data corruption and ensure optimal performance.
- Capacidade soportada: The Vantrue T3 supports Micro SD cards up to 256GB. Using a high-quality, reputable brand Class 10 (or higher) card is crucial for reliable recording.
- Card Lifespan: Micro SD cards have a limited number of write cycles. If you experience frequent recording errors, consider replacing the card.
5.2 Actualizacións de firmware
Vantrue continuously provides firmware updates to improve performance and add new features. Check the official Vantrue website for the latest firmware. Firmware updates are typically performed by downloading the update file to your Micro SD card and inserting it into the dash cam.
6 Solución de problemas
If you encounter issues with your Vantrue T3 Dash Cam, please refer to the following common problems and solutions:
- A cámara do salpicadero non se acende:
- Ensure the OBD cable is securely connected to both the dash cam and the vehicle's OBD-II port.
- Check if the vehicle's ignition is on (if not using 24/7 parking mode).
- Try using the standard car charger to rule out an issue with the OBD cable.
- Dash cam stops recording or freezes:
- Format the Micro SD card within the dash cam.
- Ensure you are using a genuine Class 10 (or higher) Micro SD card from a reputable brand. Counterfeit or low-quality cards can cause issues.
- Try a different Micro SD card to see if the issue persists.
- Perform a factory reset via the dash cam's menu.
- Vídeo footage está borroso ou pouco claro:
- Clean the dash cam lens and the section of the windshield in front of the lens.
- Asegúrate de que a película protectora foi retirada da lente.
- Comproba a configuración da resolución de vídeo no menú.
- Parking monitor is not working:
- Ensure the OBD hardwired cable is correctly installed and providing continuous power.
- Verify that parking mode is enabled in the dash cam's settings.
- Adjust the radar detection sensitivity if necessary.
If these steps do not resolve your issue, please contact Vantrue customer support for further assistance.
7. Especificacións
| Característica | Especificación |
|---|---|
| Marca | VANTRUE |
| Número de modelo | T3 |
| Resolución de captura de vídeo | 1520p (2592x1520 @ 30FPS) or 1080P @ 60FPS |
| Campo de View | 160 graos |
| Tamaño da pantalla | 2.45 Inches (IPS LCD) |
| Características especiais | F1.4 Large Aperture, Parking Monitor (Radar Detection), Super Capacitor, Night Vision (HDR), G-Sensor, Loop Recording, Time Lapse |
| Tecnoloxía de conectividade | USB |
| Tipo de memoria flash | MicroSD (Supports up to 256GB) |
| Fonte de enerxía | OBD Hardwired Cable (12V/24V compatible) |
| Temperatura de funcionamento | 14 °F a 158 °F (-10 °C a 70 °C) |
| Peso do elemento | 100 gramos |
8. Garantía e soporte
The Vantrue T3 Dash Cam comes with an 18 meses de garantía desde a data de compra. Esta garantía cobre os defectos de fabricación e garante que o seu produto estea libre de defectos de materiais e de fabricación en condicións de uso normal.
Vantrue also provides soporte técnico de por vida. If you have any questions, encounter issues, or require assistance with your device, please do not hesitate to contact our support team. We are committed to continuously updating the firmware to improve performance and features, and our team is ready to help you resolve any product-related concerns.
For support, please visit the official Vantrue websitio web ou consulte a información de contacto que se inclúe na embalaxe do produto.