
1. Introdución
Grazas pola compraasing the Gravity Audio G12BD1 12-inch 1000W Powered Subwoofer Enclosure. This manual provides essential information for the proper installation, operation, and maintenance of your new subwoofer. To ensure optimal performance and safety, please read this manual thoroughly before attempting to install or use the product. Keep this manual for future reference.
2. Información de seguridade
Observe as seguintes precaucións de seguridade para evitar lesións ou danos ao produto e ao vehículo:
- Seguridade eléctrica: Always disconnect the vehicle's negative battery terminal before beginning any electrical work. Ensure all wiring is correctly routed and secured to prevent pinching or damage. Use appropriate gauge wiring for power and ground connections.
- Entorno de instalación: Install the subwoofer in a dry, well-ventilated area, away from direct sunlight, heat sources, and moisture. Ensure the enclosure is securely mounted to prevent movement during vehicle operation.
- Protección auditiva: Prolonged exposure to high sound pressure levels can cause permanent hearing damage. Operate the subwoofer at comfortable listening levels.
- Instalación profesional: If you are unsure about any aspect of the installation, it is recommended to seek assistance from a qualified professional car audio installer.
3. Contido do paquete
Verifica que todos os elementos estean presentes no paquete:
- 1 x Gravity Audio G12BD1 Powered Subwoofer Enclosure
4. Configuración e instalación
Proper installation is crucial for the performance and longevity of your subwoofer. The G12BD1 is designed for universal fit in vehicles, typically in the trunk or a large cargo area.
4.1. Consideracións sobre a colocación
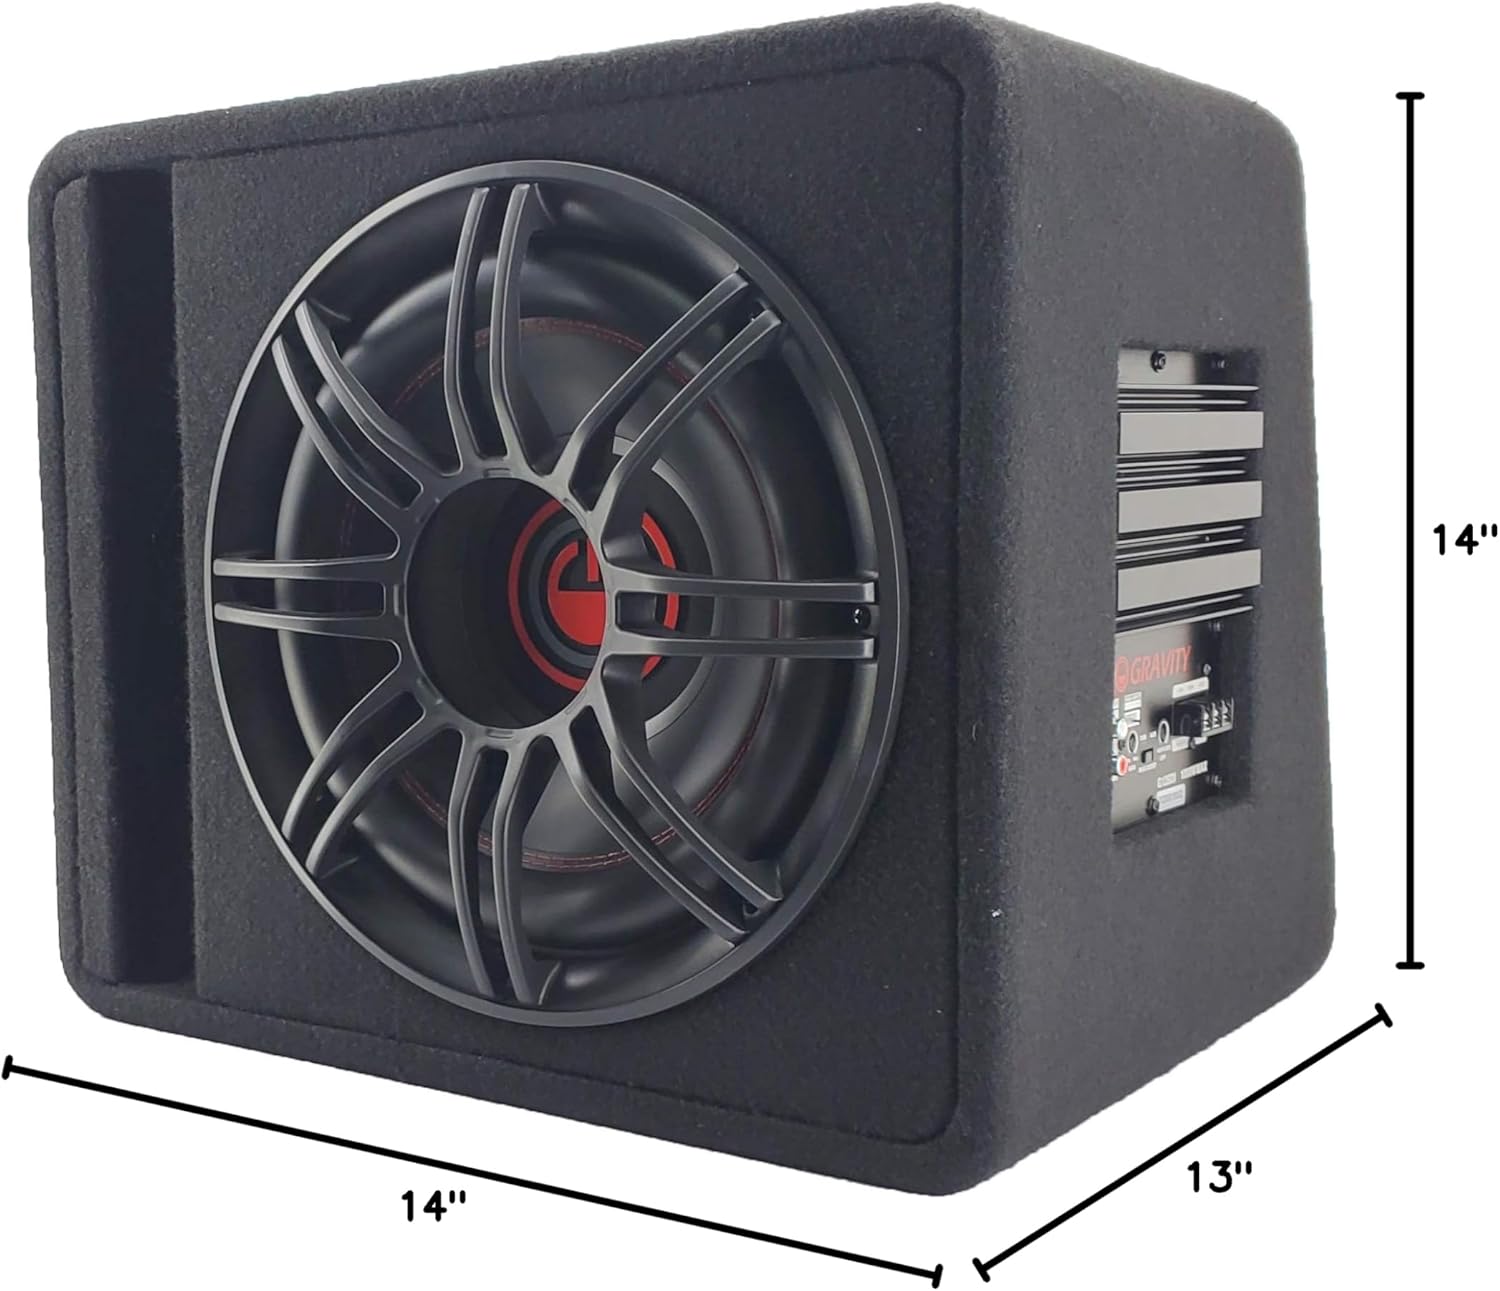
Consider the available space in your vehicle. The dimensions of the enclosure are approximately 13"D x 14"W x 14"H. Ensure there is adequate clearance for air circulation around the ampsección máis viva.
4.2. Conexións de cableado
The G12BD1 features an integrated amplifier, simplifying the wiring process. You will need to connect power, ground, a remote turn-on signal, and an audio input signal.

- Conexión de alimentación (+12 V): Connect a heavy-gauge power cable (e.g., 8-gauge or 4-gauge, depending on total system power) directly from the vehicle's positive battery terminal to the +12V terminal on the subwoofer's amplifier. Install an in-line fuse holder (with an appropriately rated fuse) within 18 inches of the battery.
- Conexión a terra (GND): Conecte un cable de terra de grosor groso desde o terminal GND do ampo adaptador a unha superficie metálica limpa e sen pintar no chasis do vehículo. Asegúrese de que a conexión sexa sólida e de baixa resistencia.
- Acendido remoto (REM): Connect a remote turn-on wire from your head unit's remote output (typically a blue/white wire) to the REM terminal on the amplifier. This signal turns the ampacende e apaga o activador coa unidade principal.
- Entrada de audio:
- RCA Low-Level Input: If your head unit has RCA pre-outs, connect RCA cables from the head unit's subwoofer or rear pre-outs to the RCA input jacks on the G12BD1 ampmáis vivo.
- High-Level Speaker Input: If your head unit does not have RCA pre-outs, use the high-level speaker inputs. Connect the speaker wires from your head unit's rear speaker outputs to the high-level input terminals on the ampmáis vivo.
After all connections are made, double-check them for polarity and security before reconnecting the vehicle's negative battery terminal.

5. Instrucións de funcionamento
Once installed, you can adjust the subwoofer's settings for optimal sound performance.
5.1. Control Panel Adjustments
Refer to Figure 2 for the location of these controls:
- GAÑA: This control matches the output level of your head unit to the input sensitivity of the subwoofer amplifier. Start with the gain set to minimum. Gradually increase it until you hear distortion, then back it off slightly. Do not use the gain control as a volume knob.
- BASS BOOST: This control allows you to increase the bass output at a specific frequency. Use sparingly to avoid distortion and potential damage to the subwoofer.
- LPF (filtro paso baixo): This control sets the upper frequency limit for the subwoofer. Frequencies above this setting will be filtered out. A common starting point is between 80Hz and 120Hz. Adjust to blend smoothly with your main speakers.
5.2. Acendamento inicial
After all connections are secure and settings are initially adjusted:
- Turn on your vehicle's ignition and head unit.
- The power indicator on the subwoofer amplifier should illuminate.
- Play some music with a good bass range.
- Carefully adjust the GAIN, BASS BOOST, and LPF controls to achieve balanced and clear bass output without distortion.
6. Mantemento
Regular maintenance ensures the longevity and performance of your subwoofer.
- Limpeza: Use a soft, dry cloth to wipe down the enclosure and ampEvite o uso de produtos químicos agresivos ou produtos de limpeza abrasivos.
- Inspección: Periodically check all wiring connections for tightness and signs of wear or corrosion. Ensure the enclosure remains securely mounted.
- Ventilación: Asegurar o amplifier's heat sink is not obstructed to allow for proper cooling.
7 Solución de problemas
If you experience issues with your G12BD1 subwoofer, consult the following table before contacting support.
| Problema | Causa posible | Solución |
|---|---|---|
| Sen enerxía / Ampo lifier non se acende |
|
|
| Non hai son do subwoofer |
|
|
| Son distorsionado |
|
|
| Zumbido ou zumbido |
|
|
8. Especificacións
| Característica | Especificación |
|---|---|
| Nome do modelo | Powered Car Subwoofer |
| Tipo de altofalante | Subwoofer, woofer |
| Diámetro do subwoofer | 12 polgadas |
| Impedancia | 4 ohmios |
| Potencia de saída máxima do altofalante | 1000 vatios |
| Dimensións do produto (P x A x A) | 13" D x 14" W x 14" H |
| Peso do elemento | 37 libras |
| Tecnoloxía de conectividade | Con cable |
| Tipo de garantía | 1 ano |
9. Garantía e soporte
The Gravity Audio G12BD1 comes with a 1-year warranty. For warranty claims or technical support, please contact the retailer where the product was purchased or the manufacturer directly. Keep your proof of purchase for warranty validation.