
1. Introdución
This manual provides comprehensive instructions for the installation, setup, operation, and maintenance of your Amazon Basics Traditional Electronic Keypad Deadbolt with Handle Set. This product offers secure keyless entry with a keypad function and a motorized deadbolt for convenient one-touch locking. It meets ANSI grade 3 standards for security and strength. Please read this manual thoroughly before installation and use to ensure proper function and safety.
2. Información de seguridade
- Prevent Unauthorized Access: To prevent unauthorized access, it is crucial to complete the setup process by changing the default programming code, creating your own unique user codes, and deleting the default user code immediately after installation.
- Só para uso en interiores: This product is designed for indoor use only. Do not install it on exterior gates or doors exposed directly to harsh weather conditions.
- Accidental Lockouts: Always keep the door open and the lockset unlocked while programming new codes to prevent accidental lockouts.
- Seguridade da batería: Empregue só o tipo de batería especificado (4 baterías AA). Non mesture baterías vellas e novas, nin baterías de diferentes tipos. Desfágase das baterías usadas de forma responsable.
3. Contido do paquete
Comprobe que todos os compoñentes estean presentes antes de comezar a instalación:
- Exterior Keypad Deadbolt Assembly
- Interior Assembly (with battery cover)
- Exterior Handle Lever
- Interior Handle Lever
- Pestillo de pestillo
- Pestillo de mango
- Strike Plates (for deadbolt and handle)
- Ferraxes de montaxe (parafusos, pernos)
- Cylinder and Keys
- Modelo de instalación

Figura 3.1: Todos os compoñentes incluídos no paquete.
4. Produto rematadoview
The Amazon Basics Electronic Keypad Deadbolt with Handle Set combines a secure electronic deadbolt with a traditional passage lever for complete door security and access control.

Figura 4.1: Exterior view of the electronic keypad deadbolt and handle set.

Figure 4.2: Close-up of the electronic keypad.
5. Door Compatibility Guide
Asegúrate de que a túa porta cumpra as seguintes especificacións para unha instalación correcta:
- Espesor da porta: Accommodates door thickness of 1-3/8 to 1-3/4 inches (35.1 mm to 50.8 mm).
- Door Holes: Suitable for standard 2-1/8 inch (54mm) door holes.
- Retroceso: The 6-way adjustable latch fits any 2-3/8 inch (60mm) or 2-3/4 inch (70mm) backset.
Importante: Measure your door's backset, cross bore, and thickness to ensure compatibility before installation.

Figure 5.1: Door compatibility dimensions.
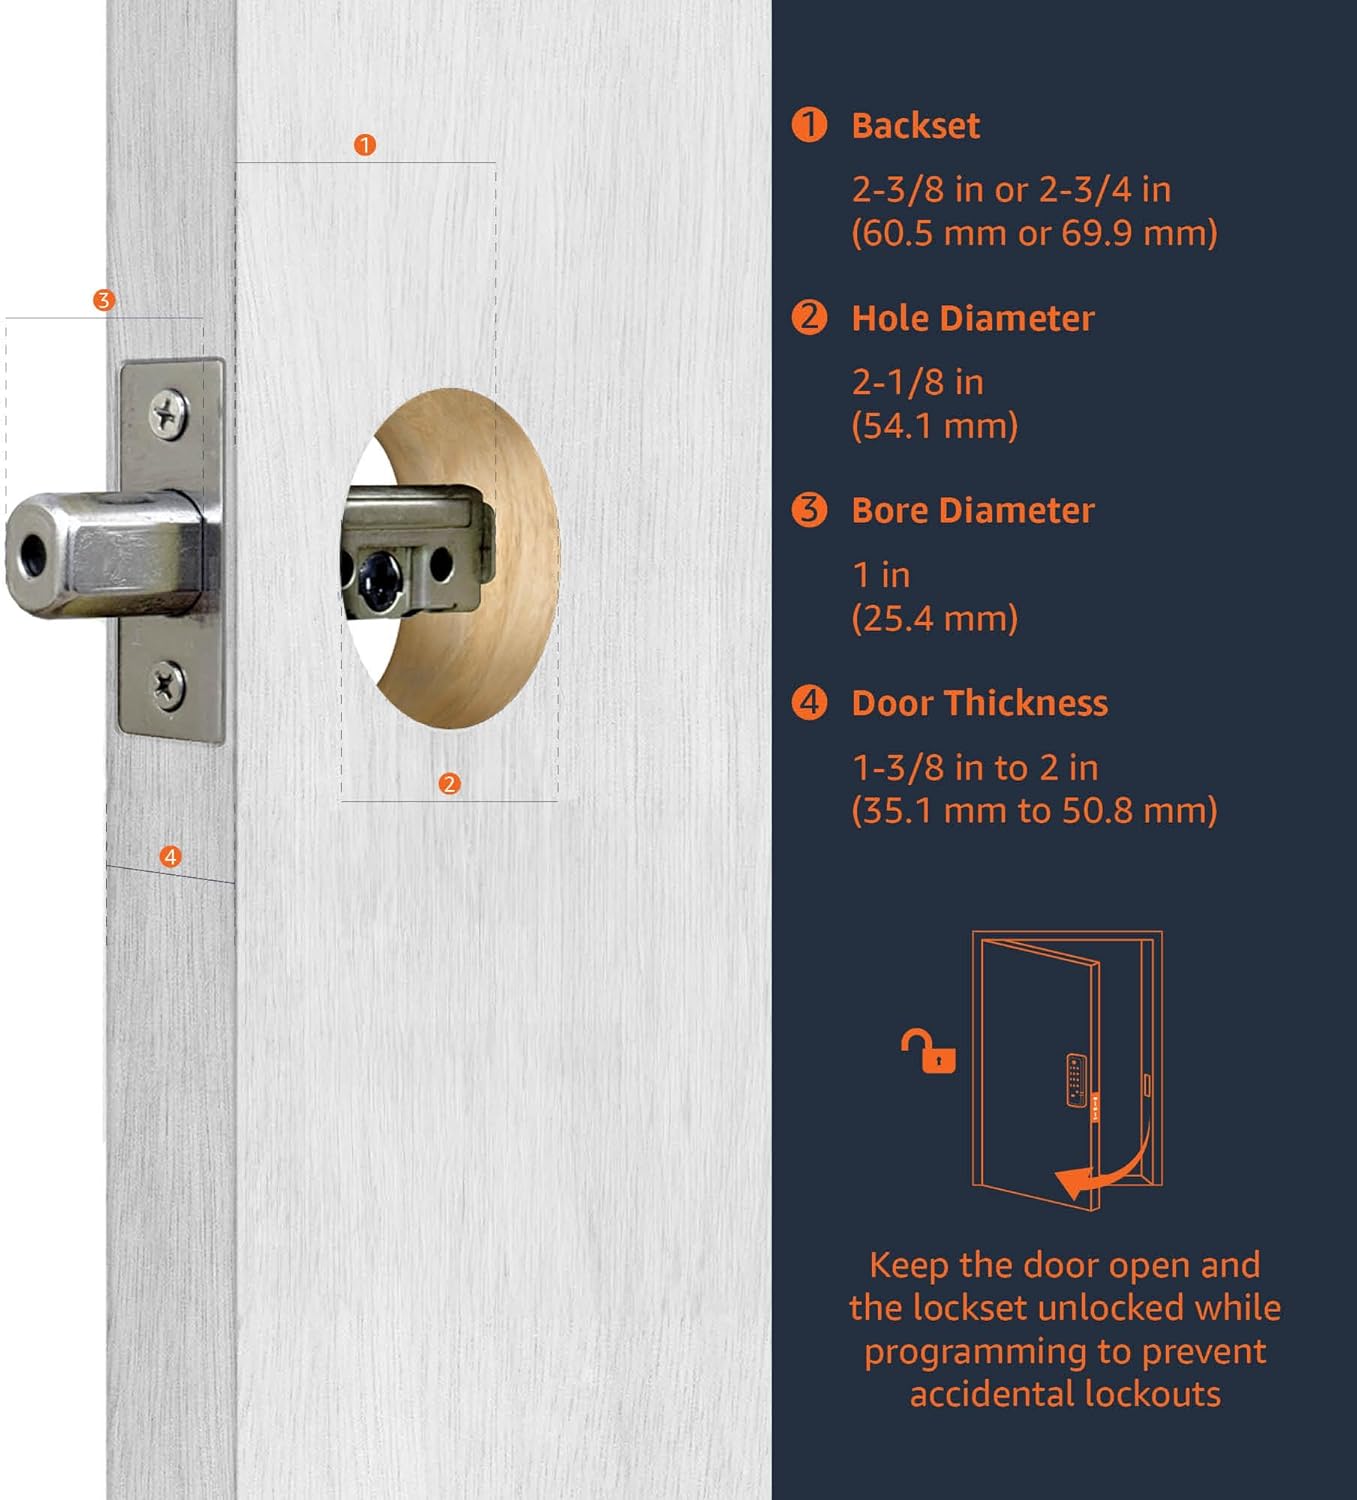
Figure 5.2: Guide for measuring door dimensions.
6. Instalación
Installation is straightforward and typically requires only a screwdriver. All necessary hardware components are included in the package. For detailed, step-by-step visual instructions, please refer to the official Manual de instalación (PDF).
Pasos xerais de instalación:
- Prepara a porta: Ensure your door meets the compatibility requirements. Use the provided template if drilling new holes.
- Instalar os peches: Insert the deadbolt latch and handle latch into the door edge. Adjust the backset if necessary.
- Instalar o teclado exterior: Mount the exterior keypad assembly, ensuring the spindle passes through the deadbolt latch.
- Instalar a placa de montaxe interior: Fixe a placa de montaxe interior ao conxunto exterior usando os parafusos proporcionados.
- Instalación do conxunto interior: Connect the cable from the exterior assembly to the interior assembly. Mount the interior assembly to the mounting plate.
- Install Handle Set: Attach the exterior and interior handle levers, ensuring they operate smoothly.
- Instalar as placas de peche: Secure the strike plates to the door frame.
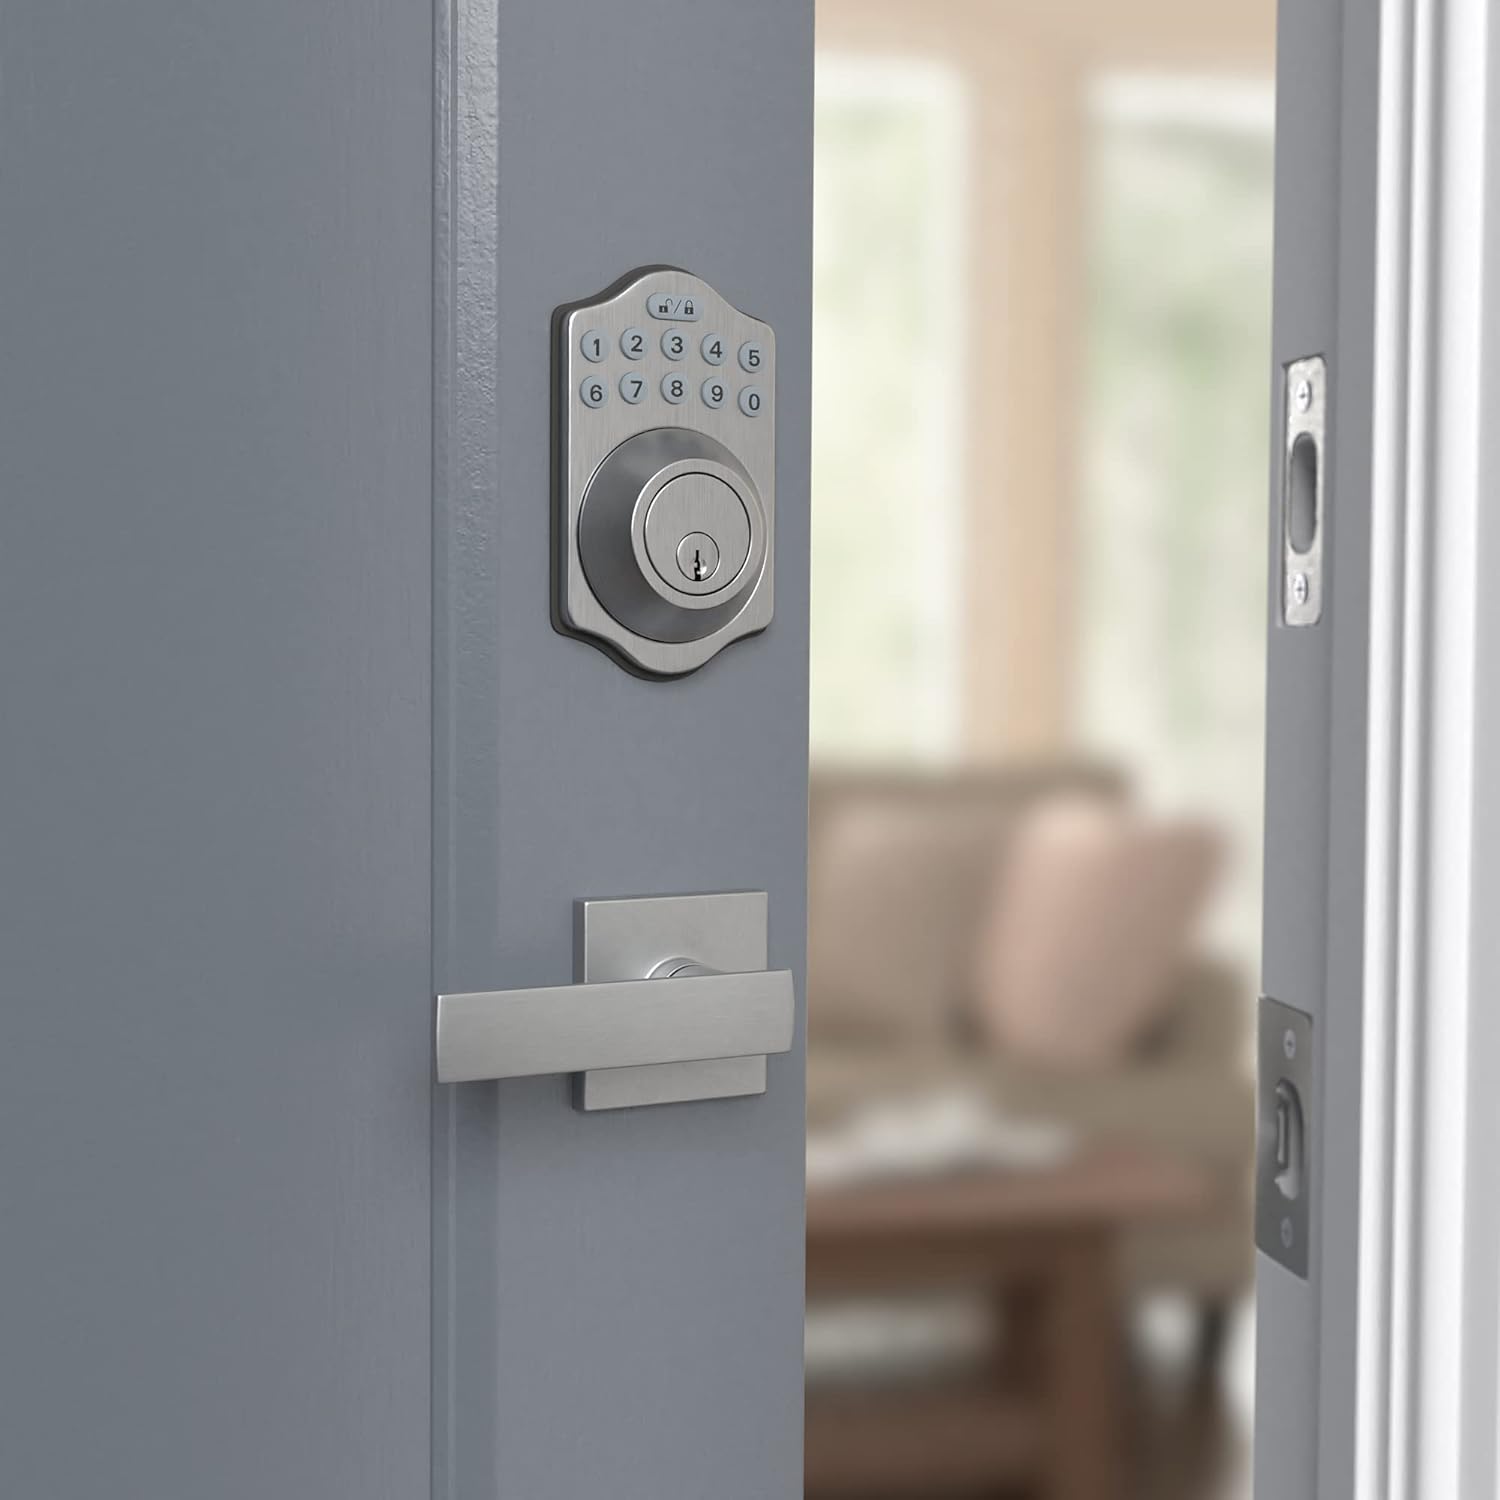
Figura 6.1: Exterior view of the installed lock.
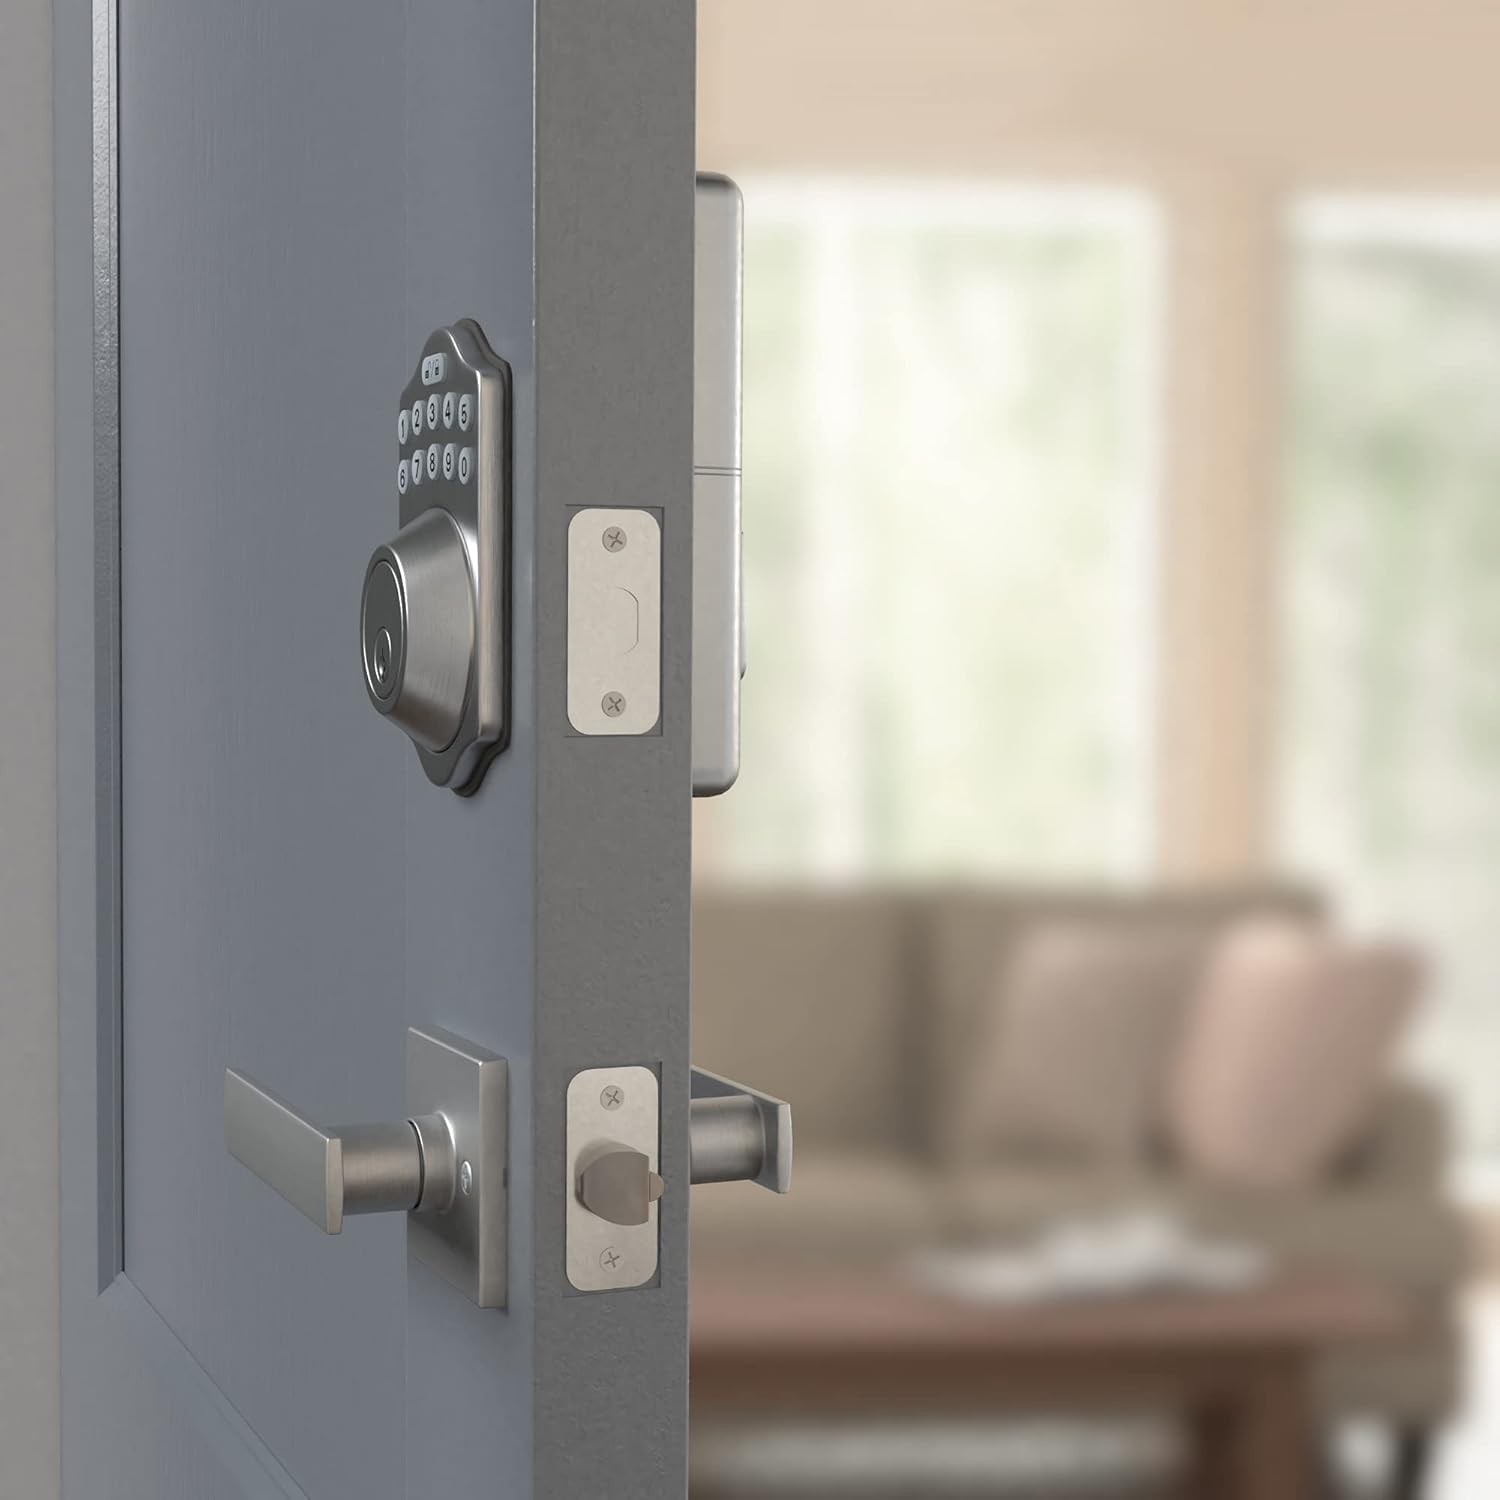
Figura 6.2: Interior view of the installed lock.
7. Configuración
After physical installation, you must program the lock for secure operation.
7.1 Programación inicial
- Instalar baterías: Insira 4 pilas AA no conxunto interior.
- Change Default Programming Code: The lock comes with a default programming code. For security, change this immediately. Refer to the full User Manual for specific steps.
- Crear códigos de usuario: Program your desired user codes (4-10 digits). Multiple user codes can be stored.
- Delete Default User Code: Ensure the default user code is deleted after creating your own.
7.2 Función de bloqueo automático
This lock can be programmed to automatically lock after a set period of time once the door is closed. Consult the full User Manual for instructions on enabling and configuring this feature.
8. Funcionamento da pechadura
8.1 Pechadura da porta
- Bloqueo dun toque: Press the lock button on the keypad. The deadbolt will extend, securing the door.
- Bloqueo automático: If enabled, the deadbolt will automatically extend after a programmed delay once the door is closed.
8.2 Desbloquear a porta
- Entrada de teclado: Enter your valid user code on the keypad. The deadbolt will retract, allowing entry.
- Anulación da tecla: In case of battery failure or forgotten code, use the physical key provided to unlock the deadbolt.
9. Mantemento
9.1 Substitución da batería
The lock requires 4 AA batteries. When batteries are low, the lock may provide an audible or visual indicator. Replace all four batteries simultaneously with new, high-quality alkaline AA batteries. To replace, remove the battery cover on the interior assembly, remove old batteries, insert new ones according to polarity, and replace the cover.
9.2 Limpeza
Clean the keypad and handle surfaces with a soft, damp pano. Evite produtos de limpeza abrasivos ou solventes que poidan danar o acabado ou os compoñentes electrónicos.
10 Solución de problemas
- O peche non responde: Check battery levels. Replace all 4 AA batteries if necessary. Ensure the battery pack is correctly seated.
- O teclado non funciona: Verify that the lock is receiving power. If batteries are new and correctly installed, try resetting the lock (refer to the full User Manual for reset procedures).
- Battery Cover Loose: Ensure the battery cover is properly aligned and snapped into place. If it consistently comes loose, contact customer support.
- Accidental Lockouts: If you are locked out due to programming errors, use the physical key to gain entry. Always program with the door open.
- Lock Does Not Engage/Disengage Smoothly: Check for any obstructions in the door frame or strike plate. Ensure the latch and deadbolt are properly aligned with the strike plates. Re-check installation steps for proper alignment.
11. Especificacións
| Característica | Detalle |
|---|---|
| Marca | Conceptos básicos de Amazon |
| Número de modelo | PL1TMS0S18 |
| UPC | 193598103755 |
| Tipo de bloqueo | Peche de teclado |
| Característica especial | Entrada sen chave |
| Método de control | Toca |
| Material | Alloy Steel, Nickel, Zinc |
| Cor | Níquel satinado |
| Dimensións do artigo (L x W x H) | 5.08 x 3.08 x 0.1 polgadas |
| Peso do elemento | 4.3 libras |
| Fonte de enerxía | 4 pilas AA (non incluídas) |
| Uso recomendado | Seguridade |
| Número de pezas | 2 (Deadbolt and Handle Set) |
12. Garantía e soporte
This Amazon Basics Traditional Electronic Keypad Deadbolt with Handle Set is backed by an Amazon Basics 1-year limited warranty. For warranty claims or technical support, please refer to the official documentation or contact Amazon Basics customer service.