Introdución
Thank you for choosing the Casaria Waterproof Poly Rattan Storage Box. This manual provides essential information for the safe assembly, proper use, and effective maintenance of your new storage box. Please read these instructions carefully before beginning assembly or use, and retain them for future reference.
Instrucións de seguridade
- Asegúrate de que todos os compoñentes estean presentes e non estean danados antes da montaxe. Non o uses se falta algunha peza ou está rota.
- Manteña os nenos e as mascotas lonxe da zona de montaxe. As pezas pequenas poden supoñer un perigo de asfixia.
- Assemble the storage box on a soft, clean, and level surface to prevent scratches and damage.
- Do not overload the storage box. Refer to the specifications for maximum weight capacity.
- The gas lifts are designed to assist in opening and holding the lid. Do not force the lid open or closed against the gas lift mechanism.
- When moving the box, utilize the integrated wheels and handles. Ensure the lid is securely closed.
- This storage box is designed for outdoor and indoor use. Ensure proper ventilation if used indoors.
- Do not allow children to play inside the box to avoid suffocation hazards.
Configuración e montaxe
The Casaria storage box requires assembly. Follow these steps carefully to ensure correct and safe construction.
1. Desembalaxe e comprobación de compoñentes
Carefully unpack all components from the packaging. Lay them out on a clean, flat surface. Verify that all parts listed in the parts diagram are present and undamaged.

Image: All components of the storage box are laid out, including side panels, base, lid, and hardware, ready for assembly.
2. Assembling the Base and Side Panels
Attach the side panels to the base using the provided screws and tools. Ensure all connections are secure but do not overtighten.

Image: Illustration showing the process of connecting the side panels to the base of the storage box.
3. Attaching the Lid and Gas Lifts
Secure the lid to the main body of the box. Then, attach the gas lifts to the designated points on the lid and the box. These lifts will assist in smooth opening and closing.

Image: The final assembly step, showing the lid being attached and the gas springs being installed to support the lid.

Imaxe: Unha detallada view of the gas lift mechanism, which allows for easy and controlled opening and closing of the lid.
4. Installing the Inner Lining
Place the waterproof inner lining inside the assembled box. Secure it using the Velcro system. Ensure the zipper on the lining is functional and can be closed to protect contents from dirt and moisture.

Image: A close-up of the robust zipper on the inner lining, designed to keep contents dry and clean.
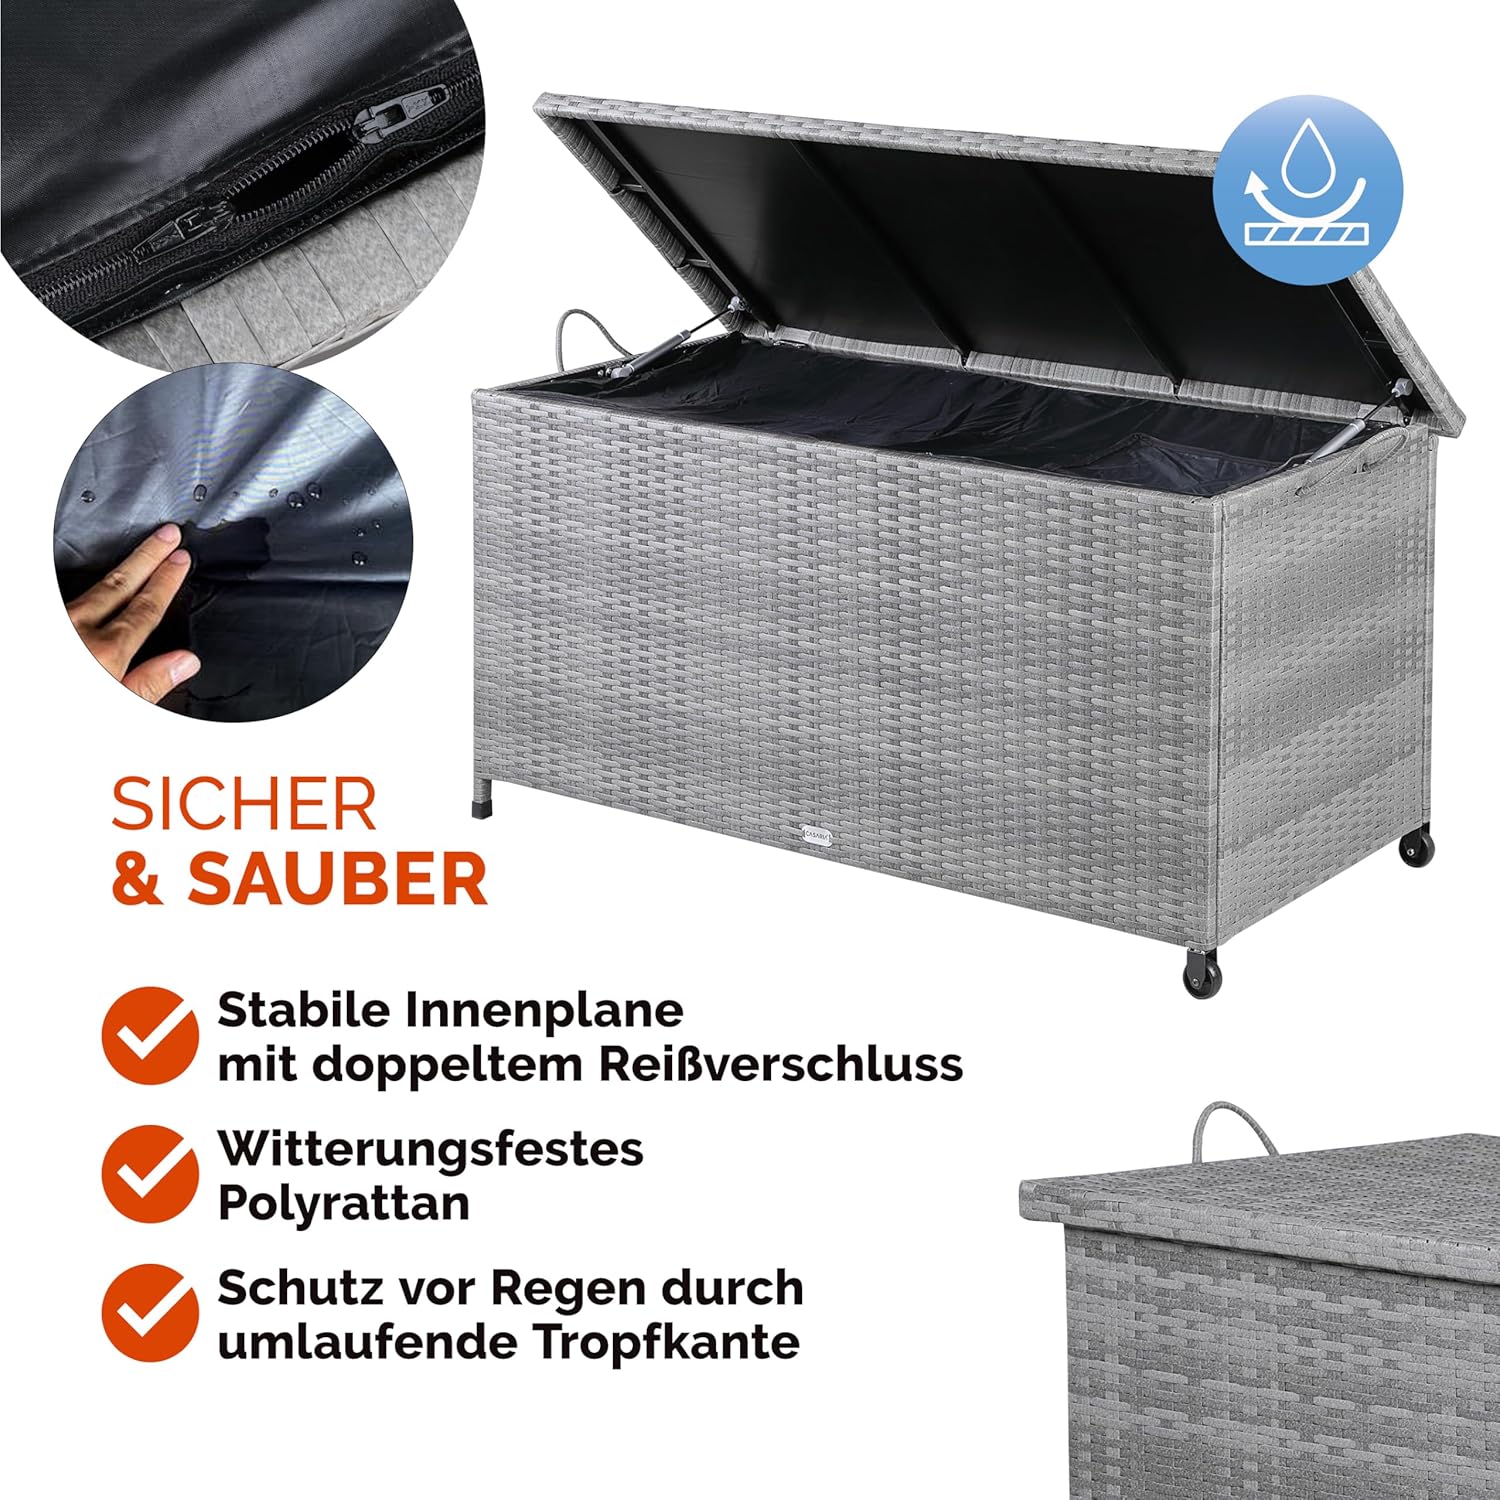
Image: The waterproof inner lining shown protecting the contents of the storage box from water, highlighting its protective function.
Instrucións de funcionamento
Apertura e peche da tapa
To open the lid, gently lift it. The gas lifts will assist in raising the lid and holding it open. To close, gently pull the lid down. The gas lifts will provide a controlled descent. Ensure no objects are obstructing the lid's path.
Almacenamento de elementos
Place cushions, garden tools, or other items inside the waterproof inner lining. Close the zipper on the lining for maximum protection against moisture and dirt. Then, close the main lid of the box.

Image: The storage box with its lid open, revealing ample space for storing multiple garden cushions and other outdoor items.
Moving the Storage Box
The storage box is equipped with wheels and handles for easy relocation. To move, ensure the lid is closed and secured. Lift one end using the handles and roll the box on its wheels to the desired location.

Image: A person demonstrating how to easily transport the storage box by tilting it and utilizing its integrated wheels and handles.
Mantemento
Cleaning the Poly Rattan Exterior
Clean the poly rattan surface with a soft cloth, mild soap, and water. Avoid abrasive cleaners or harsh chemicals, as these can damage the material. Rinse thoroughly with clean water and allow to air dry.
Cleaning the Inner Lining
The polyester inner lining can be wiped clean with a damp cloth. For deeper cleaning, it can be removed and hand-washed with mild soap. Ensure it is completely dry before placing it back into the box to prevent mold or mildew.
Atención Xeral
- Regularly check all screws and connections for tightness and re-tighten if necessary.
- Inspect the gas lifts periodically for smooth operation.
- While the box is UV-resistant, prolonged exposure to extreme weather conditions may affect its lifespan. Consider covering it during harsh winters or intense sun.
Resolución de problemas
| Problema | Causa posible | Solución |
|---|---|---|
| A tapa non abre/pecha con suavidade. | Gas lifts are stiff or damaged; obstruction in the hinge mechanism. | Check gas lifts for damage. Ensure no items are blocking the lid's movement. Lubricate hinges if necessary. |
| Auga dentro da caixa. | Inner lining zipper not closed; damage to the inner lining; extreme weather conditions. | Ensure the inner lining zipper is fully closed. Inspect the lining for tears and repair or replace if needed. Ensure the box is not submerged in water. |
| Box is unstable after assembly. | Screws are loose; uneven assembly. | Check and tighten all screws. Ensure the box is placed on a level surface. |
Especificacións

Image: Visual representation of the storage box dimensions, indicating a length of 122 cm, width of 56 cm, and height of 61 cm.
- Número de modelo: 108641
- Marca: Casaria
- Dimensións (L x W x H): 122 x 56 x 61 cm
- Material: Metal, Plastic, Poly Rattan, Resin
- Cor: Gris
- Volume de almacenamento: 360 litros
- Peso: 15 kg
- Nivel de resistencia á auga: Impermeable
- Características especiais: Removable inner lining, automatic gas lift mechanism, multi-functional (can be used as a bench).
- Uso recomendado: Garden storage, outdoor storage.
Garantía e Soporte
For warranty information or technical support, please refer to the retailer's policy or contact Casaria customer service directly. Keep your proof of purchase for any warranty claims.