
1. Instrucións de seguridade
Please read these instructions carefully before assembly and use. Keep this manual for future reference.
- Ensure the power supply is disconnected before assembly, installation, or maintenance.
- Este produto é só para uso en interiores.
- Non expoña o lamp á auga ou á alta humidade.
- Use only the specified bulb type (E27 LED, 15W max).
- Non intente modificar nin reparar o lamp vostede mesmo. Póñase en contacto con persoal cualificado para o servizo técnico.
- Manteña os nenos e as mascotas lonxe do lamp durante a operación.
- Asegurar o lamp colócase sobre unha superficie estable e nivelada para evitar que se volque.
2. Contido do paquete
Comprobe que todos os compoñentes estean presentes antes de comezar a montaxe:
- 1 x Piso Lamp with Shelves (unassembled)
- 1 x E27 LED Bulb (15W, 3000-6500K)
- 1 x Remote Control (2 x AAA batteries not included)
- 1 x Installation Accessories Kit (screws, tools if applicable)
- 1 x Manual de usuario
3. Configuración e montaxe
The Tomshine floor lamp is designed for straightforward assembly. Follow these steps:
- Desembale todos os compoñentes e colóqueos sobre unha superficie limpa e plana.
- Assemble the wooden frame by screwing the vertical posts to the shelf panels. Ensure all connections are secure.
- Adxunta o lampshade frame to the top section of the lamp.
- Carefully place the fabric lampshade over the frame.
- Atornille a lámpada LED E27 incluída no conector L.amp titular. Non apretar demasiado.
- Coloque a lamp in your desired location, ensuring it is stable and the power cord can reach an outlet without tension.

4. Instrucións de funcionamento
O lamp can be operated using the pull chain switch or the included remote control.
4.1. Funcionamento da cadea de tracción
- Pull once: Xire o lamp ACTIVADO.
- Pull again: Xire o lamp DESACTIVADO.
- The pull chain can also cycle through different light colors if the bulb supports it.
4.2. Operación de control remoto
Insira 2 pilas AAA (non incluídas) no mando a distancia antes de usalo.

- Botón On/Off: Prema para xirar a lamp ON ou OFF.
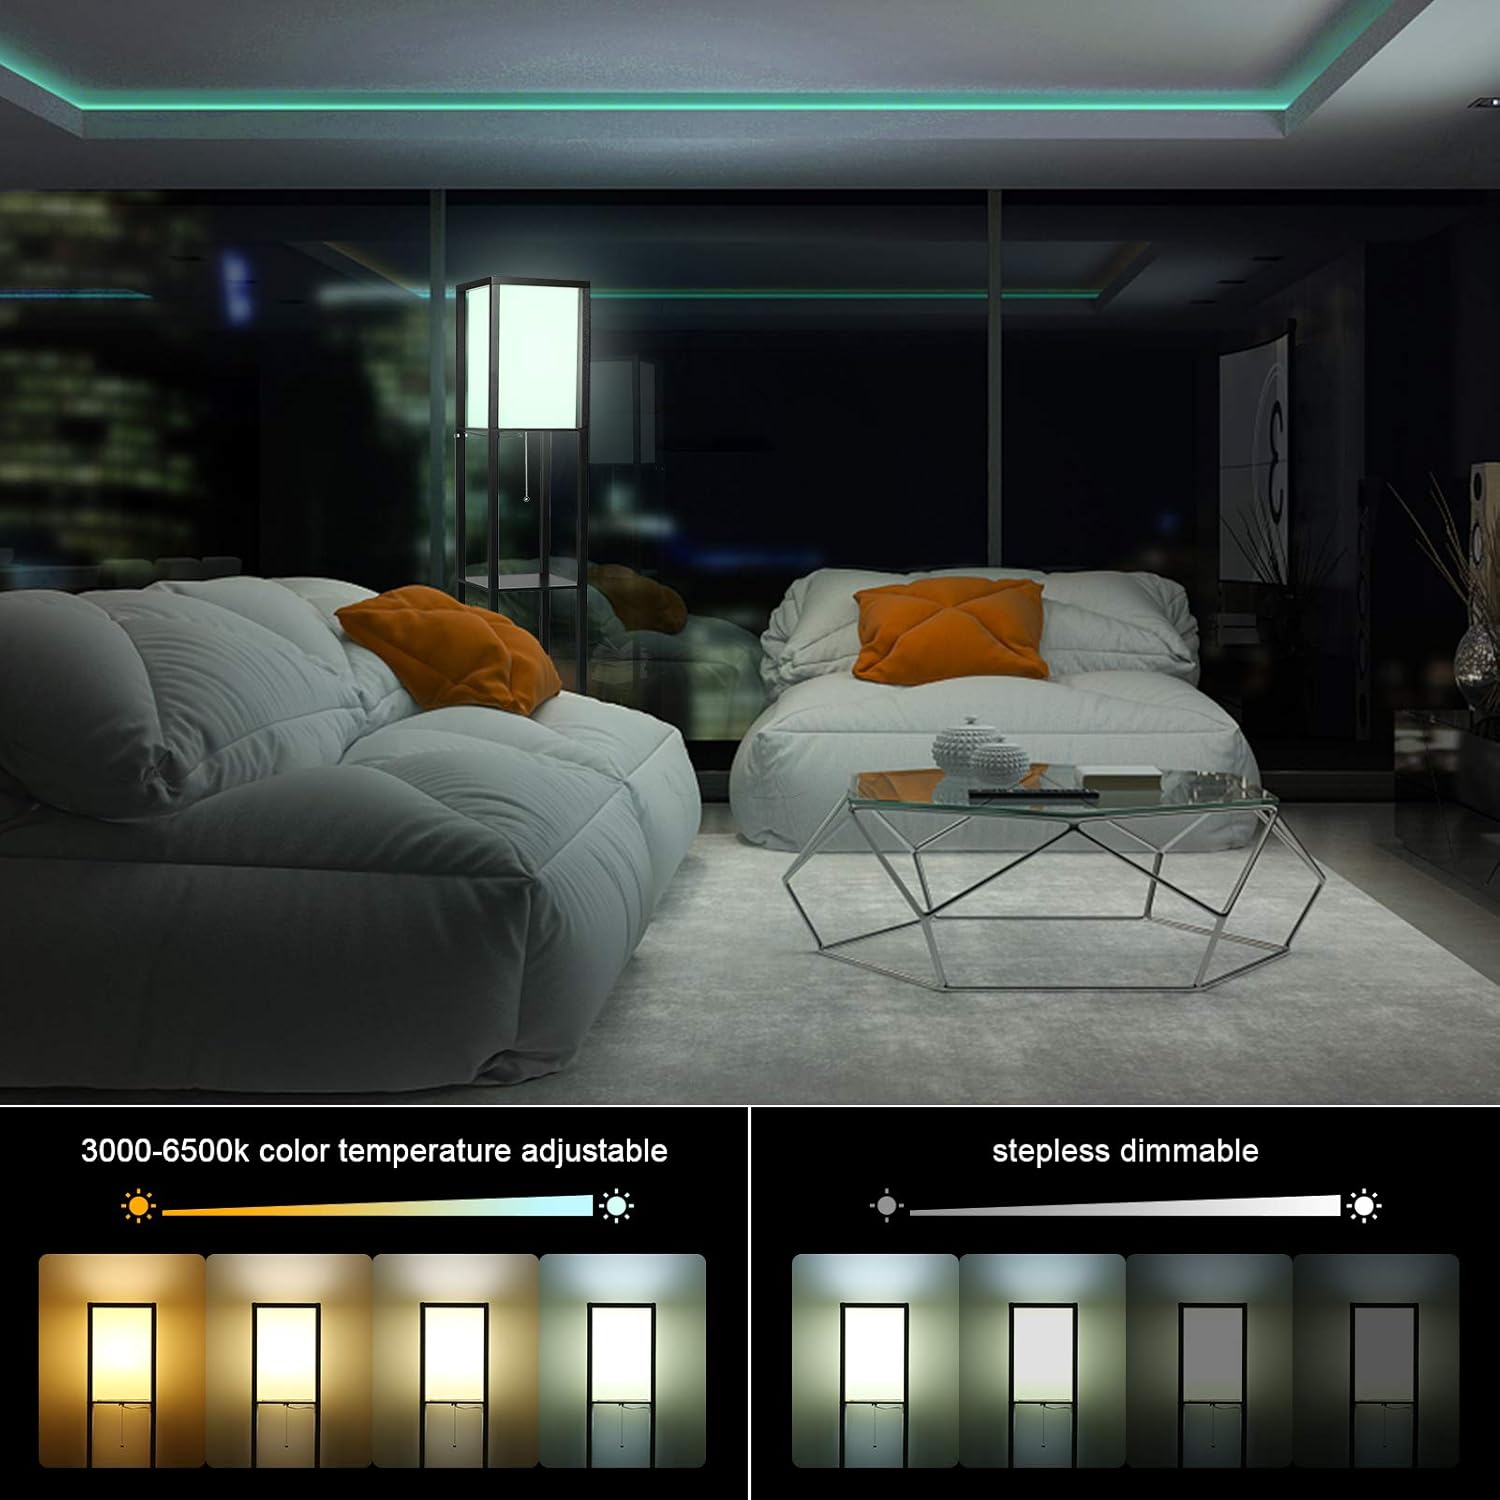
- Modo de luz nocturna: Activates a low-intensity, warm light setting.
- Regulación continua: Usa os botóns de brillo (+ / −) for continuous brightness adjustment. Short press for single step, long press for continuous change.
- Temperatura de cor sen pasos: Use the color temperature buttons (C+ / C−) to adjust the light color from warm white (3000K) to cool white (6500K). Short press for single step, long press for continuous change.
- 30/60min Timer: Sets the lamp to automatically turn off after 30 or 60 minutes.
5. Mantemento
Un mantemento regular garante a lonxevidade e o rendemento óptimo do seu lamp.
- Limpeza: Disconnect the power before cleaning. Wipe the lamp frame and shelves with a soft, dry cloth. For the fabric lampshade, use a lint roller or a soft brush to remove dust. Do not use abrasive cleaners or solvents.
- Substitución da lámpada: Asegurar o lamp is unplugged and the bulb has cooled down before attempting to replace it. Unscrew the old E27 bulb and screw in a new E27 LED bulb (max 15W).
- Baterías de control remoto: Replace AAA batteries in the remote control when its range or responsiveness decreases.
6 Solución de problemas
Se tes problemas co teu lamp, consulte os seguintes problemas e solucións comúns:
| Problema | Causa posible | Solución |
|---|---|---|
| Lamp non acende. | No power, loose bulb, faulty bulb. | Check power outlet, ensure plug is fully inserted. Tighten or replace the E27 bulb. |
| O control remoto non funciona. | Dead batteries, remote out of range, obstruction. | Replace AAA batteries. Ensure remote is within range and pointed towards the lamp. Remove any obstructions. |
| A luz parpadea ou é tenue. | Loose bulb, incompatible bulb, power fluctuation. | Tighten the bulb. Ensure the bulb is an E27 LED 15W. Check power supply. |
| Lamp é inestable. | Uneven surface, loose assembly. | Place on a flat, stable surface. Re-tighten all assembly screws. |
Se o problema persiste despois de probar estas solucións, póñase en contacto co servizo de atención ao cliente.
7. Especificacións
| Característica | Detalle |
|---|---|
| Número de modelo | LT179EU-B |
| Marca | Tomshine |
| Dimensións (L x W x H) | 26 x 26 x 159 cm (10.24 x 10.24 x 62.6 polgadas) |
| Peso | 4.15 kg (9.15 lb) |
| Vol. De entradatage | AC100-240V, 50/60Hz |
| Lonxitude do cable | Aproximadamente 3 metros (9.8 pés) |
| Tipo de bulbo | E27 LED (15W, 1200 lumens) |
| Temperatura da cor | 3000K-6500K (axustable) |
| Regulable | Si |
| Método de control | Pull Chain Switch, Remote Control |
| Material | Wood (Frame), Fabric (Lampsombra) |
| Cor | Black (Frame), Beige (Lampsombra) |
| Clase de eficiencia enerxética | F |


8. Garantía e soporte
Tomshine products are manufactured to high-quality standards. For warranty information or technical support, please refer to the retailer's policy or contact Tomshine customer service directly.
- Atención ao cliente: Consulta a documentación da túa compra para obter os datos de contacto.
- Soporte en liña: Visit the official Tomshine websitio web con preguntas frecuentes e recursos de asistencia.