
Introdución
This manual provides comprehensive instructions for the Vivitar Podcast and Social Media Microphone MIC918. This high-quality condenser microphone is designed for clear audio capture for various applications, including podcasting, live streaming, gaming, voice-overs, and vocal recording. It features a simple plug-and-play USB connection, integrated volume control, and a stable tripod stand for optimal positioning.
Información de seguridade
- Do not expose the microphone to water or excessive moisture.
- Evitar temperaturas extremas ou a luz solar directa.
- Do not attempt to disassemble or modify the microphone. This will void the warranty.
- Manteña o micrófono lonxe de campos magnéticos fortes.
- Use só un pano suave e seco para a limpeza.
Produto rematadoview
Contido do paquete
- Vivitar MIC918 Microphone Unit
- Soporte de trípode
- Integrated USB Connection Cable
Microphone Components
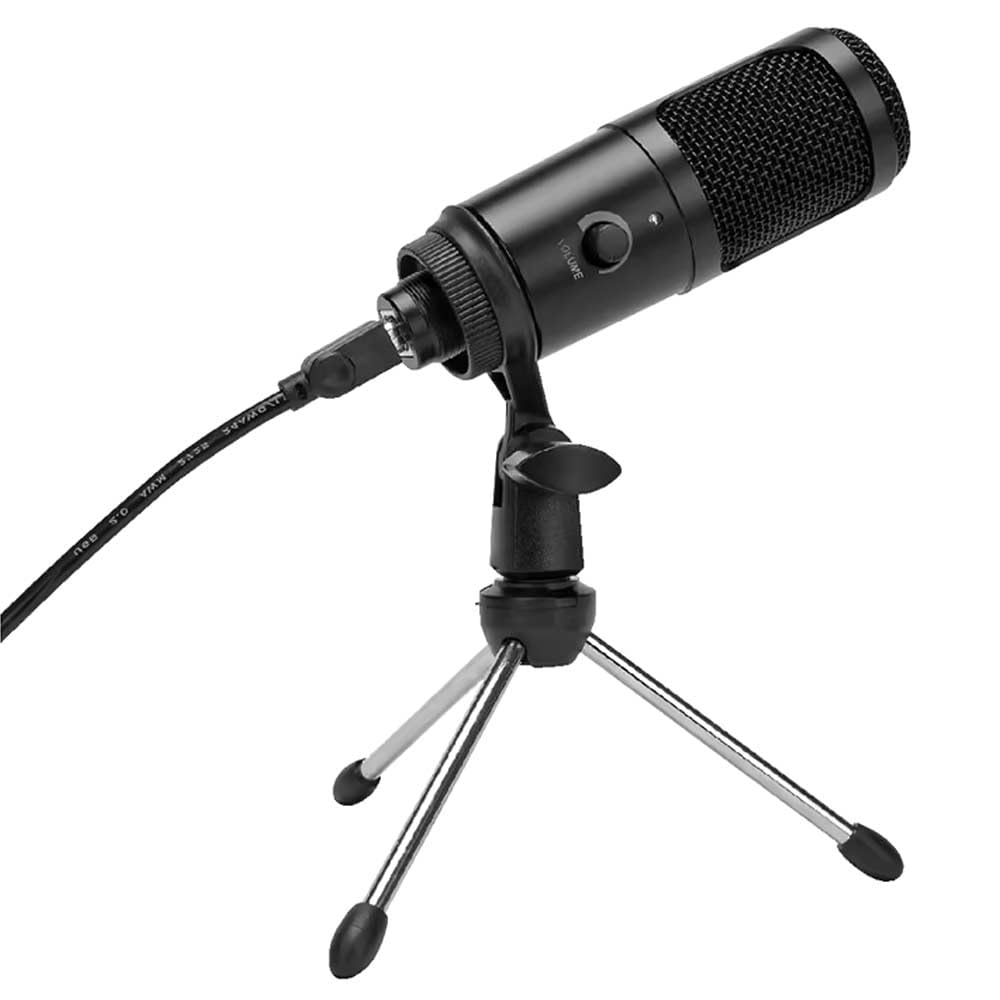
Figura 1: Vivitar MIC918 Microphone unit attached to its tripod stand, showing the integrated USB cable.

Figura 2: Lado view of the Vivitar MIC918 Microphone, highlighting the volume control knob and the Vivitar brand logo.
The microphone unit features a durable metal construction. The front side includes a volume control knob for easy audio level adjustments. The microphone is designed with a unidirectional polar pattern to focus on sound directly in front of it, reducing background noise.
Configuración
Conectando o micrófono
- Montar o soporte: If not already assembled, unfold the tripod stand and ensure it is stable on a flat surface. Securely attach the microphone unit to the stand's mounting point. The rotating shaft ring allows for angle adjustment.
- Conectar ao dispositivo: Plug the integrated USB cable from the microphone into an available USB port on your computer, laptop, or compatible gaming console.
- Plug and Play: The Vivitar MIC918 is a plug-and-play device. Your operating system (Windows, macOS, etc.) should automatically detect and install the necessary drivers. No additional software installation is typically required.
- Seleccionar como dispositivo de entrada: After connecting, navigate to your device's sound settings or the audio settings within your recording/streaming software. Select the "Vivitar MIC918" or similar USB audio device as your primary input (microphone) device.
En funcionamento
Axuste do volume
The microphone features a built-in volume control knob located on its side (refer to Figure 2). Rotate this knob clockwise to increase the microphone's input sensitivity (volume) and counter-clockwise to decrease it. Adjust this to achieve the desired recording level without distortion.
Posicionamento do micrófono
For optimal audio capture, position the microphone directly in front of the sound source (e.g., your mouth for speaking or singing). The tilting tripod stand allows you to adjust the microphone's angle to best suit your needs. Due to its unidirectional polar pattern, the microphone is most sensitive to sounds coming from the front and less sensitive to sounds from the sides or rear, helping to minimize ambient noise.
Mantemento
- Limpeza: Use a soft, dry, lint-free cloth to wipe the microphone's exterior. Do not use liquid cleaners, aerosols, or solvents.
- Almacenamento: When not in use, store the microphone in a clean, dry place, away from dust and extreme temperatures.
- Manexo: Manexa o micrófono con coidado. Evita deixalo caer ou sometelo a impactos fortes.
Resolución de problemas
| Problema | Causa posible | Solución |
|---|---|---|
| Non se emite son polo micrófono. | Micrófono non conectado correctamente. Seleccionouse o dispositivo de entrada incorrecto. Volume do micrófono demasiado baixo. | Ensure USB cable is securely plugged into both the microphone and the device. Verify that "Vivitar MIC918" is selected as the input device in your system's sound settings or recording software. Increase the volume using the knob on the microphone and check system input levels. |
| Poor sound quality (e.g., muffled, too quiet, background noise). | Incorrect microphone positioning. Ruído ambiental elevado. Input level too high or too low. | Position the microphone closer to the sound source and ensure it's facing directly towards it. Grava nun ambiente máis tranquilo. Adjust the microphone's volume knob and system input levels to an optimal range, avoiding clipping or being too faint. |
| Micrófono non recoñecido polo ordenador. | Porto ou cable USB defectuoso. System driver issue. | Proba a conectar o micrófono a un porto USB diferente do teu ordenador. Restart your computer. If the issue persists, check your operating system's device manager for any driver conflicts or updates. |
Especificacións
| Característica | Especificación |
|---|---|
| Marca | En directo |
| Número de modelo | MIC918 |
| Conectividade | USB (Plug and Play) |
| Tipo de micrófono | Condensador |
| Patrón polar | Unidireccional |
| Relación sinal-ruído | 78 dB |
| Material do recinto | Metal |
| Peso do elemento | 0.95 libras (aprox. 0.43 kg) |
| Dimensións do artigo (L x W x H) | 8.86 x 5.36 x 2.49 polgadas (aprox. 22.5 x 13.6 x 6.3 cm) |
| Fonte de enerxía | Eléctrico con cable (vía USB) |
| Dispositivos compatibles | Computers, Laptops, Gaming Consoles |
Información da garantía
The Vivitar Podcast and Social Media Microphone MIC918 comes with a 3-Year USA Warranty. For specific terms, conditions, and to register your product, please refer to the official Vivitar websitio web ou póñase en contacto directamente co servizo de atención ao cliente. Garde o comprobante de compra para reclamacións de garantía.
Atención ao cliente
For further assistance, technical support, or inquiries regarding your Vivitar MIC918 microphone, please visit the official Vivitar website or contact their customer service department. Contact information can typically be found on the Vivitar websitio nas seccións "Asistencia" ou "Contacto".