
1. Instrucións de seguridade importantes
Observe sempre as precaucións de seguridade básicas para reducir o risco de incendio, descarga eléctrica e lesións persoais ao usar ferramentas eléctricas. Lea todas as instrucións atentamente antes do uso.
- Seguridade na zona de traballo: Manteña a súa área de traballo limpa e ben iluminada. As zonas desordenadas ou escuras invitan aos accidentes. Non manexe ferramentas eléctricas en atmosferas explosivas, como en presenza de líquidos, gases ou po inflamables.
- Seguridade eléctrica: Os enchufes das ferramentas eléctricas deben coincidir coa toma de corrente. Nunca modifique o enchufe de ningún xeito. Evite o contacto corporal con superficies conectadas á terra, como tubaxes, radiadores, fogóns e frigoríficos.
- Seguridade persoal: Use sempre protección ocular. Use protección auditiva cando traballe durante períodos prolongados. Vístase axeitadamente; non use roupa folgada nin xoias. Manteña o cabelo, a roupa e as luvas lonxe das pezas móbiles.
- Uso e coidado da ferramenta: Non force a ferramenta eléctrica. Empregue a ferramenta eléctrica axeitada para a súa aplicación. Desconecte o enchufe da fonte de alimentación antes de facer axustes, cambiar accesorios ou gardar ferramentas eléctricas.
- Mantemento: Manter ferramentas eléctricas. Comprobe se hai desalineamiento ou atadura de pezas móbiles, roturas de pezas e calquera outra condición que poida afectar o funcionamento da ferramenta eléctrica. Se está danada, repare a ferramenta eléctrica antes de usala.
2. Produto rematadoview e Compoñentes
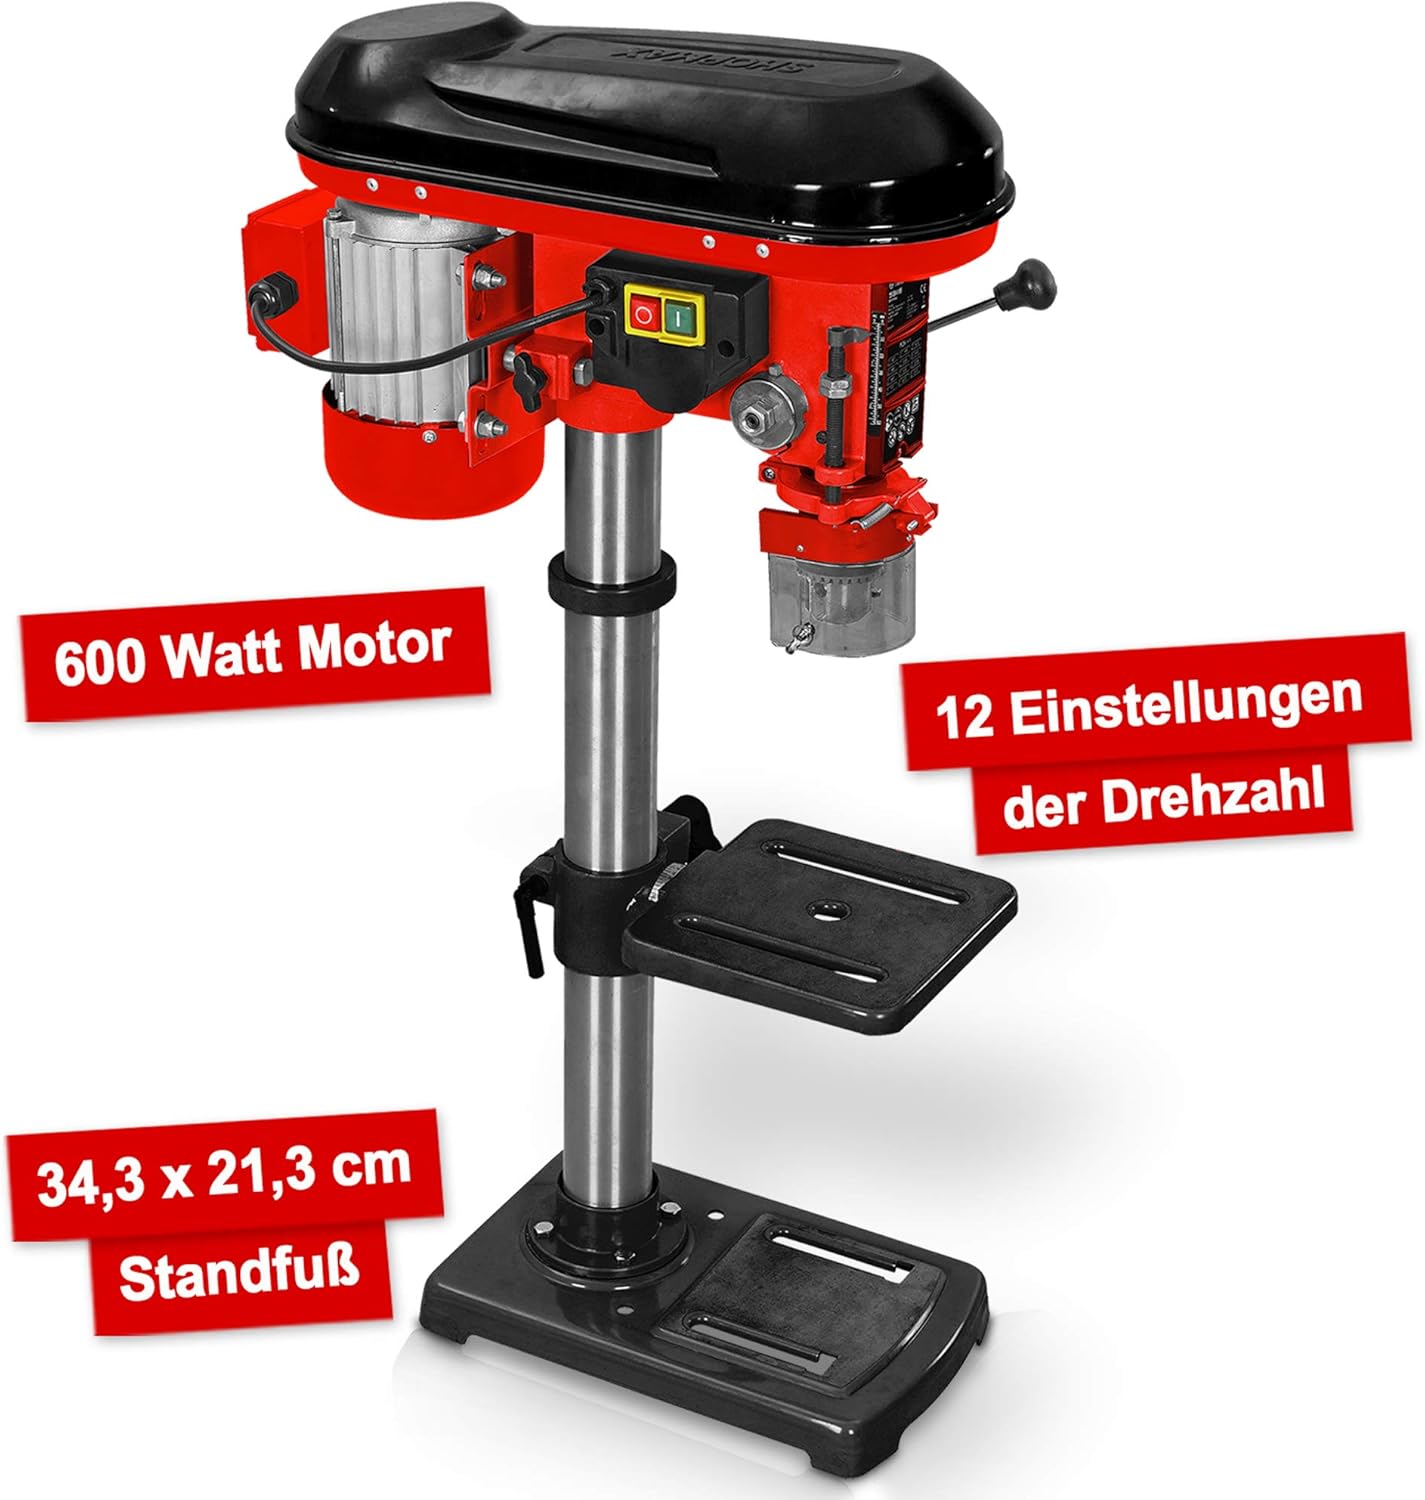
The Hecht Professional Pillar Drill is designed for precise drilling operations. Familiarize yourself with its main components for safe and effective use.

- Carcasa Motor: Contains the 600W motor and belt drive system.
- Asemblea de cabeza: Includes the chuck, spindle, and depth stop.
- Columna: The main support structure for the head assembly and drilling table.
- Drilling Table: Adjustable in height and angle for versatile drilling.
- Placa base: Provides stability and features mounting slots for securing to a workbench.
- chuck: Holds the drill bits securely (3-16 mm capacity).
- Speed Adjustment Lever: Used to change the drilling speed.
- Asas de alimentación: Used to lower the chuck and drill bit into the workpiece.
- Interruptor On/Off: Power control for the drill.
- Chip Protection Guard: Transparent guard for safety during operation.
3. Configuración e montaxe
Follow these steps to assemble and set up your pillar drill before initial use.
- Desembalaxe: Retire con coidado todos os compoñentes da embalaxe. Comprobe se hai algún dano ou pezas que falten.
- Instalación da placa base: Place the base plate on a stable, level workbench. Secure it using appropriate bolts through the elongated slots on the base.
- Column Assembly: Mount the column securely onto the base plate according to the provided hardware.
- Drilling Table Attachment: Slide the drilling table assembly onto the column. Adjust its height and secure it with the locking handle.
- Head Assembly Mounting: Carefully place the head assembly onto the top of the column and secure it.
- Chuck Installation: Insert the chuck onto the spindle taper. Use a rubber mallet to gently tap it into place, ensuring a firm fit.
- Chip Guard: Attach the transparent chip protection guard around the chuck area.

4. Instrucións de funcionamento
Understand how to properly operate your pillar drill for optimal performance and safety.
4.1 Selecting Drill Bits
Choose the appropriate drill bit for the material and desired hole size. The chuck accommodates bits from 3 mm to 16 mm. Ensure the drill bit is sharp and free from damage.
4.2 Instalación das brocas
- Asegúrate de que o berbiquí estea desconectado.
- Open the chuck jaws using the chuck key.
- Insert the drill bit into the chuck, ensuring it is centered and seated firmly.
- Tighten the chuck jaws securely with the chuck key. Remove the chuck key immediately after tightening.
4.3 Axuste da velocidade
The drill features 12 speed settings, adjustable via a belt drive system. Select the speed appropriate for your material and drill bit size. Lower speeds are generally for larger bits and harder materials, while higher speeds are for smaller bits and softer materials.


4.4 Adjusting Drilling Table
The drilling table can be adjusted in height and tilted up to +/- 45 degrees. Loosen the locking handle, position the table as required, and then securely tighten the handle.

4.5 Axuste da profundidade de perforación
Use the depth stop mechanism to set the desired drilling depth. This ensures consistent hole depths for repetitive tasks.
4.6 Procedemento de perforación
- Secure the workpiece firmly to the drilling table using clamps ou un torno. Nunca suxeite a peza de traballo coa man.
- Adjust the table height and angle, and set the drilling depth.
- Selecciona a velocidade adecuada.
- Turn on the drill using the On/Off switch.
- Baixe lentamente a broca na peza de traballo usando as manivelas de alimentación, aplicando unha presión constante e uniforme.
- Once the desired depth is reached, retract the drill bit from the workpiece.
- Turn off the drill.
5. Mantemento
Regular maintenance ensures the longevity and safe operation of your pillar drill.
- Limpeza: After each use, clean the drill of dust and chips. Use a brush or compressed air. Do not use solvents that may damage plastic parts.
- Lubricación: Periodically lubricate moving parts such as the column, spindle, and depth stop mechanism with light machine oil.
- Tensión da correa: Check the tension of the drive belt regularly. Adjust if necessary to prevent slippage and ensure proper power transmission. Refer to the belt diagram inside the motor housing cover.
- Mantemento do mandril: Keep the chuck jaws clean and free of debris. If the chuck becomes stiff, clean and lightly lubricate it.
- Cordón eléctrico: Inspect the power cord for any damage. Replace if frayed or cut.
6 Solución de problemas
This section addresses common issues you might encounter with your pillar drill.
| Problema | Causa posible | Solución |
|---|---|---|
| A furadeira non arranca | Sen fonte de alimentación; interruptor defectuoso; problema co motor | Check power connection and circuit breaker; Inspect switch for damage; Consult qualified service personnel. |
| Vibración excesiva | Loose mounting; Unbalanced drill bit; Worn bearings | Tighten mounting bolts; Replace or re-center drill bit; Consult service personnel for bearing replacement. |
| A broca escorrega no mandril | Chuck not tightened sufficiently; Oily chuck jaws; Damaged chuck jaws | Tighten chuck firmly with key; Clean chuck jaws; Replace chuck if damaged. |
| O motor sobrequenta | Overloading; Insufficient ventilation; Prolonged use | Reduce load; Ensure clear ventilation; Allow motor to cool down. |
| Perforación inexacta | Loose workpiece; Worn drill bit; Misaligned table | Secure workpiece firmly; Replace drill bit; Check and adjust table alignment. |
7. Especificacións
Technical data for the Hecht Professional Pillar Drill.
| Característica | Especificación |
|---|---|
| Fabricante | Hecht |
| Número de modelo do artigo | Standbohrmaschine Hecht |
| Fonte de enerxía | Eléctrico con cable |
| Voltage | 230 voltios |
| Potencia máxima | 600 Watts |
| Velocidade máxima de rotación | 2700 RPM |
| Número de velocidades | 12 |
| Tamaño máximo de mandril | 16 mm |
| Material | Metal |
| Cor | Red Pillar Drill |
| Dimensións do paquete | 71 x 45 x 27 cm |
| Peso | 23 kilograms (approx.) |
| Ambiente de uso | Interior |
| Número de referencia | 8595614925655 |
8. Garantía e soporte
For warranty information, please refer to the documentation provided with your purchase or contact the retailer. For technical support or spare parts inquiries, please contact Hecht customer service or your authorized dealer.
Please have your model number (Standbohrmaschine Hecht) and reference number (8595614925655) available when contacting support.