
1. Introdución
Thank you for choosing the HOFTRONIC Esto 2-Light GU10 Black LED Spotlight. This product is designed for indoor use, providing adjustable lighting with two GU10 LED bulbs. Constructed from high-quality aluminum, this spotlight offers a modern aesthetic and reliable performance. Please read this manual carefully before installation and use to ensure safe and optimal operation.
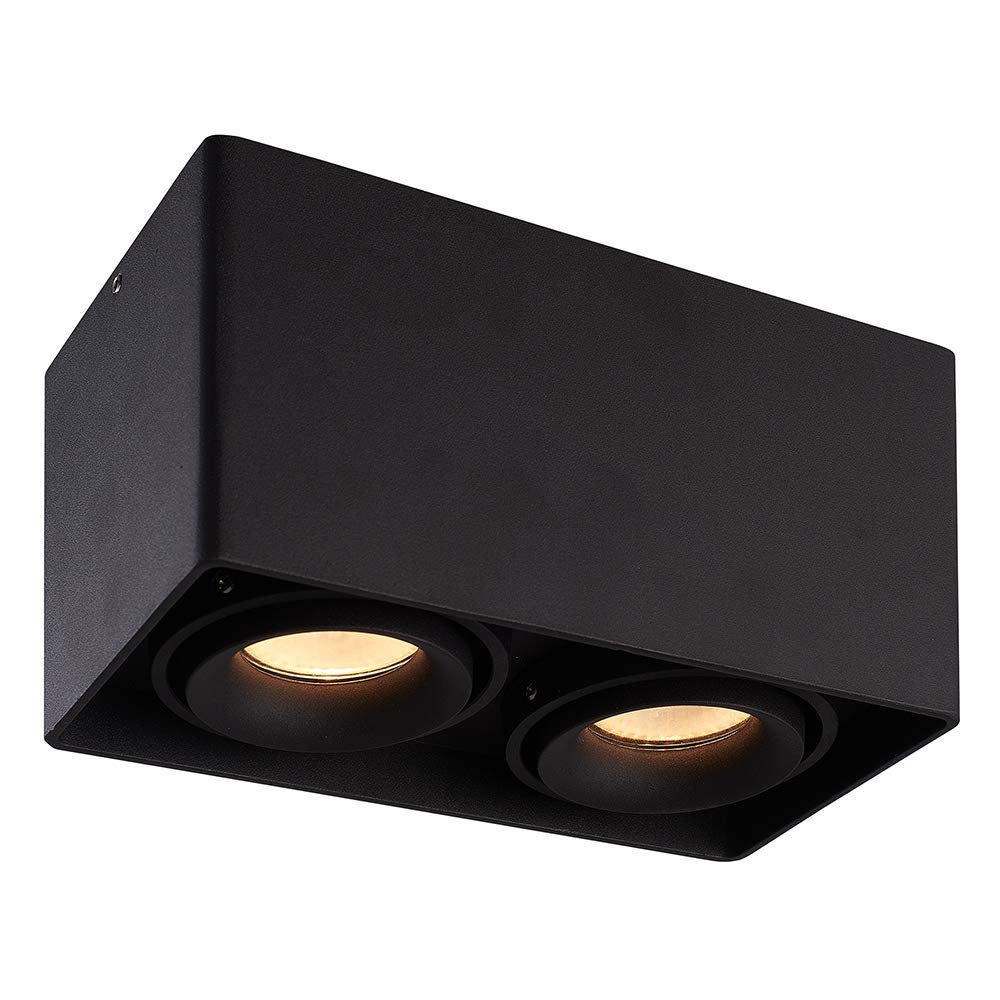
Image: The HOFTRONIC Esto 2-Light GU10 Black LED Spotlight installed on a ceiling, providing illumination in a modern interior setting.
2. Instrucións de seguridade
- Always disconnect the main power supply before attempting any installation, maintenance, or bulb replacement.
- Installation should be performed by a qualified electrician to ensure compliance with local electrical codes and safety standards.
- This product is rated IP20 and is suitable for só para uso interior. Do not expose to moisture or direct water.
- Asegurar o voltagA subministración coincide cos requisitos do produto (230 V CA).
- Non exceda a potencia máximatage of 35 Watts per GU10 LED bulb.
- Asegúrese de que haxa unha ventilación axeitada arredor da instalación para evitar o sobrequecemento.
- Do not cover the fixture with insulating material unless specifically designed for it.
3. Contido da caixa
Comprobe que todos os compoñentes estean presentes e non estean danados antes de continuar coa instalación.

Image: Contents of the product box, including the spotlight fixture and mounting hardware.
- 1x HOFTRONIC Esto Double Black LED Ceiling Spot Fixture
- 1 x chave Allen
- 4x Parafusos
- 4 x arandelas
- 4x Tacos de pared
4. Configuración e instalación
Follow these steps for safe and correct installation of your LED spotlight.
- Preparación para a instalación: Asegúrese de que a subministración eléctrica principal da zona de instalación estea desconectada no disyuntor.
- Marcar os puntos de perforación: Position the fixture on the ceiling at the desired location. Use the mounting holes on the base of the fixture to mark the drilling points. Refer to the diagram below for mounting dimensions.
- Perforación: Fai buratos nos puntos marcados. Introduce os tacos de parede fornecidos nos buratos perforados.
- Conectar cableado: Open the terminal cover on the fixture. Carefully connect the electrical wires from your ceiling to the terminal block inside the fixture. Ensure correct connections: Live (L), Neutral (N), and Earth (⌀). The cable inlet supports a maximum diameter of 12mm.
- Montar o aparello: Align the fixture's mounting holes with the wall plugs. Secure the fixture to the ceiling using the provided screws and washers. Do not overtighten.
- Insert GU10 Bulbs: Insert two GU10 LED bulbs (not included) into the lamp holders. Ensure they are securely twisted into place. Do not exceed 35 Watts per bulb.
- Restaurar enerxía: Once installation is complete and all connections are secure, restore the main power supply.

Image: Detailed diagram of the spotlight's base with mounting hole dimensions (69mm x 69mm spacing, 4mm diameter holes, 13mm edge distance, max 12mm cable inlet).
5. Instrucións de funcionamento
The HOFTRONIC Esto spotlight is designed for simple operation.
- Encendido/apagado: Control the spotlight using your standard wall light switch.
- Axustar a dirección da luz: The GU10 fittings are tiltable, allowing you to adjust the light direction by up to 30 degrees. Gently pivot the inner lamp holders to direct the light as desired.

Image: Illustration of the adjustable light direction, demonstrating the 30-degree tilt capability of the GU10 fittings.
6. Mantemento
Regular maintenance will help prolong the life and appearance of your spotlight.
- Limpeza: Ensure the power is off and the fixture is cool before cleaning. Wipe the exterior of the spotlight with a soft, dry, or slightly damp pano. Non empregue produtos de limpeza abrasivos, solventes nin produtos químicos agresivos, xa que poden danar o acabado.
- Substitución da lámpada:
- Desconecte a fonte de alimentación do aparello.
- Deixa que a lámpada arrefríe completamente se foi usada recentemente.
- Gently push the GU10 bulb into its fitting and twist it counter-clockwise to remove.
- Insert a new GU10 LED bulb (max 35W) by pushing it into the fitting and twisting clockwise until secure.
- Restaurar a enerxía.
7 Solución de problemas
If you encounter issues with your spotlight, refer to the following common problems and solutions:
- A luz non se acende:
- Comprobe se a fonte de alimentación principal está activada.
- Ensure the wall switch is in the 'on' position.
- Verify that the GU10 bulbs are correctly inserted and not faulty.
- Inspeccione as conexións do cableado para ver se están soltas ou danos (asegúrese de que a electricidade estea desconectada antes da inspección).
- Parpadeos de luz:
- Ensure GU10 bulbs are fully seated in their sockets.
- Try replacing the bulb to rule out a faulty bulb.
- Check for loose wiring connections (with power off).
- Fixture feels hot:
- Confirm that the installed GU10 bulbs do not exceed the maximum wattage de 35W.
- Ensure there is no obstruction preventing proper heat dissipation.
Se os problemas persisten, póñase en contacto co servizo de atención ao cliente ou cun electricista cualificado.
8. Especificacións
| Marca | HOFTRONIC |
| Número de modelo | 446496 |
| Cor | Negro |
| Material | Aluminio |
| Estilo | Moderno |
| Usos específicos | Só para uso en interiores |
| Fonte de enerxía | CA 230 V |
| Tipo de bulbo | LED |
| Voltage | 230 voltios (CA) |
| Max Wattage (por lámpada) | 35 vatios |
| Base de bulbo | GU10 |
| Etiqueta de eficiencia enerxética | A+ |
| Tipo de montaxe | Montaxe no teito |
| Peso do produto | 5 gramos |
| Dimensións (L x W x H) | 187 mm x 94 mm x 105 mm |
| Clasificación IP | IP20 |

Image: Overall dimensions of the HOFTRONIC Esto 2-Light GU10 Black LED Spotlight.
9. Garantía
This HOFTRONIC product comes with a 3 ano de garantía, reflecting our commitment to quality and durable construction. The robust aluminum enclosure ensures a long lifespan for your ceiling light.

Image: Warranty information, indicating a 3-year warranty and durable build quality.
10. Apoio
For further assistance, technical support, or warranty claims, please contact your retailer or the HOFTRONIC customer service department. Refer to your purchase documentation for contact details.