
1. Introdución
This manual provides comprehensive instructions for the installation, operation, and maintenance of your PANOEAGLE DS-7608NI-I2/8P 8-Channel 4K Network Video Recorder (NVR). Please read this manual thoroughly before using the product to ensure proper setup and functionality. Retain this manual for future reference.
The PANOEAGLE DS-7608NI-I2/8P is an embedded Plug and Play 4K NVR designed for robust 24/7 surveillance recording. It supports up to 8 cameras simultaneously, offering high-resolution recording up to 12MP and utilizing H.264+/H.264/H.265 video compression for efficient storage. Its Power over Ethernet (PoE) capability simplifies camera installation by providing both power and data through a single cable.
2. Produto rematadoview
Familiarize yourself with the components and interfaces of your NVR.
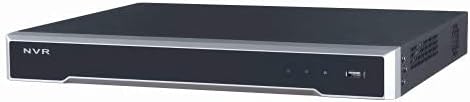
Figura 2.1: Panel frontal View
This image displays the front panel of the NVR, featuring the 'NVR' branding, status indicators, and a USB port for peripheral connections.

Figura 2.2: Panel traseiro View
This image shows the rear panel of the NVR, highlighting the power input, cooling fan, 8 PoE ports, network port, USB ports, audio input/output, VGA, and HDMI video outputs, and alarm/control terminals.

Figure 2.3: Angled Rear View
An angled perspective of the NVR's rear panel, providing a clearer view of the various connectivity options and ventilation.
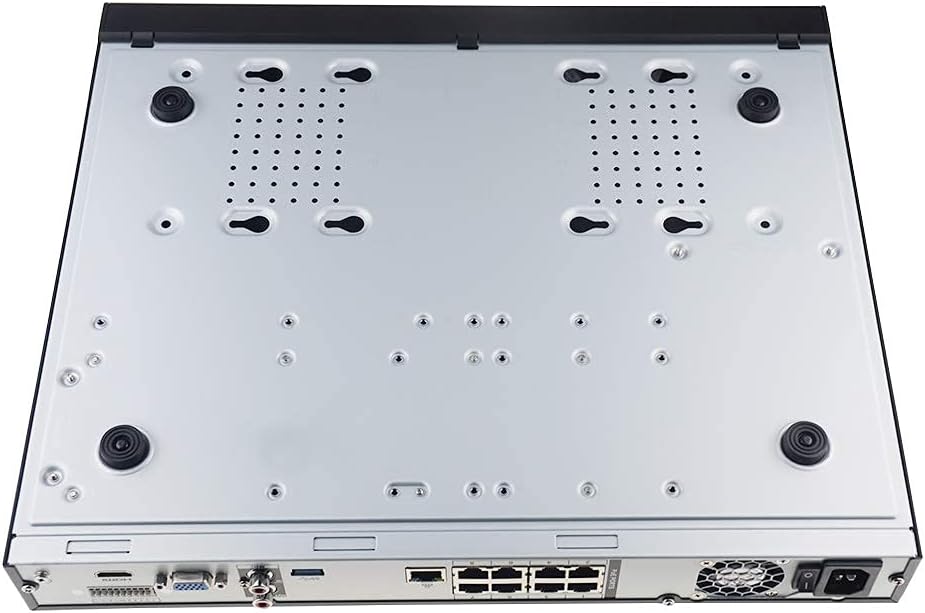
Figure 2.4: Bottom Panel View
This image displays the bottom of the NVR, showing mounting points and ventilation holes, along with rubber feet for stable placement.
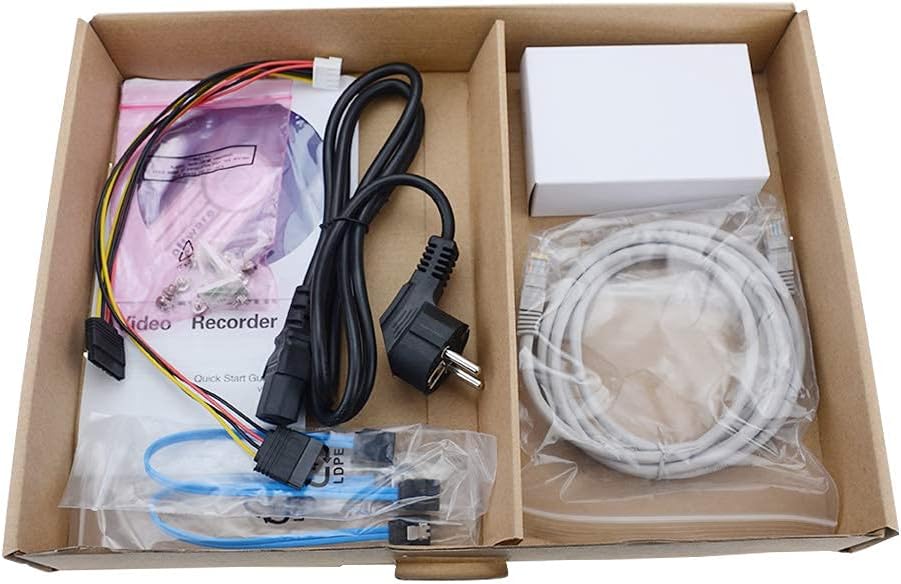
Figura 2.5: Contido do paquete
A view of the accessories included with the NVR, typically comprising a power cable, network cable, USB mouse, SATA cables for hard drive installation, and a quick start guide.
3. Características clave
- Gravación de 8 canles: Supports simultaneous recording from up to 8 IP cameras.
- Soporte de resolución 4K: Capable of recording and displaying video resolutions up to 12MP.
- PoE Easy Setup: Integrated Power over Ethernet (PoE) ports for direct connection and power supply to IP cameras via a single Ethernet cable.
- Advanced Video Compression: Utilizes H.264+/H.264/H.265 codecs for efficient storage and bandwidth usage.
- Gravación 24/7: Designed for continuous, reliable surveillance monitoring.
- Saída HDMI: High-definition video output for connecting to monitors or TVs.
- Soporte SATA: Features 2 SATA interfaces for internal hard drive installation (HDDs not included).
4. Guía de configuración
4.1. Instalación do disco duro (opcional)
Se o seu NVR non veu cun disco duro preinstalado, siga estes pasos:
- Apague o NVR e desconecte todos os cables.
- Desaparafuse e retire a tapa superior do chasis do NVR.
- Connect the SATA data cable and power cable from the NVR to the hard drive.
- Fixe o disco duro ao chasis do NVR cos parafusos fornecidos.
- Volva colocar a tapa superior e asegúreaa con parafusos.
4.2. Conexións iniciais
- Conectar un monitor: Conecte un monitor ao porto de saída HDMI ou VGA do NVR.
- Conectar un rato: Conecta o rato USB a un dos portos USB do NVR.
- Conectarse á rede: Conecta o porto LAN do NVR ao teu enrutador ou conmutador de rede mediante un cable Ethernet.
- Conectar cámaras IP: Connect your PoE IP cameras to the NVR's PoE ports using Ethernet cables. The NVR will provide power and data to the cameras.
- Encendido: Conecta o adaptador de corrente ao NVR e logo conéctao a unha toma de corrente. O NVR acenderase automaticamente.
4.3. Configuración inicial
Upon first boot, the NVR will guide you through an initial setup wizard. This typically includes:
- Configuración dun contrasinal de administrador.
- Configuring network settings (DHCP is usually default).
- Initializing the hard drive (if newly installed).
- Searching for and adding connected IP cameras.
- Axuste de data e hora.
Siga as indicacións en pantalla para completar a configuración.
5. Instrucións de funcionamento
5.1. En directo View
After logging in, the NVR will typically display the live view de todas as cámaras conectadas. Podes cambiar entre unha soa cámara view, grella multicámara viewe personalizar os deseños da pantalla.
5.2. Gravación
- Gravación continua: Records 24/7. Configure schedules in the NVR's menu.
- Gravación de detección de movemento: Records only when motion is detected. Sensitivity and detection zones can be adjusted.
- Gravación programada: Set specific times for recording.
Access recording settings via the NVR's main menu, usually under "Record" or "Storage" settings.
5.3. Reprodución
Para review gravado footage:
- From the main menu, select "Playback".
- Choose the camera(s) and date/time range you wish to review.
- Use the timeline to navigate through recorded events. Options for fast-forward, rewind, and pause are available.
5.4. Acceso remoto
The NVR supports remote viewing via a mobile app or web browser. Refer to the NVR's network settings for details on enabling P2P (peer-to-peer) or port forwarding for remote access. Download the official PANOEAGLE mobile application from your device's app store.
6. Mantemento
- Limpeza regular: Keep the NVR free from dust. Use a soft, dry cloth for exterior cleaning. Ensure ventilation openings are clear.
- Actualizacións de firmware: Periodically check the PANOEAGLE official website for firmware updates. Updates can improve performance, add features, and enhance security. Follow update instructions carefully.
- Estado do disco duro: Monitor the health of your hard drive(s) through the NVR's system information. Replace failing drives promptly to avoid data loss.
- Seguridade contrasinal: Regularly change your administrator password and use strong, unique passwords.
7 Solución de problemas
| Problema | Causa posible | Solución |
|---|---|---|
| Sen saída de vídeo no monitor. | Conexión do cable solta, fonte de entrada incorrecta no monitor, NVR non acendido. | Check HDMI/VGA cable connections. Ensure monitor is set to correct input. Verify NVR power. |
| As cámaras non mostran en directo view. | Camera not powered, network issue, camera not added to NVR, incorrect IP address. | Check camera power and Ethernet cables. Ensure cameras are connected to PoE ports. Use NVR's camera management to search and add cameras. Verify camera IP addresses. |
| No recording or missing footage. | Hard drive not installed/initialized, recording schedule not configured, hard drive full, hard drive failure. | Install and initialize HDD. Configure recording schedules. Check HDD status and capacity. Replace faulty HDD. |
| Non se pode acceder ao NVR de forma remota. | Network configuration issues, P2P disabled, incorrect app settings, firewall blocking. | Ensure NVR has internet access. Enable P2P service. Verify app settings and NVR's network configuration. Check router firewall settings. |
8. Especificacións
| Característica | Detalle |
|---|---|
| Modelo | DS-7608NI-I2/8P |
| Marca | PANOEAGLE (Compatible with Hi-k USA systems) |
| Número de canles | 8 |
| resolución máxima | Ata 12MP |
| Compresión de vídeo | H.264+/H.264/H.265 |
| Saída de vídeo | HDMI, VGA |
| Entrada de audio | RCA |
| Interfaces SATA | 2 (for HDD) |
| Tecnoloxía de conectividade | HDMI, Ethernet (PoE) |
| Data de primeira dispoñibilidade | 28 de xullo de 2021 |
9. Garantía e soporte
For warranty information, please refer to the warranty card included with your product or visit the official PANOEAGLE website. Technical support may be available through the manufacturer's websitio web ou poñéndose en contacto co seu departamento de atención ao cliente.
Always ensure you are using official channels for support and firmware downloads to maintain product integrity and security.