Infinity KAPPA693C
Infinity KAPPA693C Component Speaker System User Manual
Model: KAPPA693C (INFSPKKA693CAM)
Introdución
The Infinity Kappa Series component speaker system is engineered to deliver exceptional car audio performance. Featuring Plus One fiberglass woofers for powerful bass and high-resolution edge-driven textile dome tweeters for clear highs, this system provides a superior listening experience in virtually any vehicle. This manual provides essential information for installation, operation, and maintenance of your KAPPA693C speaker system.
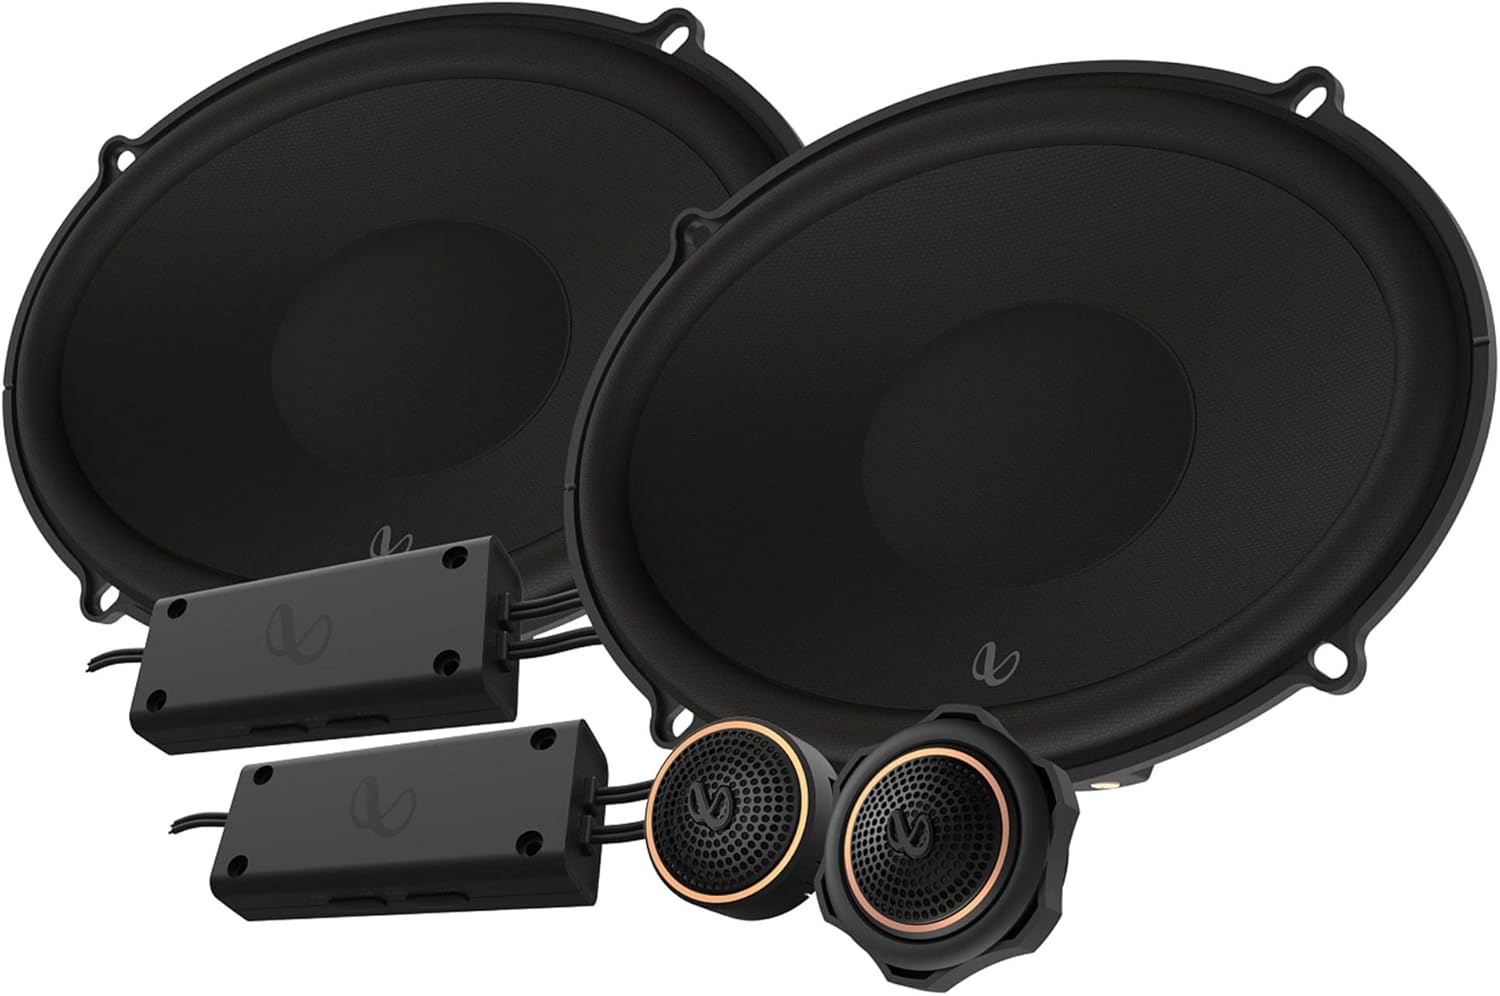
Figure 1: Infinity KAPPA693C Component Speaker System components.
O que hai na caixa
Verifique que todos os compoñentes que se indican a continuación estean presentes no seu paquete:
- 2x Speakers (Woofers)
- 2x espaciadores
- 2 x xuntas de espuma
- 2x Crossovers
- 2x tweeters
- 2x adaptadores roscados de montaxe empotrada
- 2 porcas de bloqueo de plástico
- 2 vasos de montaxe superficial
- 2 montaxes de tweeter con estrela de mar
- 22x Parafusos
- Clips de velocidade 16x
- 1x punta de cabeza Allen (2.5 mm)
- 2x insignias de logotipo Infinity
- 2 adhesivos de marca
- 1x Owner’s manual (this document)
Especificacións
| Característica | Detalle |
|---|---|
| Tipo de altofalante | 6" x 9" (168mm x 240mm) Two-way Component System |
| Manexo de potencia | 145 W RMS, 435 W pico |
| Sensitivity (@ 2.83V) | 94 dB |
| Resposta en frecuencia | 35 Hz - 40 kHz |
| Impedancia | 3.0 ohmios |
| Diámetro do woofer | 15.24 cm (6 polgadas) |
| Diámetro do tweeter | 1.91 cm (0.75 polgadas) |
| Peso bruto | 5.06 kg (10.93 libras) |
| Número de modelo | INFSPKKA693CAM |
| UPC | 050667376987 |
Características clave
- Plus One Fiberglass Woofers: Lighter and stiffer cones provide increased low-frequency output and higher efficiency for robust bass.
- Edge-Driven Silk Dome Tweeters: Equipped with oversized voice coils for smooth highs and impressive thermal power handling up to 40kHz.
- Adjustable Tweeter Output: A push-button on the angled tweeter allows for 0dB or -3dB output level control to optimize system linearity based on installation.
- Compact Crossovers: Designed for easy integration, with 2-way and 3-way selections to accommodate optional midrange upgrades.


Figura 2: detallada views of the woofer, tweeters, and crossovers.
Configuración e instalación
Professional installation is recommended for optimal performance and to prevent damage to your vehicle's electrical system. Always disconnect the vehicle's battery before beginning any electrical work.
1. Planificación da Instalación
- Selección de localización: Choose suitable locations for the woofers, tweeters, and crossovers within your vehicle. Ensure adequate clearance and proper acoustic placement.
- Diagrama de cableado: Refer to the detailed wiring diagram provided in the physical owner's manual for correct connections between your head unit, amplifier (if used), crossovers, woofers, and tweeters.
- Ferramentas necesarias: Gather necessary tools including screwdrivers, wire strippers, crimpers, drill, and appropriate safety gear.
2. Mounting the Woofers
- Carefully remove existing speakers or prepare the mounting location.
- Use the provided spacers and foam gaskets as needed to ensure a secure and sealed fit.
- Secure the woofers using the supplied screws and speed clips.

Figura 3: Lateral view of the woofer, illustrating mounting depth considerations.
3. Mounting the Tweeters
- Choose between flush-mount, surface-mount, or starfish tweeter mounts based on your vehicle's interior and desired sound dispersion.
- Install the tweeters securely using the appropriate adapters and nuts.
- Adjust the tweeter output level (0dB or -3dB) using the push-button on the tweeter to match your listening preference and vehicle acoustics.
4. Installing Crossovers
- Mount the compact crossovers in a dry, accessible location, away from excessive heat or moisture.
- Conecta a entrada do teu amplifier/head unit to the crossover, and then connect the woofer and tweeter outputs from the crossover to their respective speakers.
- Asegúrate de que todas as conexións estean seguras e debidamente illadas para evitar curtocircuítos.
Instrucións de funcionamento
Once installed, operate your Infinity KAPPA693C system as follows:
- Encendido inicial: After installation, reconnect the vehicle's battery. Turn on your car audio system at a low volume.
- Axuste de volume: Gradually increase the volume to a comfortable listening level. Avoid excessively high volumes that can cause distortion or damage to the speakers.
- Configuración de audio: Adjust your head unit's equalizer and sound settings to optimize the audio output for your vehicle's acoustics and personal preference. Experiment with bass, treble, and balance controls.
- Tweeter Level: If you notice the highs are too bright or too subtle, re-adjust the tweeter output level on the tweeters (0dB or -3dB) as needed.
Mantemento
To ensure the longevity and optimal performance of your Infinity KAPPA693C speakers, follow these maintenance guidelines:
- Limpeza: Use a soft, dry cloth to gently wipe down the speaker grilles and surrounds. Avoid using harsh chemicals or abrasive cleaners.
- Protección ambiental: While designed for automotive use, avoid exposing the speakers to extreme moisture or direct sunlight for prolonged periods, which can degrade materials over time.
- Inspección periódica: Comprobe periodicamente as conexións dos altofalantes para asegurarse de que estean ben axustadas e de que ningún cable estea desfiado ou exposto.
- Evitar a sobrecarga: Do not continuously play audio at distortion levels, as this can cause permanent damage to the speaker components.
Resolución de problemas
If you experience issues with your speaker system, consult the following common troubleshooting steps:
| Problema | Causa posible | Solución |
|---|---|---|
| Non hai son dos altofalantes | Conexións de cableado soltas ou incorrectas. Amplifier/head unit not powered on or faulty. Speaker wires shorted. | Check all wiring connections at the head unit, amplifier, crossovers, and speakers. Ensure proper polarity. Verify power to your audio system components. Inspeccione os cables do altofalante para ver se hai danos ou curtocircuítos. |
| Son distorsionado | Volume demasiado alto. Ampganancia do lificador axustada demasiado alta. Configuración incorrecta do crossover. Damaged speaker. | Reduce o volume. Axustar ampaxustes de ganancia do lifier. Verify crossover connections and settings. Inspeccione os altofalantes para detectar danos físicos. |
| Un altofalante non funciona | Loose connection to that specific speaker or crossover. Damaged speaker or crossover. | Check connections for the affected speaker. Swap the speaker with a known working one to isolate the issue. |
| Falta de baixos | Incorrect woofer wiring polarity. Insuficiente amppotencia lifier. Poor speaker seal in mounting location. | Verify woofer wiring polarity. Garantir ampO lificador proporciona a potencia axeitada. Check for air leaks around the speaker mounting. |
If the problem persists after trying these steps, contact Infinity customer support or a qualified car audio technician.
Garantía e Soporte
Información da garantía: This product comes with a Limited Warranty provided by Infinity. Please refer to the physical owner's manual included in your package for specific terms, conditions, and duration of the warranty. Retain your proof of purchase for warranty claims.
Atención ao cliente: For technical assistance, installation questions, or warranty service, please visit the official Infinity website or contact their customer support line. Contact information can typically be found in your physical manual or on the manufacturer's websitio.
Tamén podes visitar o Infinity Store on Amazon para obter máis información sobre o produto e recursos de asistencia.
Ask a question about this manual
Ask about setup, troubleshooting, compatibility, parts, safety, or missing instructions. Manuals+ will review the question and use this page’s manual context to help answer it.