
1. Introdución
This manual provides comprehensive instructions for the installation, operation, and maintenance of your SENSTREE WTC200 Wireless Thermostat Plug-in Temperature Controller Outlet. Please read this manual thoroughly before using the device to ensure proper function and safety. Keep this manual for future reference.
2. Produto rematadoview
2.1 Compoñentes incluídos
- Wireless Thermostat Receiver (Plug-in Outlet)
- Mando a distancia sen fíos
- 2m/6ft NTC Temperature Probe
- Manual de usuario (este documento)
- 2 AAA batteries (for remote controller, may be included or required separately)
2.2 Características principais
- Operación sen fíos: Control temperature remotely with the handheld unit.
- High Accuracy Sensor: The temperature is detected automatically by the thermostat outlet or remote.
- Heating & Cooling Modes: Automatically activates or deactivates connected devices based on preset temperatures.
- Botón de ON/OFF manual: The plug-in outlet features a manual power button.
- Interruptor de unidade de temperatura: Cambia facilmente entre Celsius (℃) e Fahrenheit (℉).
- Programable: Simple two-step setup for heating or cooling applications.
- High/Low Temperature Alarms: Provides alerts for temperature deviations.
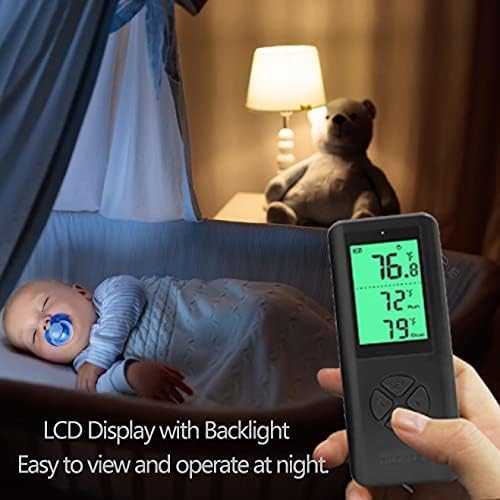
- Pantalla LCD retroiluminada: Clear digital display for easy reading, even in low light.
2.3 Product Components Visual Guide


3. Instrucións de configuración
3.1 Remote Controller Battery Installation
- Localice o compartimento das baterías na parte traseira do mando a distancia.
- Abra a tapa do compartimento da batería.
- Introduza dúas pilas AAA, asegurándose de manter a polaridade correcta (+/-).
- Pecha a tapa do compartimento da batería.
3.2 Connecting the Temperature Probe
- Identify the NTC temperature probe cable.
- Plug the probe's jack into the designated port on the side of the wireless thermostat receiver (plug-in outlet).
- Position the probe in the area where you wish to measure and control the temperature. Ensure it is not obstructed or directly exposed to heat/cold sources that do not represent the ambient temperature.
3.3 Acendido inicial e emparellamento
- Plug the wireless thermostat receiver into a standard 3-prong grounded electrical outlet.
- The remote controller and receiver are designed to automatically pair upon initial power-up. The display on the remote should activate and show temperature readings.
- If the remote does not display readings or connect, ensure batteries are correctly installed and the receiver is powered. Refer to the Troubleshooting section if issues persist.
4. Instrucións de funcionamento
4.1 Remote Controller Layout

The remote controller features a digital display and several buttons:
- Botón SET: Úsase para introducir e confirmar a configuración.
- Botóns Arriba (▲) / Abaixo (▼): Used to adjust temperature values and navigate menu options.
- Botón M (modo): Used to switch between heating and cooling modes, and other functions.
4.2 Setting Temperature and Mode
- Seleccionar modo: Preme o M button to toggle between Heating (indicated by a flame icon or similar) and Cooling (indicated by a snowflake icon or similar) modes.
- Enter Setting: Preme o SET button once. The target temperature display will begin to flash.
- Axustar a temperatura: Usa o Arriba (▲) e Abaixo (▼) botóns para axustar a temperatura obxectivo desexada.
- Confirmar configuración: Preme o SET button again to confirm and save the target temperature. The display will stop flashing.
- The thermostat will now automatically turn on or off the connected device to maintain the set temperature.
4.3 Switching Temperature Units (℃/℉)
To switch between Celsius (℃) and Fahrenheit (℉):
- With the remote display active, press and hold the M button for approximately 3 seconds. The temperature unit on the display will change.
- Release the button once the desired unit is shown.
4.4 High/Low Temperature Alarms
The WTC200 features adjustable high and low-temperature alarms. When the ambient temperature exceeds the high alarm setting or falls below the low alarm setting, the remote controller will emit an audible alert.
- Preme o SET button twice to enter the alarm setting mode.
- Usa o Arriba (▲) e Abaixo (▼) buttons to adjust the high-temperature alarm threshold.
- Preme SET again to switch to the low-temperature alarm threshold.
- Usa o Arriba (▲) e Abaixo (▼) buttons to adjust the low-temperature alarm threshold.
- Preme SET a third time to save and exit the alarm settings.
4.5 Manual ON/OFF on the Outlet
The plug-in outlet receiver has a manual power button. Press this button to manually turn the connected device ON or OFF, overriding the thermostat's automatic control. The remote will reflect the current status.
5. Mantemento
5.1 Limpeza
- Asegúrese de que o dispositivo estea desconectado antes de limpar.
- Wipe the surfaces of the remote controller and plug-in outlet with a soft, dry cloth.
- Non empregue produtos de limpeza abrasivos nin disolventes, nin mergulle o dispositivo en auga.
5.2 Substitución da batería
When the battery indicator on the remote controller's display shows low power, replace the AAA batteries as described in Section 3.1. Prompt battery replacement ensures continuous and reliable operation.
6 Solución de problemas
| Problema | Causa posible | Solución |
|---|---|---|
| Remote display is blank or unresponsive. | Pilas baixas ou gastadas; instalación incorrecta da pila. | Substitúa as pilas AAA, asegurándose de que a polaridade sexa correcta. |
| Thermostat not controlling connected device. | Device not plugged into the outlet; outlet not receiving power; incorrect mode (heating/cooling); temperature settings outside range. | Ensure device is securely plugged into the thermostat outlet. Verify the thermostat outlet is plugged into a live wall socket. Check if the correct mode (heating/cooling) is selected. Adjust target temperature settings. |
| As lecturas de temperatura son inexactas. | Temperature probe is disconnected or improperly placed; probe is damaged. | Ensure the temperature probe is securely connected to the outlet. Reposition the probe away from direct heat/cold sources or drafts. If damage is suspected, contact support. |
| Remote and outlet not communicating. | Out of range; interference; pairing issue. | Move the remote closer to the outlet. Ensure no large metal objects or strong electronic devices are between them. Re-power both units to attempt re-pairing. |
| A alarma soa inesperadamente. | Ambient temperature has reached a set high or low alarm threshold. | Check the current temperature and your alarm settings. Adjust alarm thresholds if necessary (refer to Section 4.4). |
7. Especificacións
| Característica | Detalle |
|---|---|
| Marca | SENSTREE |
| Número de modelo | WTC200 |
| Tipo de controlador | Mando a distancia |
| Tipo de control de temperatura | Automático |
| Tecnoloxía de conectividade | RF (frecuencia de radio) |
| Fonte de enerxía | Eléctrico |
| Voltage | 1.5 Volts (Remote), 100-240 Volts (Outlet) |
| Carga máxima | 14A, 1500W (at 110V), 3000W (at 220V) |
| Tipo de visualización | LCD dixital con retroiluminación |
| Método de control | Control por botón, control remoto |
| Sonda de temperatura | 2m/6ft NTC probe |
| Pilas (control remoto) | 2 pilas AAA necesarias |
| Peso do elemento | 8.4 onzas |
| Dimensións do paquete | 4.8 x 4.17 x 2.32 polgadas |
8. Garantía e soporte
8.1 Garantía do produto
The SENSTREE WTC200 Wireless Thermostat Plug-in Temperature Controller Outlet comes with a garantía dun ano desde a data de compra. Esta garantía cobre defectos de materiais e fabricación en condicións de uso normal. Non cobre danos causados por mal uso, accidentes, modificacións non autorizadas ou instalación incorrecta.
8.2 Atención ao cliente
For technical assistance, troubleshooting, or warranty claims, please contact SENSTREE customer support. Refer to the product packaging or the official SENSTREE websitio para obter a información de contacto máis actualizada.