
1. Introdución
This manual provides essential instructions for the safe and effective operation, setup, maintenance, and troubleshooting of your AMZCNC Hydraulic Knockout Punch Electrical Conduit Hole Cutter Set, Model 15T(1/2"-4"). Please read this manual thoroughly before using the tool to ensure proper function and to prevent injury or damage.
The AMZCNC Hydraulic Knockout Punch is designed for creating clean, precise holes in various materials such as steel, stainless steel, brass, copper, aluminum (soft alloys only), fiberglass, and plastic. It is ideal for electrical conduit installation and other sheet metal fabrication tasks.
2. Instrucións de seguridade
Priorice sempre a seguridade ao usar ferramentas eléctricas. O incumprimento destas instrucións pode provocar lesións graves ou danos materiais.
- Equipos de protección individual (EPI): Always wear safety glasses, gloves, and appropriate work attire.
- Área de traballo: Asegúrate de que a túa área de traballo estea limpa, ben iluminada e libre de desorde. Mantén afastados aos nenos e aos transeúntes.
- Estado da ferramenta: Inspect the tool for any damage or leaks before each use. Do not operate a damaged tool.
- Peza de traballo segura: Always secure the material being punched to prevent movement during operation.
- Presión hidráulica: Be aware of the hydraulic pressure. Never attempt to disassemble the hydraulic unit under pressure.
- Compatibilidade de materiais: Only use the punch on materials and thicknesses specified in this manual.
- Manipulación adecuada: Carry the tool by its handle. Do not carry it by the hose or dies.
3. Contido do paquete
Ao desembalar, comprobe que todos os compoñentes estean presentes e non presenten danos.

Image 3.1: Complete AMZCNC Hydraulic Knockout Punch Kit.
- Hydraulic Pump and Punch Head Assembly
- Draw Studs (1 x 3/4"x3/4" and 1 x 7/16"x3/4")
- Die Sets for conduit fitting sizes: 1/2", 3/4", 1", 1-1/4", 1-1/2", 2", 2-1/2", 3", 3-1/2", 4"
- Maletín de transporte

Imaxe 3.2: Detallada view of draw studs and opening molds (dies).
4. Produto rematadoview e Compoñentes
Familiarize yourself with the main components of the hydraulic knockout punch.

Image 4.1: Key components of the hydraulic punch head and pump.
- Bomba hidráulica: Generates the force required for punching. Features a long handle for effective force transfer.
- Punch Head: Connects to the hydraulic pump and holds the dies and draw stud.
- Draw Studs: Threaded rods that pull the punch through the material. Two sizes are included.
- Dies (Punch and Die): The cutting components that create the hole. Available in various sizes.
- 360° Free Rotating Joint: Allows for flexible positioning of the punch head relative to the pump.
- Cambiar: Controls the hydraulic pressure (Work/Reset).
- High Precision Plunger: Internal component of the hydraulic pump.
5. Especificacións
Technical details for the AMZCNC Hydraulic Knockout Punch.
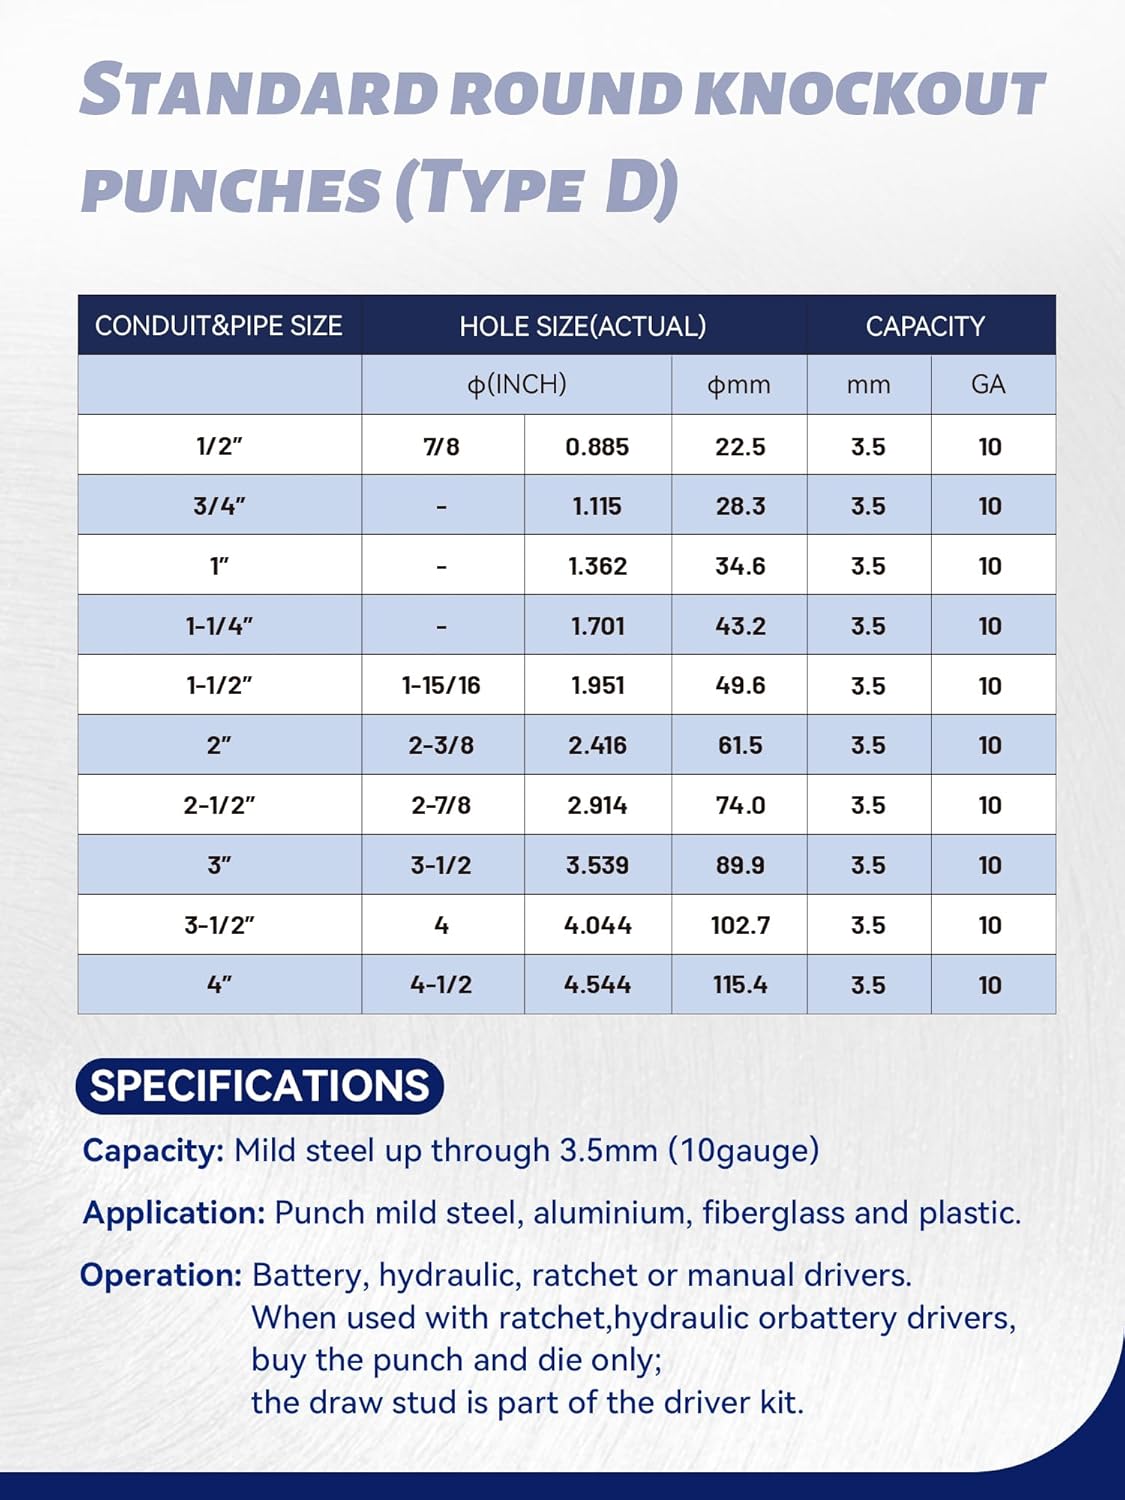
Image 5.1: Standard Round Knockout Punches (Type D) Specifications.
| Especificación | Detalle |
|---|---|
| Capacidade de perforación | 15 US TRUE TON |
| Punching Thickness (Steel) | 1/8 inch (10 gauge) |
| Punching Thickness (Stainless Steel) | 1/16 polgadas |
| Materiais compatibles | Aceiro, aceiro inoxidable, latón, cobre, aluminio (só aliaxes brandas), fibra de vidro, plástico |
| Die Set Sizes | 1/2", 3/4", 1", 1-1/4", 1-1/2", 2", 2-1/2", 3", 3-1/2", 4" |
| Draw Stud Threads | 3/4"-16 (compatible with GREENLEE and other domestic punch tooling) |
| Dimensións do produto | 17.1"L x 14.2"W x 5.2"H (case dimensions) |
| Peso do elemento | 19.66 quilogramos (aprox. 43.34 libras) |
| Material | Aceiro de aliaxe |
6. Configuración
Follow these steps to prepare your hydraulic knockout punch for operation.
- Select Dies: Choose the appropriate punch and die set for the desired hole size.
- Select Draw Stud: Select the correct draw stud based on the die size and material thickness.
- Connect Punch Head: Ensure the hydraulic hose is securely connected to both the pump and the punch head. The 360° free rotating joint allows for flexible connection.
- Preparar o material: Mark the center of the desired hole on your workpiece. Drill a pilot hole large enough to accommodate the draw stud.
7. Instrucións de funcionamento
Perform the following steps to punch a hole in your material.
- Assemble Punch:
- Thread the selected die onto the draw stud.
- Insert the draw stud through the pilot hole in your workpiece.
- Thread the punch onto the draw stud from the opposite side of the workpiece, ensuring the material is sandwiched between the punch and the die.
- Attach the punch head to the draw stud.
- Ferramenta de posición: Ensure the punch and die are correctly aligned with the pilot hole and the workpiece is stable.
- Engage Hydraulic Pump: Turn the switch on the hydraulic pump to the "Work" position.
- Perforación: Begin pumping the handle of the hydraulic unit. Continue pumping until the punch cleanly cuts through the material. You will feel a release of pressure when the cut is complete.
- Presión de liberación: Turn the switch on the hydraulic pump to the "Reset" position to release the hydraulic pressure.
- Remove Punch: Carefully unthread the punch head, punch, and die from the draw stud. Remove the slug from the die.
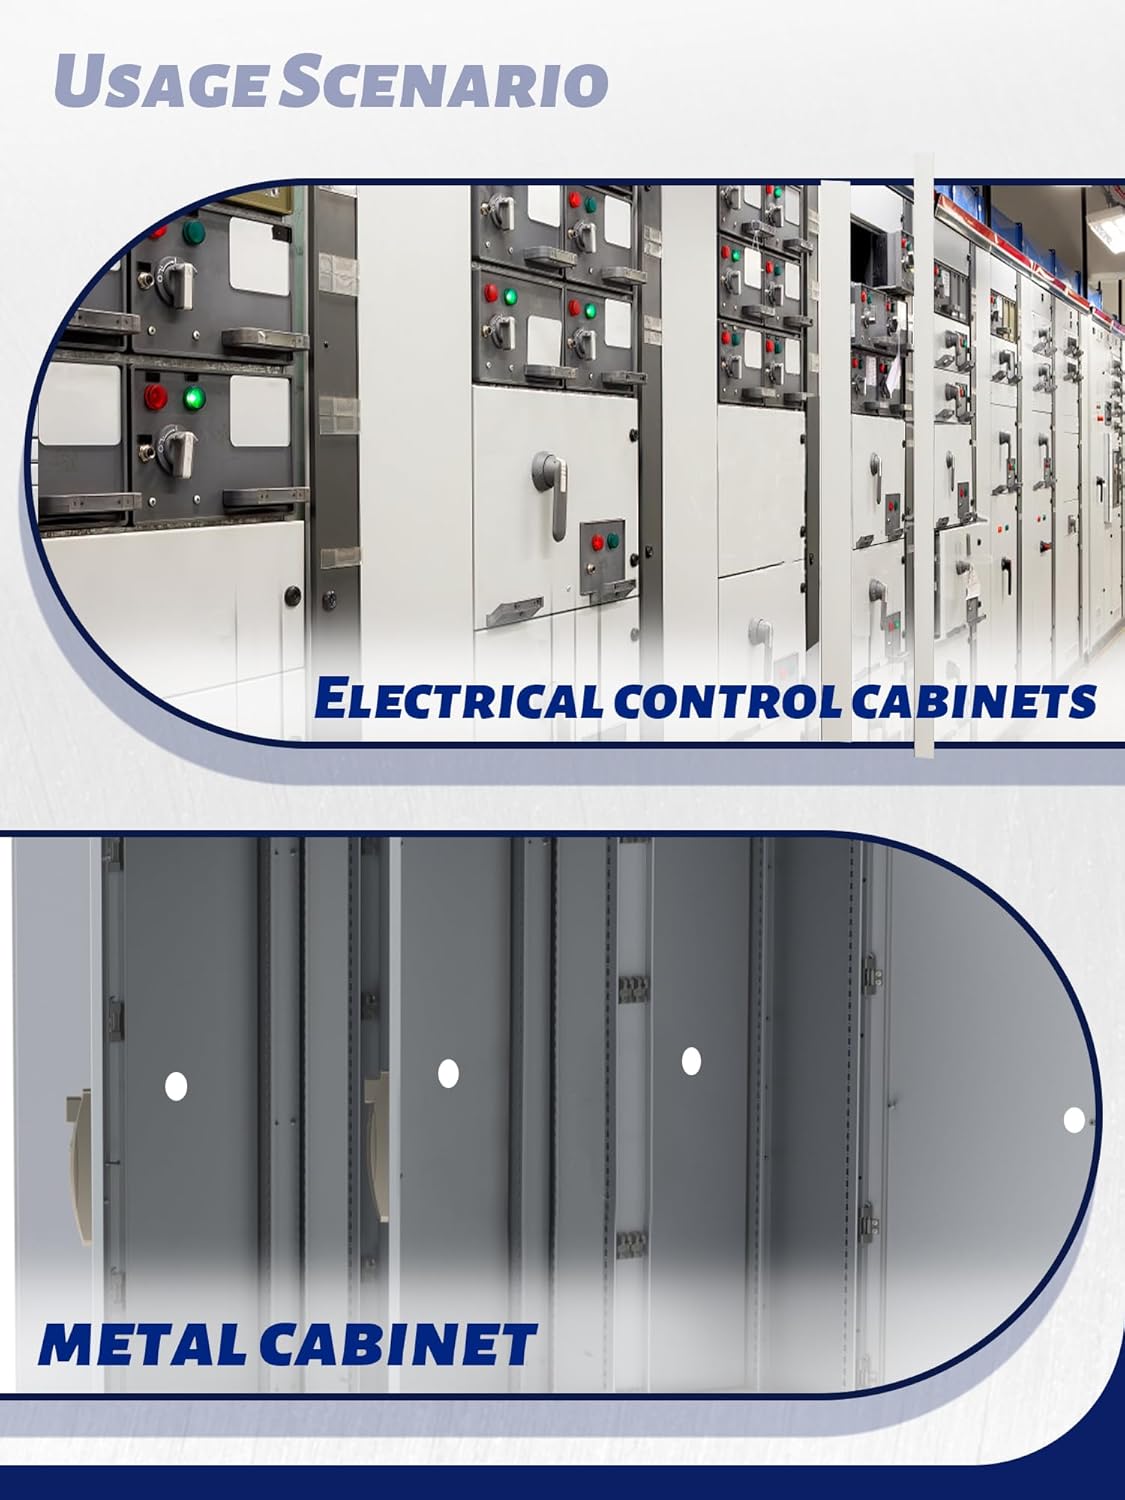
Image 7.1: Application examples in electrical control cabinets and metal cabinets.

Image 7.2: The 360° free rotation joint provides flexibility during operation.
8. Mantemento
Un mantemento regular garante a lonxevidade e o rendemento óptimo da súa ferramenta.
- Limpeza: After each use, clean the punch, dies, and draw studs to remove metal shavings and debris. Use a clean cloth.
- Lubricación: Lightly lubricate the threads of the draw studs and the cutting edges of the dies with machine oil to prevent rust and ensure smooth operation.
- Fluído hidráulico: Periodically check the hydraulic fluid level. If low, refill with appropriate hydraulic oil as specified by the manufacturer. Consult a qualified technician if you suspect a hydraulic leak.
- Almacenamento: Store the tool and all accessories in the provided carrying case in a dry, clean environment, away from direct sunlight and extreme temperatures.
9 Solución de problemas
Consulta esta sección para coñecer os problemas comúns e as súas posibles solucións.
| Problema | Causa posible | Solución |
|---|---|---|
| Tool not punching / Insufficient force | Low hydraulic fluid level; Air in hydraulic system; Switch in "Reset" position; Material too thick or hard. | Check and refill hydraulic fluid; Bleed air from system (consult technician); Ensure switch is in "Work" position; Verify material compatibility and thickness against specifications. |
| Oil leak from hydraulic unit | Damaged seals or hose; Loose connections. | Tighten connections; Contact customer support for seal replacement or repair. Do not use if leaking significantly. |
| Punch or die stuck in material | Insufficient pressure release; Material binding. | Ensure switch is fully in "Reset" position; Gently tap the punch/die assembly to loosen (use a soft hammer if necessary, avoid damaging components). |
| Corte irregular ou áspero | Worn dies; Improper alignment; Material movement. | Replace worn dies; Ensure punch and die are perfectly aligned; Secure workpiece firmly. |
If you encounter issues not listed here or if solutions do not resolve the problem, please contact AMZCNC customer support.
10. Garantía e atención ao cliente
AMZCNC products are manufactured to high-quality standards. For warranty information, technical assistance, or to order replacement parts, please refer to the contact information provided with your purchase or visit the official AMZCNC websitio.
AMZCNC Official Store: Visit the AMZCNC Store on Amazon