Deenkee DK600
Deenkee Robot Vacuum DK600 User Manual
Model: DK600 | Brand: Deenkee
Introdución
Welcome to the Deenkee Robot Vacuum DK600 user manual. This guide provides detailed instructions for setting up, operating, and maintaining your new robot vacuum cleaner. The Deenkee DK600 is designed to simplify your cleaning routine with its powerful suction, intelligent navigation, and multiple cleaning modes.

Figure 1: Deenkee Robot Vacuum DK600. This image shows the top view of the sleek, black robot vacuum with its central control button.
Información de seguridade
Please read all safety instructions carefully before using the Deenkee DK600. Keep this manual for future reference.
- Ensure the charging dock is placed against a wall on a hard, level surface, free from obstacles.
- Manteña os cables soltos, as cortinas e outros obxectos que poidan enredar o robot fóra do seu camiño.
- The robot vacuum is equipped with anti-drop sensors to prevent falls from stairs. However, always exercise caution.
- Non permita que os nenos ou as mascotas xoguen co robot aspirador.
- Non empregues o robot aspirador para recoller residuos grandes, líquidos ou obxectos ardendo.

Figure 2: The robot vacuum demonstrating its anti-collision and anti-drop capabilities. The top panel shows the robot avoiding furniture, while the bottom panel shows it detecting a stair edge.
Video 1: Demonstrates the robot vacuum automatically adjusting its cleaning trajectory when encountering obstacles, ensuring smooth navigation around furniture.
Video 2: Illustrates the anti-drop feature of the DK600 Max Robot Vacuum Cleaner, showing it safely navigating near edges without falling.
Contido do paquete
Verifica que todos os compoñentes estean presentes no paquete:
- Deenkee Robot Vacuum DK600
- Base de carga
- Adaptador de alimentación
- Control remoto
- Cepillos laterais (2 pares)
- Filtro de alto rendemento
- Ferramenta de limpeza
- Manual de usuario
Produto rematadoview
Familiarize yourself with the main components of your Deenkee DK600 robot vacuum.
Arriba View
- Botón de limpeza: Prema para iniciar/pausar a limpeza.
- Botón de apertura do cubo do lixo: Press to remove the dustbin.
- Luz indicadora: Shows battery status and error codes.
Abaixo View
- Cepillos laterais: Collect dust and debris from edges and corners.
- Cepillo principal: Limpa profundamente alfombras e pisos duros.
- Rodas motrices: Allow the robot to move across various surfaces.
- Contactos de carga: Connect with the charging dock for recharging.
- Sensores de caída: Detectar bordos e evitar caídas.
Configuración
1. Colocación da base de carga
Place the charging dock on a hard, level surface against a wall. Ensure there is at least 3 feet (1 meter) of clear space to the front and 1.5 feet (0.5 meters) to each side of the charging dock to allow the robot to return easily.

Figure 3: The robot vacuum automatically returning to its charging dock. This image illustrates the logical route planning for docking and recharging, highlighting the 2600mAh battery's 100-minute continuous cleaning capability.
2. Carga inicial
Connect the power adapter to the charging dock and plug it into a wall outlet. Place the robot vacuum on the charging dock, ensuring the charging contacts align. The indicator light will show charging status. Fully charge the robot before first use (approximately 4-5 hours).
Video 3: Demonstrates the automatic recharge function and the use of the remote control for a simpler cleaning experience. The robot vacuum is shown returning to its charging base.
3. Instalación do cepillo lateral
Attach the side brushes to the square posts on the bottom of the robot by pressing them down until they click into place. Ensure they are securely fastened.
4. Dustbin Installation
Ensure the dustbin is properly inserted into the robot vacuum until it clicks into place. A full dustbin can reduce suction power.
Instrucións de funcionamento
1. Acendido/apagado
- Encendido: Press and hold the "Clean" button on the robot or the power button on the remote control until the indicator light illuminates.
- Apagado: Press and hold the "Clean" button on the robot or the power button on the remote control until the indicator light turns off.
2. Modos de limpeza
The Deenkee DK600 offers various cleaning modes to suit your needs:
- AUTO Cleaning: The robot automatically cleans in a systematic pattern, adjusting to different floor types.
- SPOT Cleaning: Céntrase nunha zona sucia específica, limpando en espiral.
- EDGE Cleaning: Limpa ao longo de paredes e bordos de mobles.
- SINGLE ROOM Cleaning: Cleans one room thoroughly before stopping.
- MAX CLEANING: Aumenta a potencia de succión para unha limpeza máis profunda.
- SCHEDULE CLEANING: Set a specific time for the robot to start cleaning automatically.
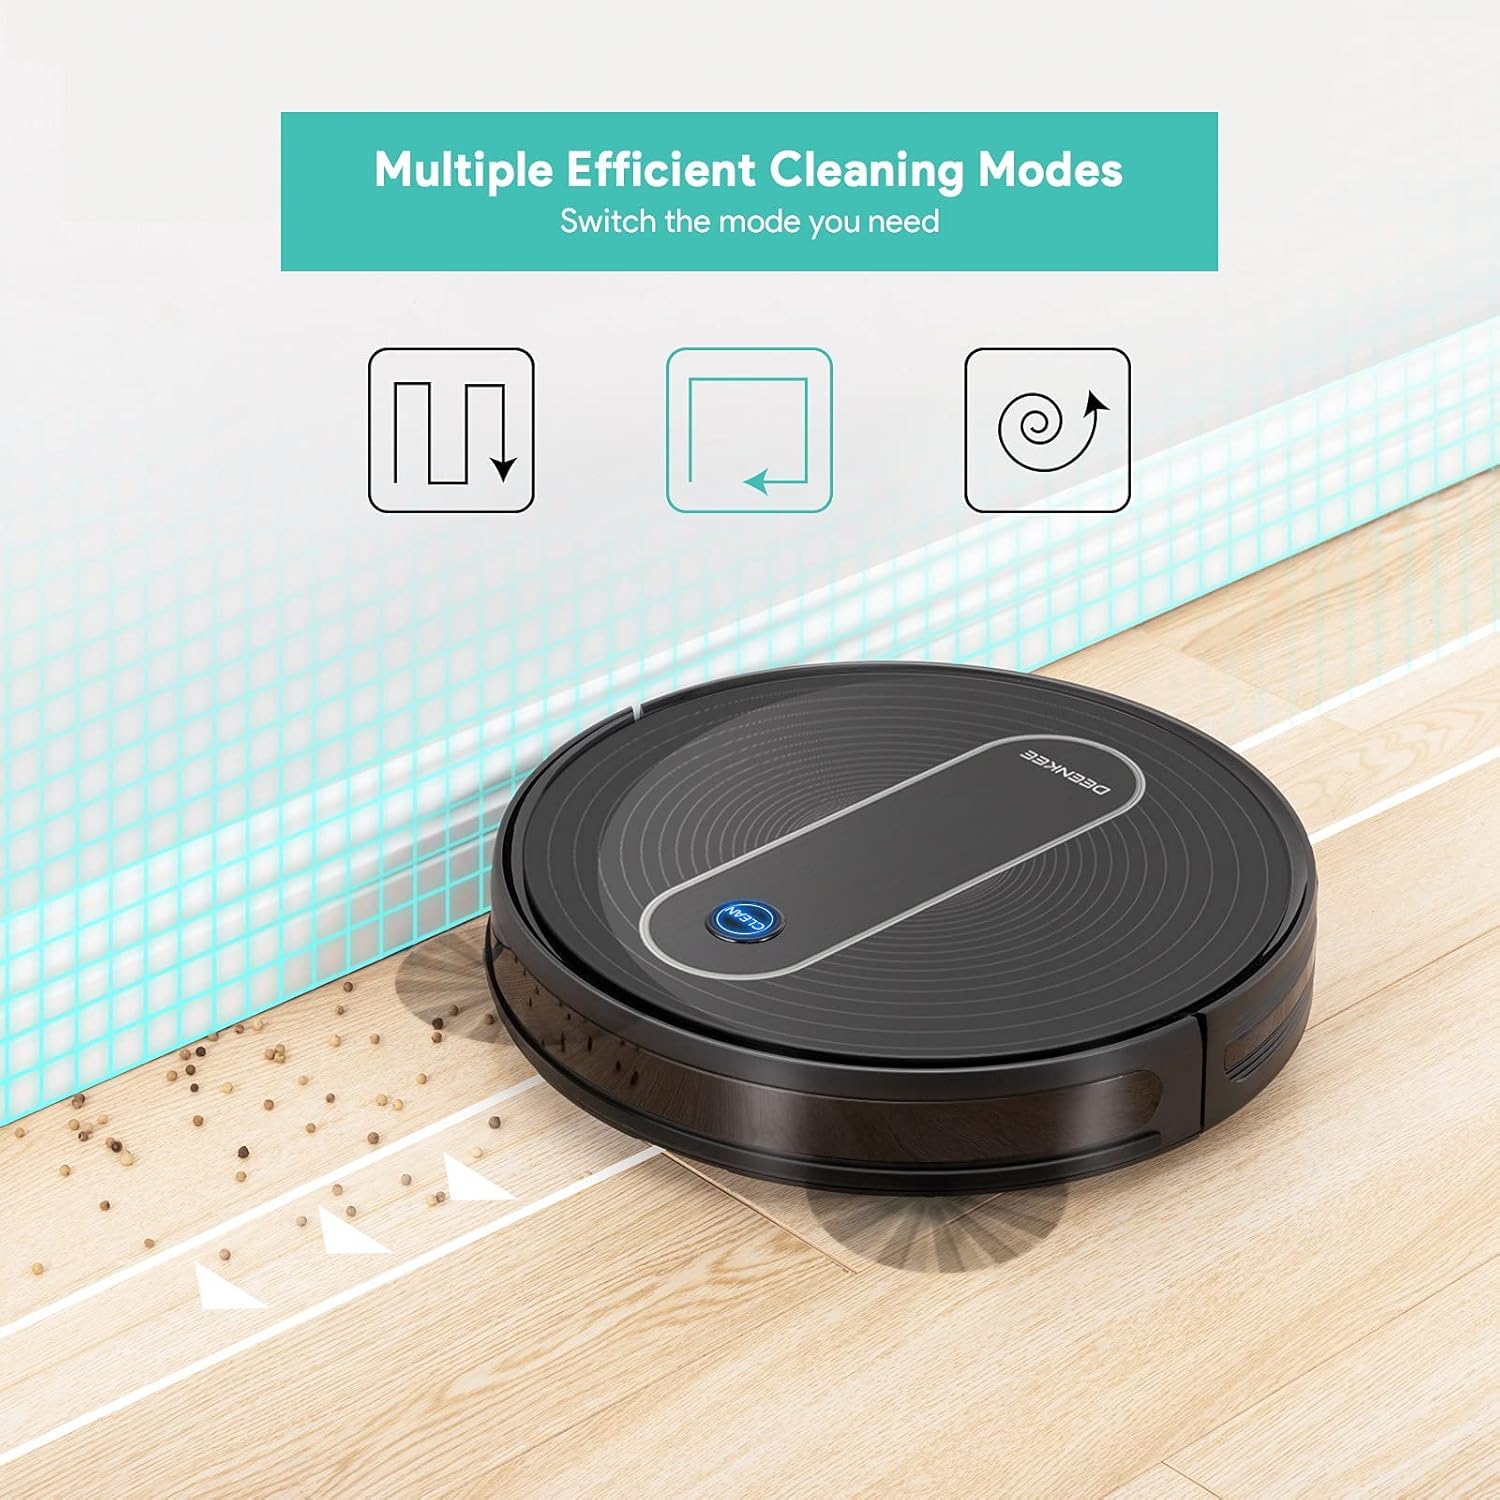
Figure 4: Illustration of the multiple efficient cleaning modes available on the Deenkee robot vacuum, including auto, spot, and edge cleaning patterns.

Figure 5: Demonstrates the 1500Pa super-strong suction of the Deenkee robot vacuum, effectively removing dust, dirt, and pet hair from floors and carpets.

Figure 6: Shows the Deenkee robot vacuum operating quietly with low noise (≤55dB), ensuring it does not disturb your family during cleaning.

Figure 7: Illustrates the robot vacuum's ability to easily cross thresholds up to 0.63 inches, allowing it to transition smoothly between different floor types like hard floor and carpet.
Video 4: Shows the powerful suction of the Deenkee robot vacuum, demonstrating its effectiveness on carpets by picking up small debris.
Video 5: Highlights the ultra-thin body design of the robot vacuum, allowing it to easily pass through and clean under most furniture.
3. Usando o mando a distancia
The remote control allows you to conveniently manage your robot vacuum. Functions include:
- Inicio / Pausa de limpeza
- Seleccione Modos de limpeza
- Manual Direction Control
- Send Robot to Charging Dock
- Establecer calendario
4. Recarga automática
When the battery level is low, the Deenkee DK600 will automatically return to its charging dock. Ensure the charging dock is accessible and free from obstructions.
Mantemento
Regular maintenance ensures optimal performance and extends the lifespan of your Deenkee DK600.
1. Baleirar o colector de lixo
Empty the dustbin after each cleaning cycle. Press the dustbin release button, pull out the dustbin, open its lid, and discard the collected debris.
2. Cepillos de limpeza
- Cepillo principal: Remove the main brush cover and lift out the main brush. Use the cleaning tool to remove hair and debris tangled around the brush. Clean the brush bearings.
- Cepillos laterais: Periodically check side brushes for wear or damage. Remove any tangled hair or debris. Replace worn brushes as needed.
3. Limpeza de sensores
Wipe the drop sensors and charging contacts on the bottom of the robot with a clean, dry cloth to ensure proper function.
4. Coidado da batería
To maintain battery health, always return the robot to the charging dock after use. If the robot will not be used for an extended period, fully charge it and store it in a cool, dry place, recharging every 3 months.
Resolución de problemas
| Problema | Causa posible | Solución |
|---|---|---|
| O robot non se acende. | Batería baixa; interruptor de alimentación apagado. | Charge the robot; Ensure power switch is on. |
| O robot quédase atascado con frecuencia. | Obstacles (cables, rugs); Dirty sensors. | Clear obstacles; Clean drop sensors. |
| Mal rendemento de limpeza. | Full dustbin; Tangled brushes; Clogged filter. | Baleirar o colector de po; limpar os cepillos principais/latais; limpar/substituír o filtro. |
| O robot non volve á base de carga. | Base de carga obstruída; o robot está demasiado lonxe da base. | Clear area around dock; Manually place robot on dock. |
Especificacións
| Característica | Detalle |
|---|---|
| Marca | Deenkee |
| Modelo | DK600 |
| Potencia de succión | 1500 Pa |
| Duración da batería | Ata 100 minutos |
| Altura do corpo | 2.75 inches (Ultra-thin) |
| Modos de limpeza | AUTO, SPOT, EDGE, SINGLE ROOM, MAX CLEANING, SCHEDULE CLEANING |
| Navegación | Intelligent Navigation with Anti-drop Sensor |
| Método de control | Control remoto |
| Tipo de filtro | Cartucho |
| Peso do elemento | 8.93 libras |
| Dimensións do produto | 2.75 cm de longo x 2.75 cm de ancho x 2.75 cm de alto |
Garantía e Soporte
Deenkee products come with a standard manufacturer's warranty. For detailed warranty information, technical support, or service inquiries, please refer to the official Deenkee websitio web ou póñase en contacto directamente co servizo de atención ao cliente. Garde o recibo da compra como proba de compra.
You can visit the official Deenkee store on Amazon for more information: Deenkee Store
Ask a question about this manual
Ask about setup, troubleshooting, compatibility, parts, safety, or missing instructions. Manuals+ will review the question and use this page’s manual context to help answer it.