
Introdución
Thank you for choosing the HECASA Steel 450LB Capacity Gravity Deer Feeder. This manual provides essential information for the safe and efficient assembly, operation, and maintenance of your new feeder. Please read these instructions carefully before use and retain them for future reference.

Image: The HECASA 450LB Gravity Deer Feeder fully assembled, showcasing its robust design and tripod structure.
Información de seguridade
- Always wear appropriate safety gear, including gloves and eye protection, during assembly and maintenance.
- Ensure the feeder is placed on stable, level ground to prevent tipping. The tripod structure provides stability, but uneven terrain can compromise it.
- Exercise caution when handling metal components, as edges may be sharp.
- When filling the feeder, be aware of its 450LB capacity. Use proper lifting techniques or equipment to avoid injury.
- Keep children and pets away from the assembly area and the feeder during operation.
- Regularly inspect the feeder for any signs of damage or instability.
Contido do paquete
Antes de comezar a montaxe, comproba que todos os compoñentes estean presentes e non estean danados. Se falta algunha peza ou está danada, ponte en contacto co servizo de atención ao cliente.
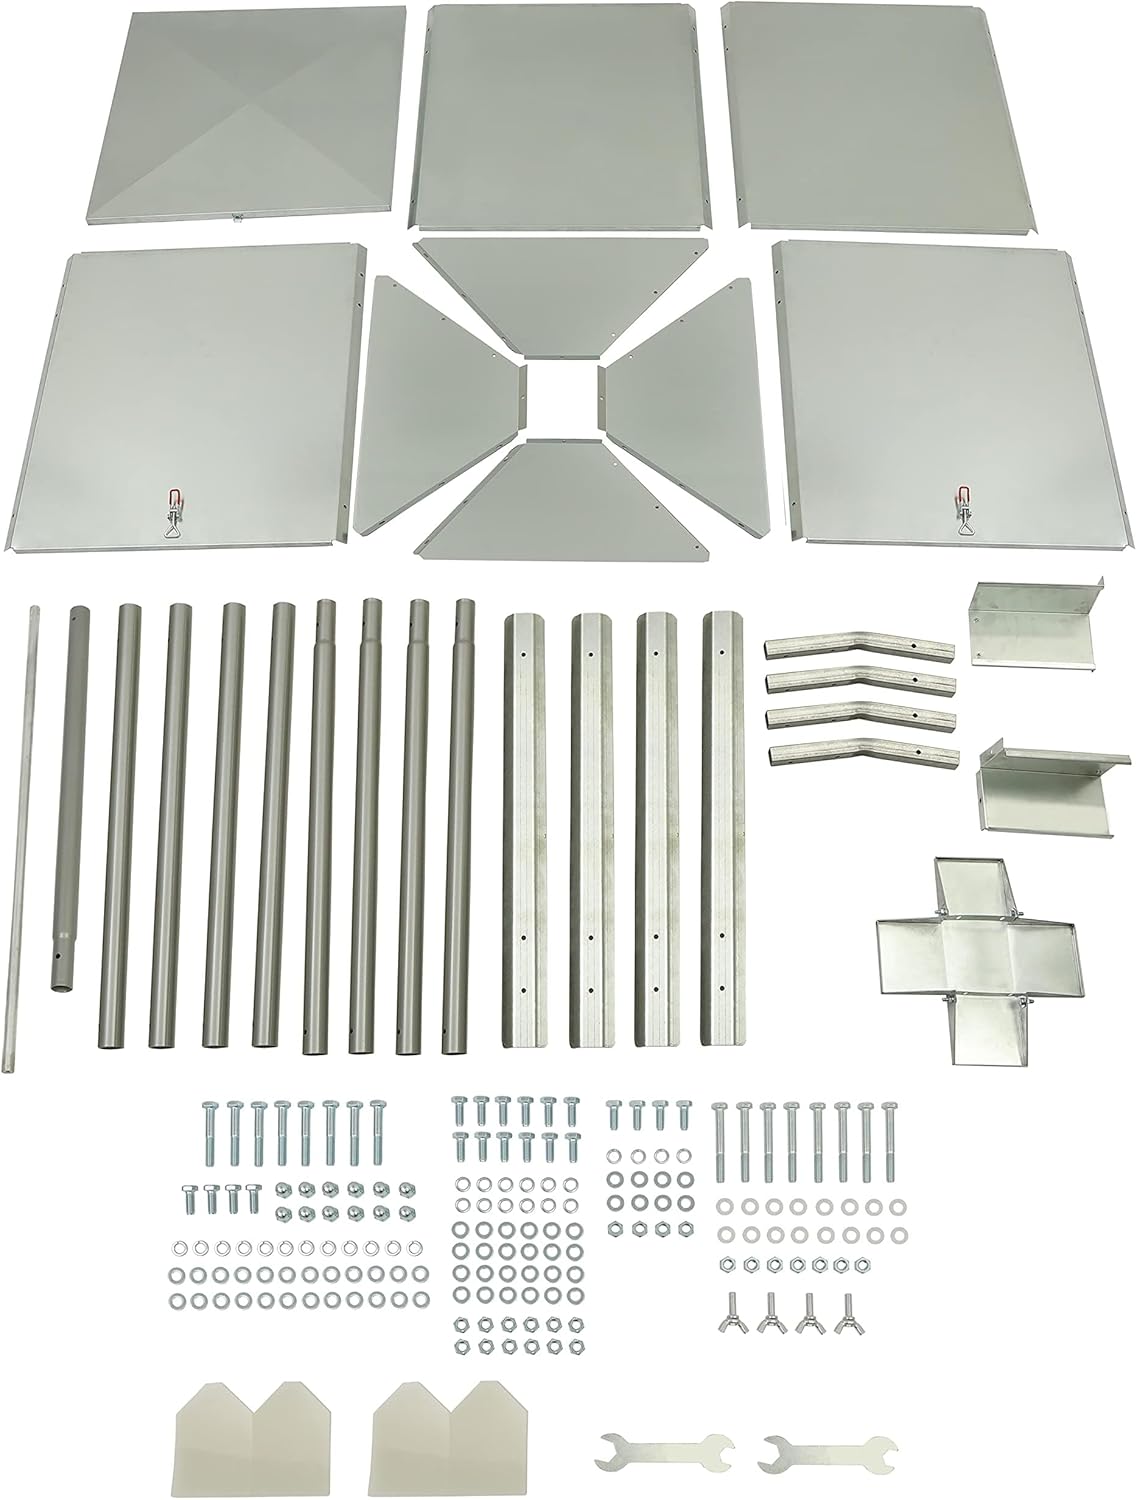
Image: All individual components of the deer feeder, including panels, legs, and hardware, laid out for inspection.
Lista de compoñentes:
- Feeder Panels (Top, Sides, Bottom Cone)
- Tripod Legs (Multiple sections)
- Feed Dispenser Assembly
- Mounting Brackets and Reinforcements
- Hardware (Bolts, Nuts, Washers, Wing Nuts)
- Assembly Tools (Basic wrenches may be included)
- Cuberta
Instrucións de configuración
Assembly requires careful attention to detail. It is recommended to have a second person assist with certain steps, especially when aligning holes and securing larger panels.
- Desembalar e inspeccionar: Carefully remove all components from the packaging. Check for any shipping damage or missing parts. Minor bends in sheet metal can often be straightened gently with a flat-faced hammer on a smooth, hard surface.
- Assemble Feeder Body: Begin by connecting the side panels to form the main hopper. Ensure all bolt holes align. Secure panels using the provided bolts, nuts, and washers. Do not overtighten initially, allowing for minor adjustments.
- Install Internal Cone: Position the internal cone structure within the feeder body. This cone is crucial for smooth feed distribution. Secure it according to the instructions.
- Attach Feed Dispenser: Mount the feed dispenser assembly to the bottom of the cone. This includes the adjustable feed ports. Ensure the wing nuts are accessible for future adjustments.
- Assemble Tripod Legs: Connect the sections of the tripod legs. The feeder features a 78-inch tall tripod design. Attach the assembled legs to the main feeder body using the designated mounting brackets. Ensure all connections are secure to provide a stable base.
- Cuberta superior segura: Place the cover on top of the feeder. The cover is designed to protect the feed from elements. Secure it using the provided latch mechanism.
- Seal Seams (Optional but Recommended): To enhance weather resistance and prevent feed spoilage, consider sealing all seams and corners of the feeder body with a suitable outdoor sealant or RV roof repair tape. The provided rubber flaps may not offer complete protection.

Imaxe: De arriba abaixo view showing the internal cone design, which facilitates gravity-fed feed flow.

Image: A close-up of the robust latch mechanism used to secure the feeder's top cover, ensuring feed protection.
Instrucións de funcionamento
Enchendo o alimentador
The HECASA Gravity Deer Feeder has a large 450LB feed capacity, reducing the frequency of refills. To fill:
- Unlatch and open the top cover.
- Carefully pour or shovel your desired feed (e.g., corn) into the hopper. Distribute it evenly to utilize the full capacity.
- Close and secure the top cover with the latch to protect the feed from weather and pests.
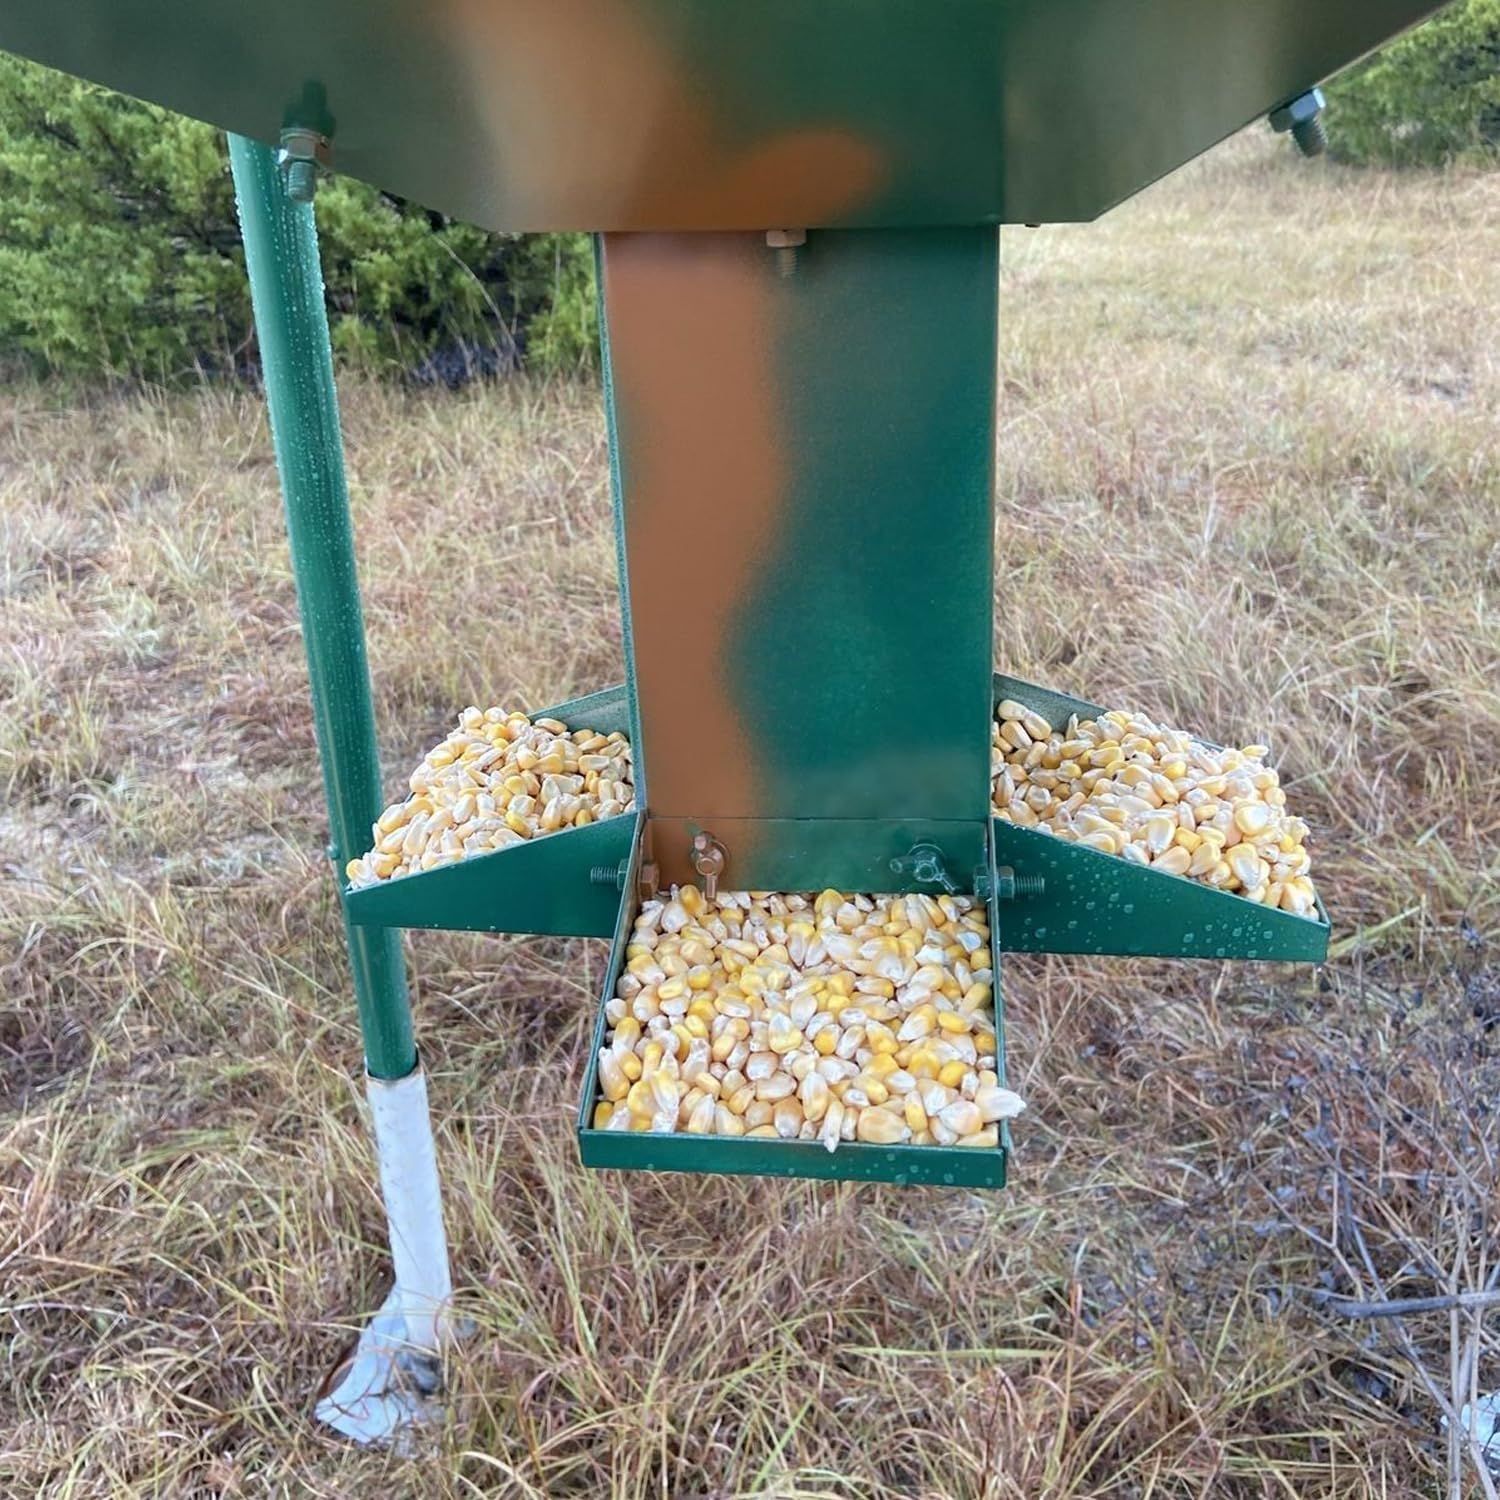
Image: The feeder's dispenser trays filled with corn, demonstrating the gravity-fed system in action.
Feed Flow Adjustment
The internal cone and dispenser design allow for consistent feed distribution. The feed flow rate can be adjusted by modifying the opening size of the dispenser ports. Use the wing nuts on the dispenser to adjust the plates, allowing more or less feed to exit. Experiment to find the optimal flow for your specific feed type and desired distribution rate.

Imaxe: Unha detallada view of the feed dispenser, highlighting the adjustable plates and wing nuts used to control feed flow.
Produto rematadoview Vídeo
Vídeo: Un funcionario acabouview of the HECASA 450LB Capacity Big Game Gravity Deer Feeder, demonstrating its features and design.
Mantemento
- Limpeza: Periodically empty the feeder and clean the interior to prevent mold or spoilage of residual feed. Use a brush and mild soap solution, then rinse thoroughly and allow to dry completely before refilling.
- Prevención da ferruxe: The feeder is constructed from durable zinc-plated steel for rust and water resistance. However, for extended longevity in harsh outdoor conditions, consider applying a protective paint coating, especially if the galvanized finish shows signs of wear or if the feeder is exposed to constant moisture.
- Inspección: Regularly check all bolts and connections for tightness. Over time, vibrations or animal activity can loosen fasteners. Inspect the legs for stability and ensure they are not sinking excessively into soft ground.
- Pest Deterrence: While the design aims to protect feed, persistent pests like raccoons may attempt to access the feed. Consider additional measures such as modifying the wing nuts on the dispenser to Allen head screws or adding physical barriers around the legs to deter climbing.
Resolución de problemas
| Problema | Causa posible | Solución |
|---|---|---|
| Feed not flowing readily | Dispenser opening too small; feed type too large/clumpy. | Adjust dispenser plates to a wider opening. If necessary, trim the openings slightly for larger feed types. Ensure feed is dry and free of clumps. |
| Feeder appears unstable or legs sink | Uneven ground; soft soil; lack of feet on legs. | Relocate to more level ground. Place concrete blocks or wide bases under the legs to prevent sinking. Consider adding aftermarket feet to the legs. |
| Pests (e.g., raccoons) accessing feed | Wing nuts on dispenser easily manipulated; climbing access. | Replace wing nuts with Allen head screws for better security. Install stove pipe or similar smooth barriers on legs to deter climbing. |
| Water ingress or feed spoilage | Gaps in seams; damaged cover. | Seal all seams and corners with outdoor-grade sealant. Ensure the cover is properly latched and undamaged. |
| Feeder surface is too reflective | Galvanized steel finish reflects sunlight. | Apply a non-reflective, outdoor-grade paint to the exterior surfaces. |
Especificacións
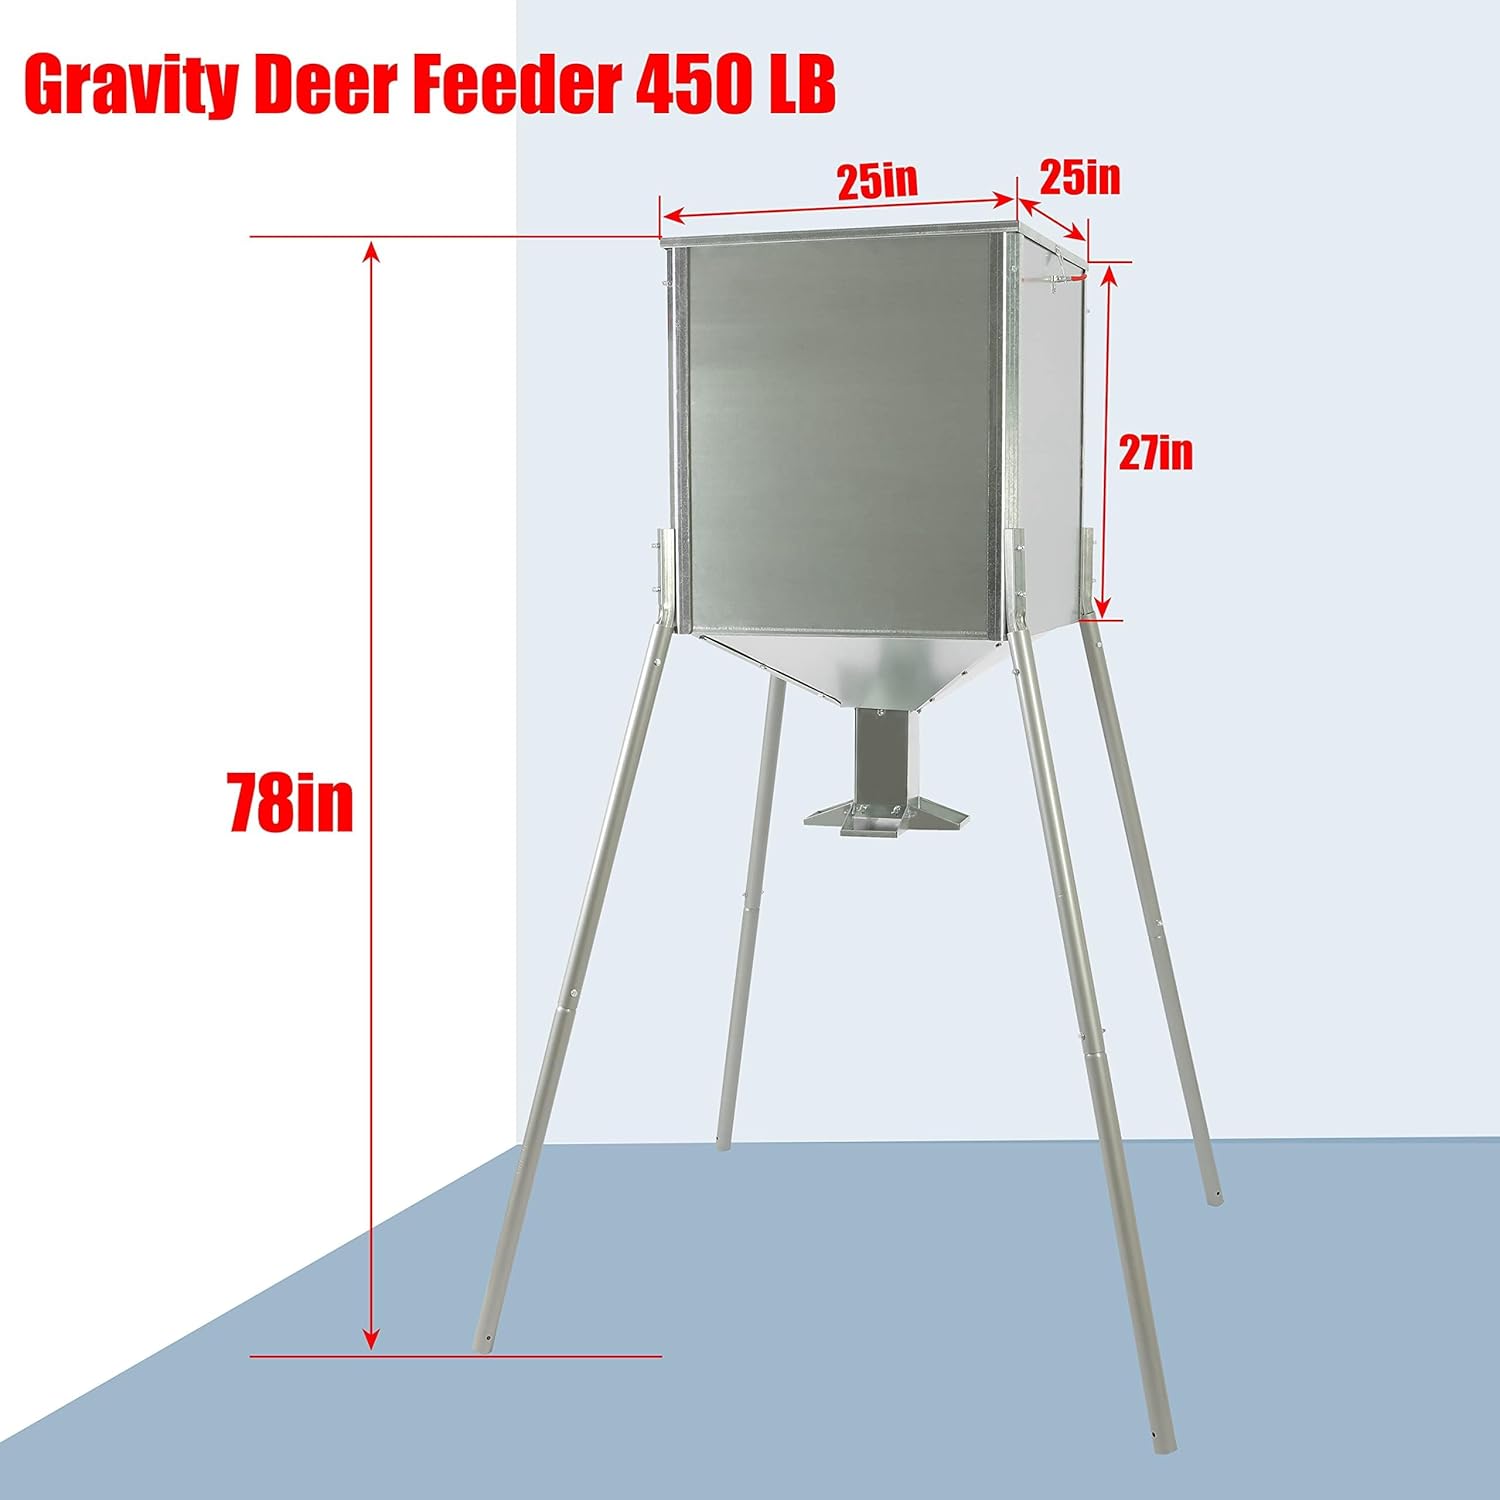
Image: A diagram illustrating the key dimensions of the HECASA 450LB Gravity Deer Feeder, including height and base measurements.
- Marca: HECASA
- Número de modelo: NN528
- Material: Alloy Steel (Zinc-Plated)
- Capacidade: 450 libras
- Peso do artigo: Aproximadamente 73 libras
- Altura total: 78 polgadas (aprox.)
- Dimensións base: 25 inches x 25 inches (approx.)
- Característica especial: Resistente á ferruxe
- Especie obxectivo: Cervo
Información da garantía
Specific warranty details for this product are not provided in the available information. Please refer to the product packaging or contact the retailer/manufacturer directly for warranty terms and conditions. Generally, products are covered against manufacturing defects for a limited period from the date of purchase.
Apoio
For further assistance, technical support, or inquiries regarding parts, please refer to the contact information provided on your purchase receipt or the product packaging. You may also visit the HECASA official websitio para recursos de apoio.
Manufacturer: HECASA