
1. Produto rematadoview
This manual provides detailed instructions for the installation, operation, and maintenance of the Gebildet 5-piece 12mm Blue LED Metal Indicator Light. These lights are designed for various applications requiring visual status cues, such as in power systems, telecommunications, machine tools, motors, and household appliances.
Características principais:
- Voltage: AC 110V-220V, ensuring broad compatibility.
- Construción duradeira: Shell made from brass plated nickel stainless steel for longevity.
- Impermeable: IP65 protection grade, suitable for use in various environments.
- Eficiencia enerxética: Utilizes excellent LED chips for low power consumption (0.5W).
- Fácil instalación: Designed for flush mounting with a 12mm hole diameter.

Image 1.1: A set of five Gebildet 12mm Blue LED Metal Indicator Lights, showcasing their compact design and pre-wired connections.
2. Especificacións técnicas
Refer to the table below for detailed technical specifications of the indicator lights:
| Especificación | Valor |
|---|---|
| Número de modelo | E825 |
| Voltage | 110 V-220 VCA |
| Corrente nominal | 20 mA |
| Consumo de enerxía nominal | 0.5 W |
| Cor clara | Azul |
| Diámetro do orificio de montaxe | 12 mm |
| Espesor do panel | 1-8 mm |
| Lonxitude do cable | 15cm (approx. 140mm) |
| Lamp Lonxitude | 2.1 cm |
| Material de carcasa | Brass Plated Nickel Stainless Steel |
| Clase impermeable | IP65 |
| De por vida | 10,000 hours (LED Life: 100,000/H as per image) |
| Temperatura de funcionamento | -30 °C a +85 °C |
| Nut Torque | 5-15 Nm |
| Resistencia de illamento | ≥1000MΩ |
| Resistencia dieléctrica | ≥1900VAC/Min |
Image 2.1: Detailed technical drawing showing dimensions and key specifications of the indicator light.
3. Precaucións de seguridade
Please read and understand all safety information before installing or operating the indicator lights. Failure to follow these instructions may result in electric shock, fire, or personal injury.
- Risco eléctrico: Always disconnect power to the circuit before installing or servicing the indicator lights.
- Voltage Compatibilidade: Asegúrese de que o voltage of your application matches the 110V-220VAC rating of these lights. Connecting to an incorrect voltage can damage the product and pose a safety risk.
- Cableado adecuado: Follow correct wiring polarity. For 110V-220VAC models, the yellow wire is typically positive, and the black wire is negative. Consult a qualified electrician if unsure.
- Condicións ambientais: While waterproof (IP65), avoid submerging the lights or exposing them to extreme conditions beyond their specified operating temperature range.
- Instalación segura: Ensure the lights are securely mounted to prevent loosening or accidental dislodgement.
4. Guía de instalación
4.1 Montaxe
- Select a suitable location on your panel or enclosure for the indicator light.
- Using a 12mm drill bit, carefully drill a mounting hole through the panel. Ensure the panel thickness is between 1mm and 8mm.
- Insert the indicator light into the drilled hole from the front of the panel.
- From the back of the panel, secure the light using the provided washer and nut. Tighten the nut to a torque of 5-15Nm to ensure a firm fit without over-tightening.
4.2 Cableado
The indicator lights come pre-wired with approximately 15cm long cables for easy connection.
- Identify the power source for your application. Ensure the power is OFF before proceeding.
- Conecta o arame amarelo of the indicator light to the positivo (+) terminal of your 110V-220VAC power supply.
- Conecta o fío negro of the indicator light to the negativa (-) terminal of your 110V-220VAC power supply.
- Asegúrate de que todas as conexións estean seguras e debidamente illadas para evitar curtocircuítos.
- Once wiring is complete, restore power to the circuit and test the indicator light.
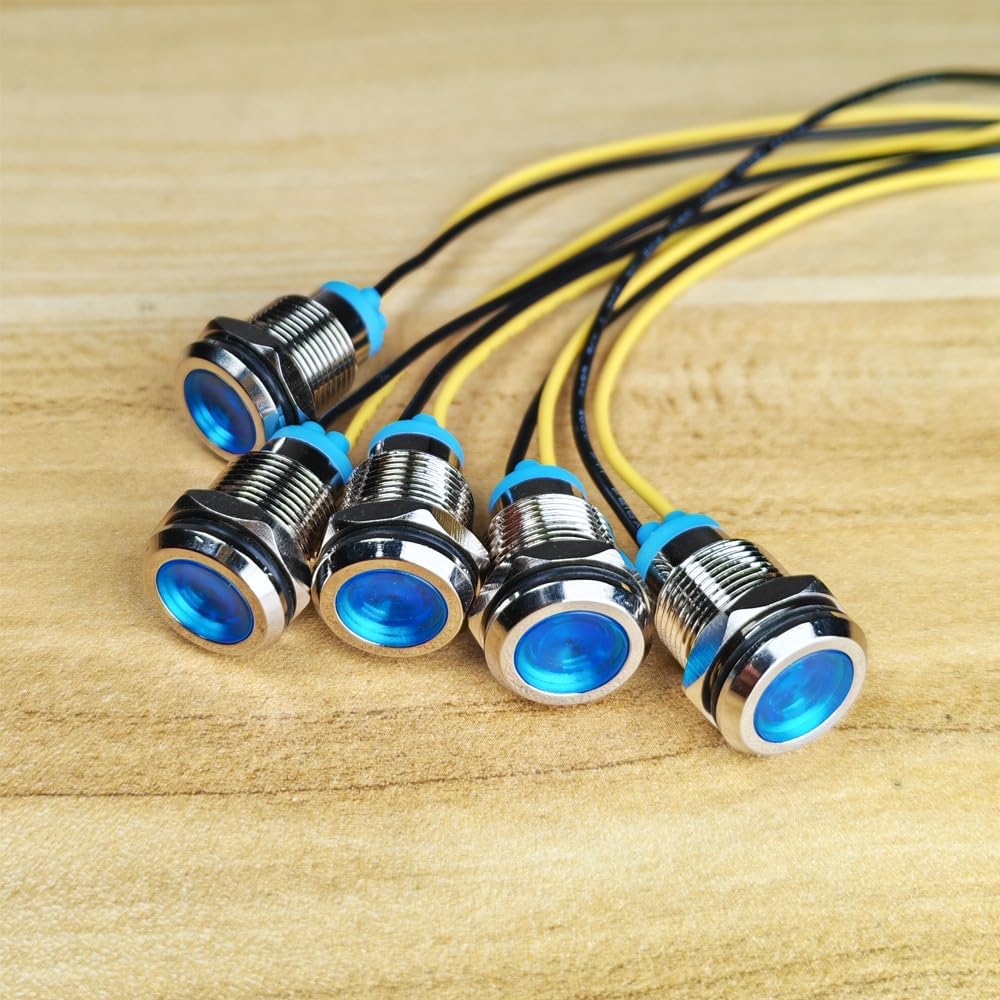
Imaxe 4.1: Primeiro plano view of the indicator lights, highlighting the yellow and black pre-wired connections for electrical hookup.
5. Funcionamento
Once properly installed and wired, the Gebildet 12mm Blue LED Metal Indicator Light will illuminate when power is supplied to its terminals. It serves as a visual signal to indicate the status of the circuit or device it is connected to. The light will remain on as long as power is present and correctly connected.

Image 5.1: The indicator lights are designed with IP65 protection, making them splashproof and suitable for various environments.
6. Mantemento
These LED indicator lights are designed for low maintenance and long operational life. Follow these general guidelines:
- Limpeza: If necessary, gently wipe the surface of the indicator light with a soft, damp cloth. Avoid using abrasive cleaners or solvents that could damage the metal finish or LED lens.
- Inspección: Periodically check the mounting nut for tightness and the wiring connections for any signs of wear or corrosion.
- Protección ambiental: Ensure the lights are not exposed to conditions beyond their IP65 rating or specified temperature range to maintain their performance and lifespan.
7 Solución de problemas
If your Gebildet LED indicator light is not functioning as expected, consider the following troubleshooting steps:
- Luz que non ilumina:
- Comprobar a fonte de alimentación: Verify that power is being supplied to the circuit where the indicator light is installed.
- Inspeccionar o cableado: Ensure the yellow wire is connected to the positive terminal and the black wire to the negative terminal of the power source. Check for loose or incorrect connections.
- Verificar voltage: Confirme que o voltage supplied to the light is within the 110V-220VAC range.
- Comprobar se hai danos: Inspect the light for any visible physical damage.
- Funcionamento intermitente:
- Conexións soltas: Re-check all wiring connections for tightness.
- Flutuacións de potencia: Ensure the power supply is stable and not experiencing intermittent interruptions.
Se estes pasos non resolven o problema, ponte en contacto co servizo de atención ao cliente.
8. Garantía e atención ao cliente
Gebildet products are manufactured to high-quality standards. For specific warranty information, please refer to the product packaging or contact Gebildet customer support directly. If you encounter any issues or have questions regarding the installation or operation of your indicator lights, please reach out to the manufacturer's customer service team for assistance.